4.2.1 Lead Page Options:
1. Lead can be found under "Sales" in the main menu.
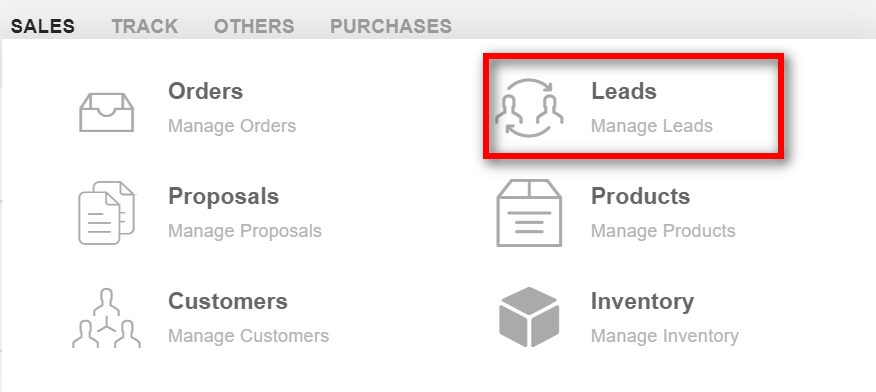
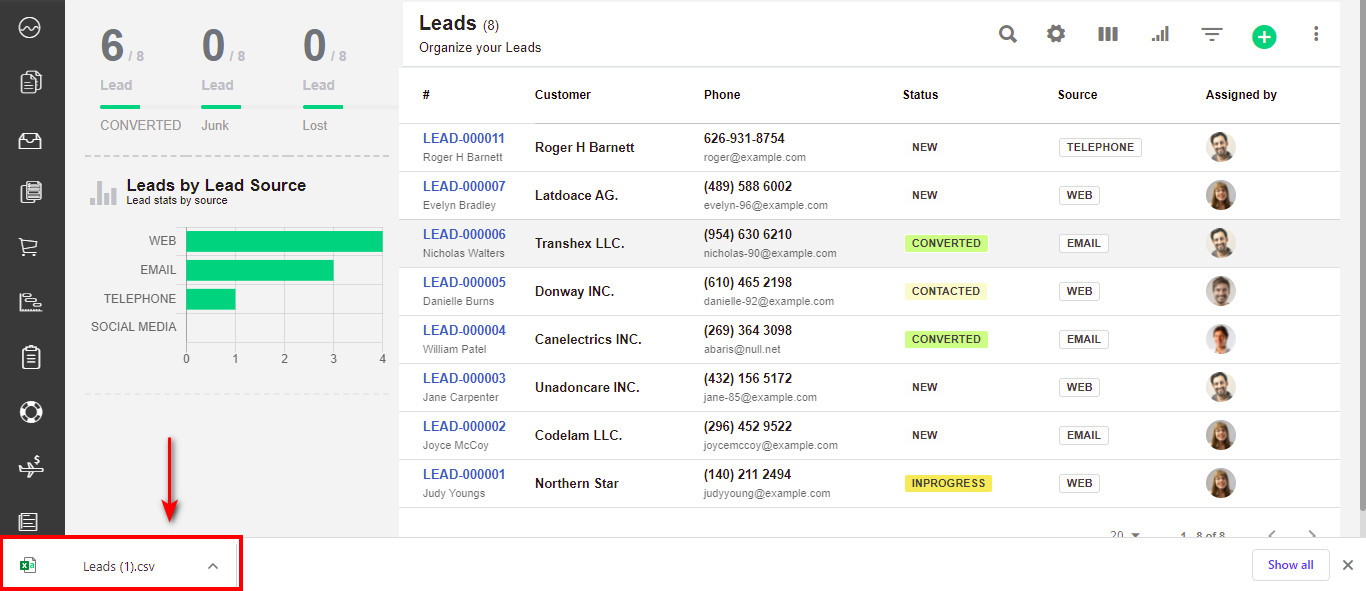
2. All the leads that are created are listed on the Leads pages here.
- You can access other options from the leads page.
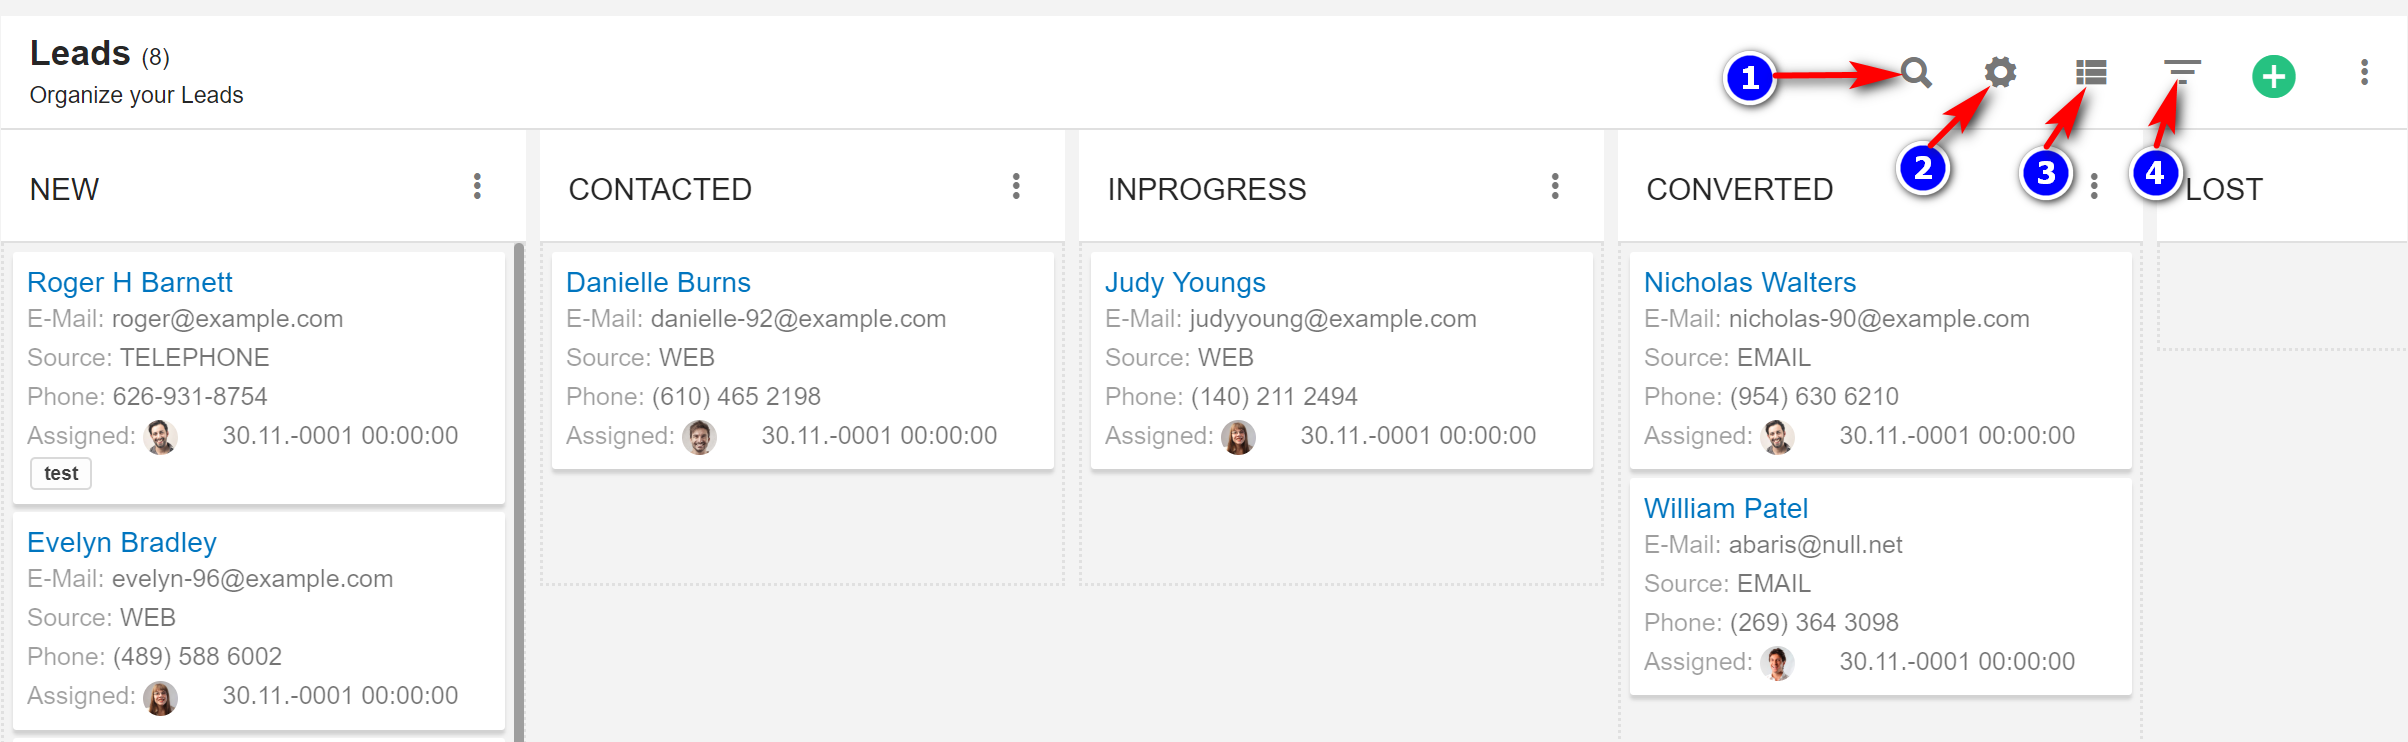
3. Search(1): To search the Lead click on the "Search" icon to search for a particular Lead.
4. Settings(2): Click on "Settings Icon" to Create, Delete, Convert the New lead's status or lead´s source.

5. "See the list(3)": To change the view of leads layout click on the "See list"(3) icon, and change the view from kanban to list view.
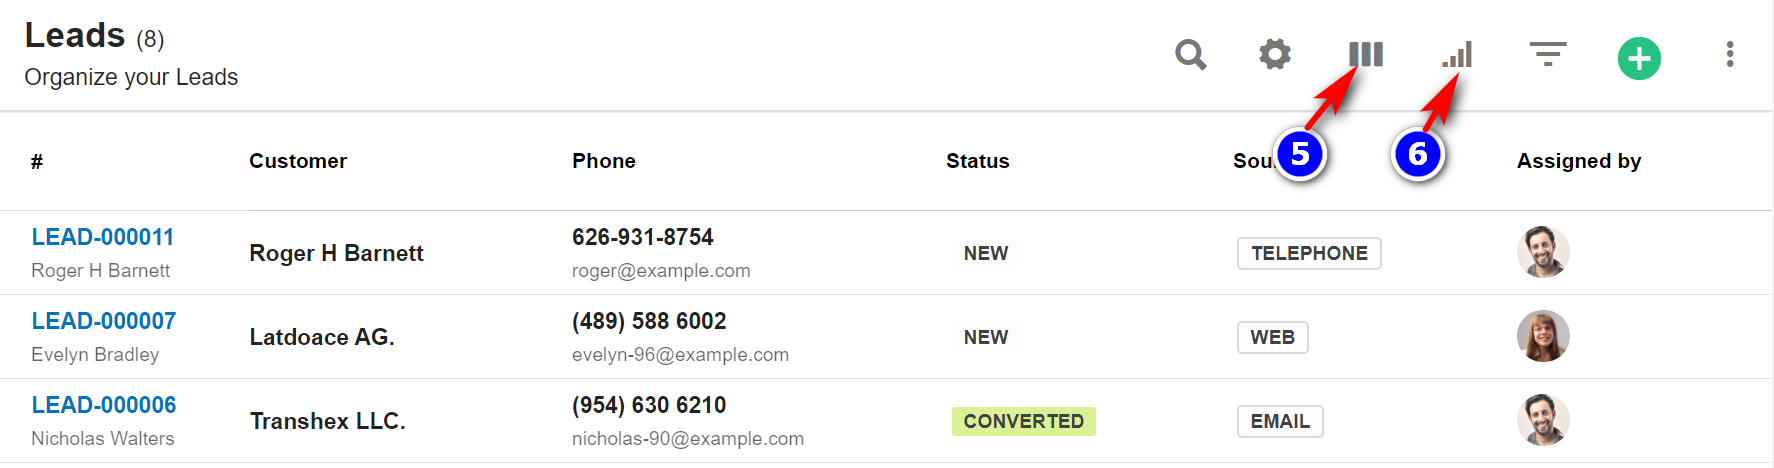
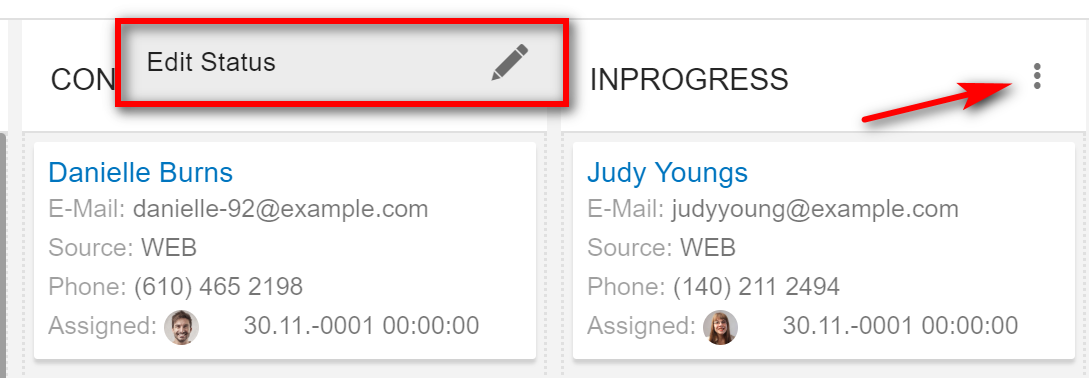
6."Show kanban(5)": To go back to the kanban view click on the "Show kanban" icon. In this view, leads are displayed based on their status.
- "Edit Status": To change the lead status name click on the "More options and then on the Pencil" icon.
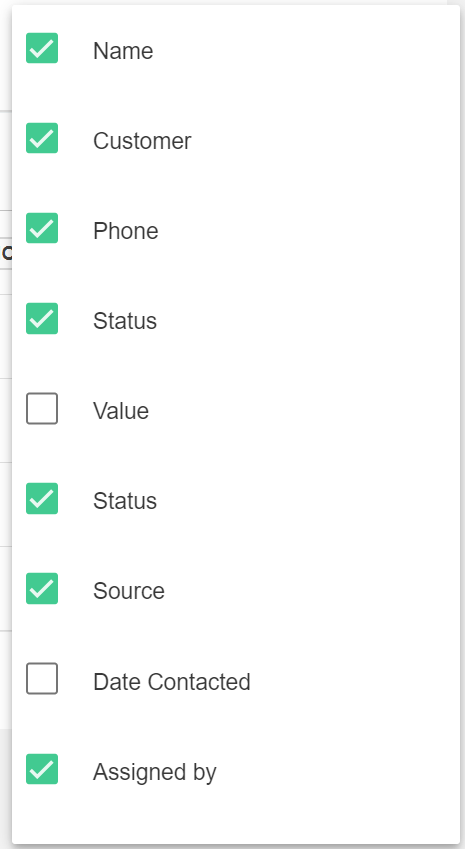
7. Filter Column(6): By default, all the columns for the leads table are displayed. To manage what column needs to be displayed, click on the "Filter Column" icon, after you click on the icon a box will appear as shown in the below image, you can "Check" or "Uncheck" the fields you want to display on your Leads page.
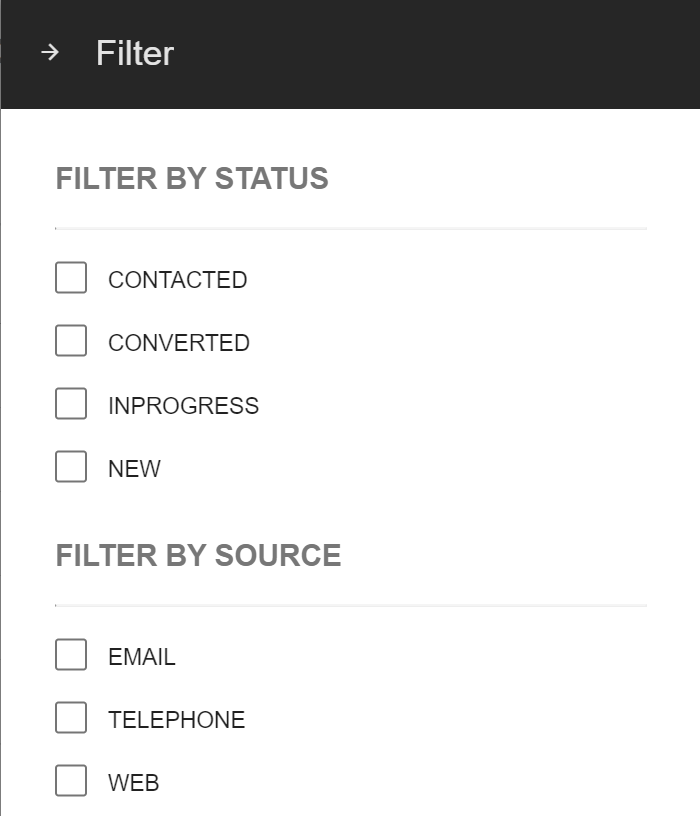
- Filter(4): To filter the leads by Status or by source click on the "Filter" icon.
4.2.2 Create Leads:
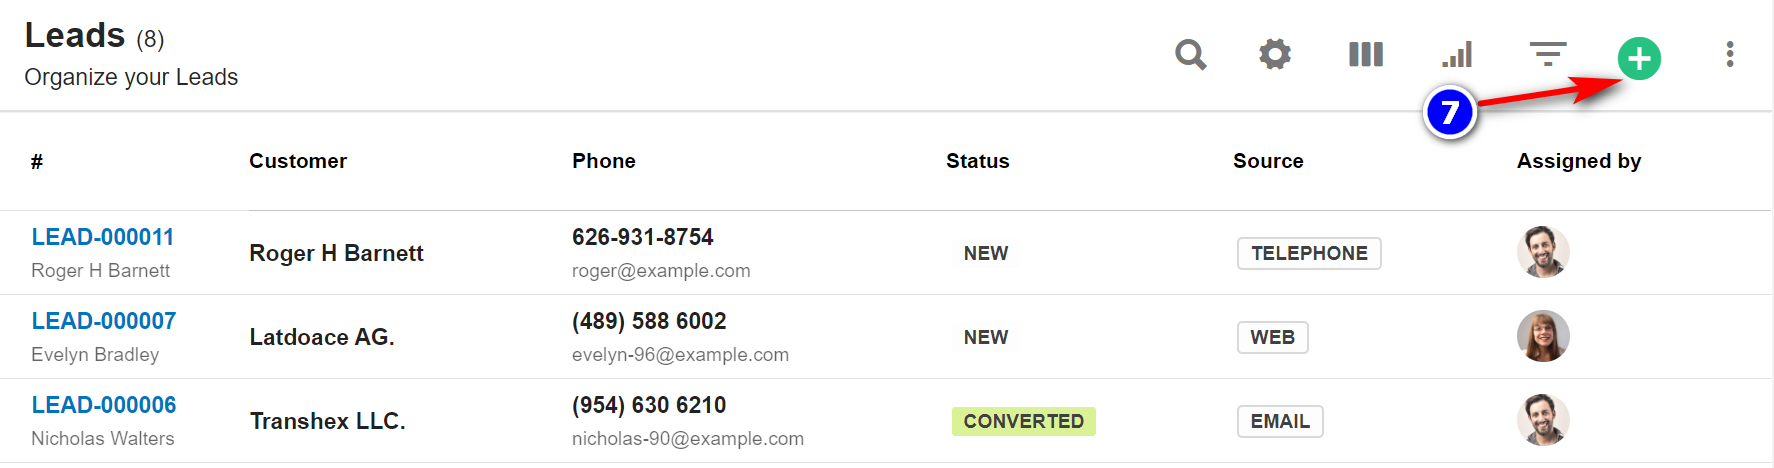
1. Create(7): To create the new lead click on the "Create"(7) icon.
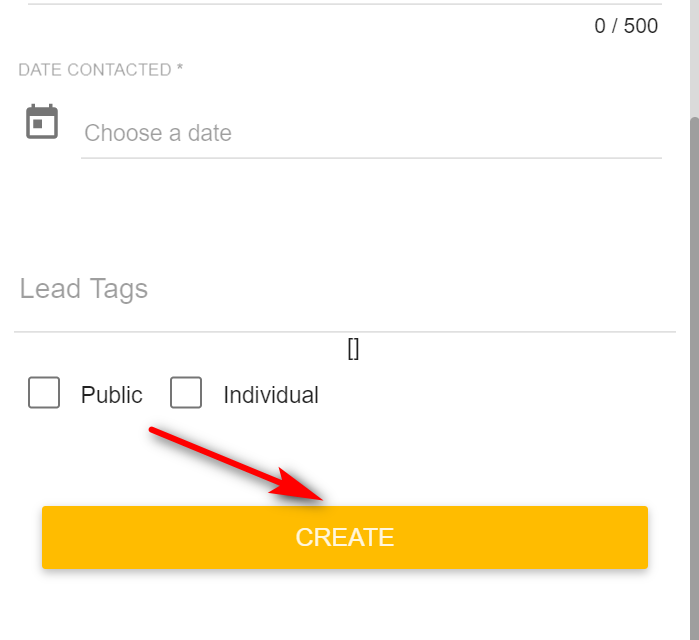
2. Enter the lead Information,
- "Choose the staff" from the drop-down.
- Select the lead "Status" whether New, InProgress, etc. As per the conversation of your clients/Customers.
- Select the "Source" from where you got the lead.
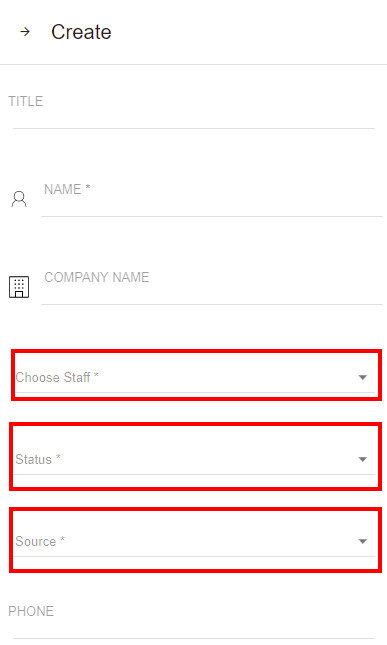
- After filling in all the details for Lead click on "Create".
4.2.3 Leads Page Details:
1. Lead: This tab displays all details of the lead.
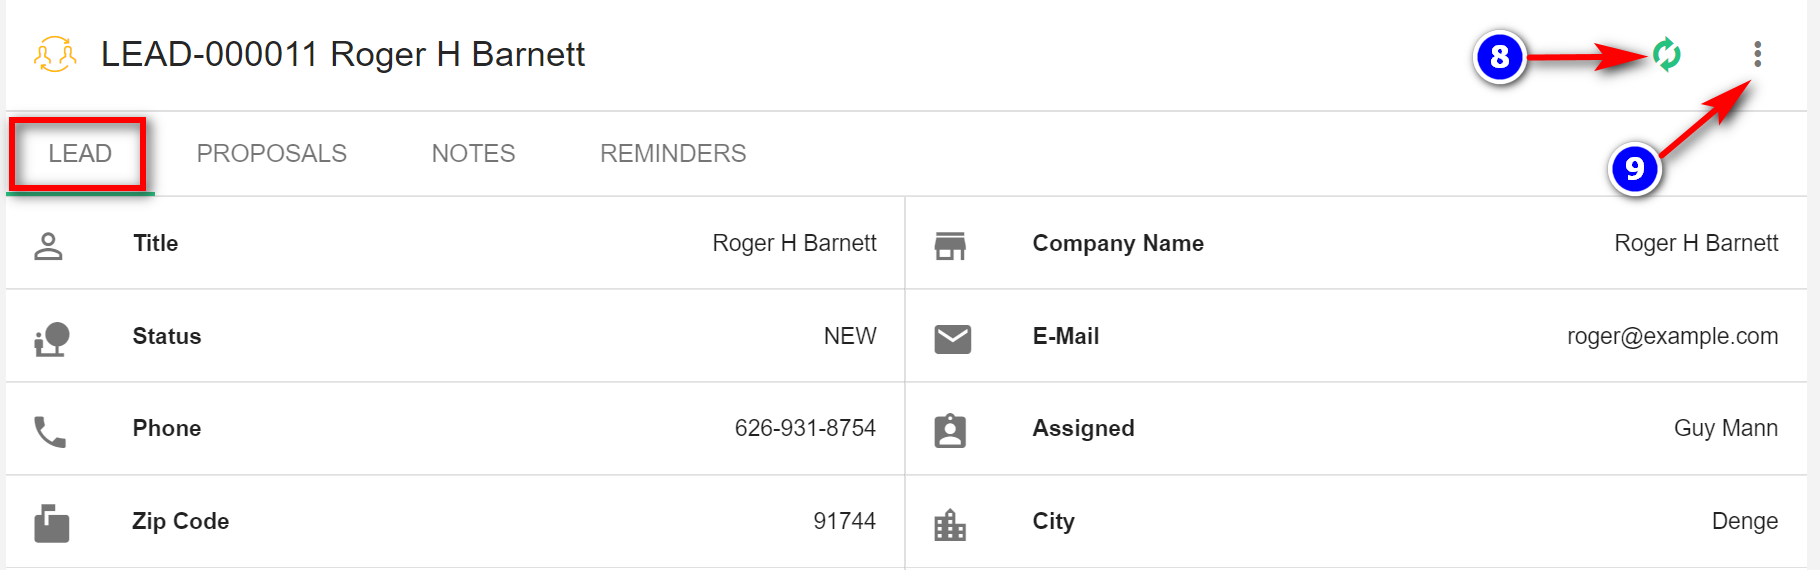
- " Convert (8) ": To convert the lead to customer click on the "Convert" icon.
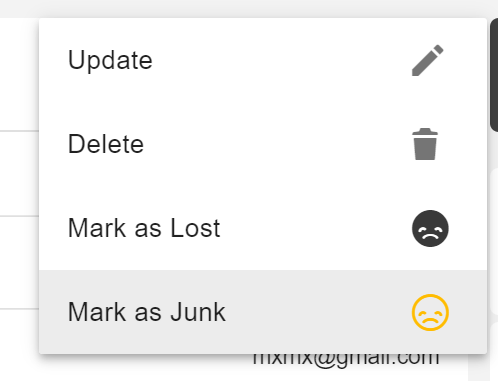
- "More Options(9)": To "Update a Lead", to "Delete a Lead ", "Unmark lead as lost", "Mark as Junk" click on the " More Options" icon.
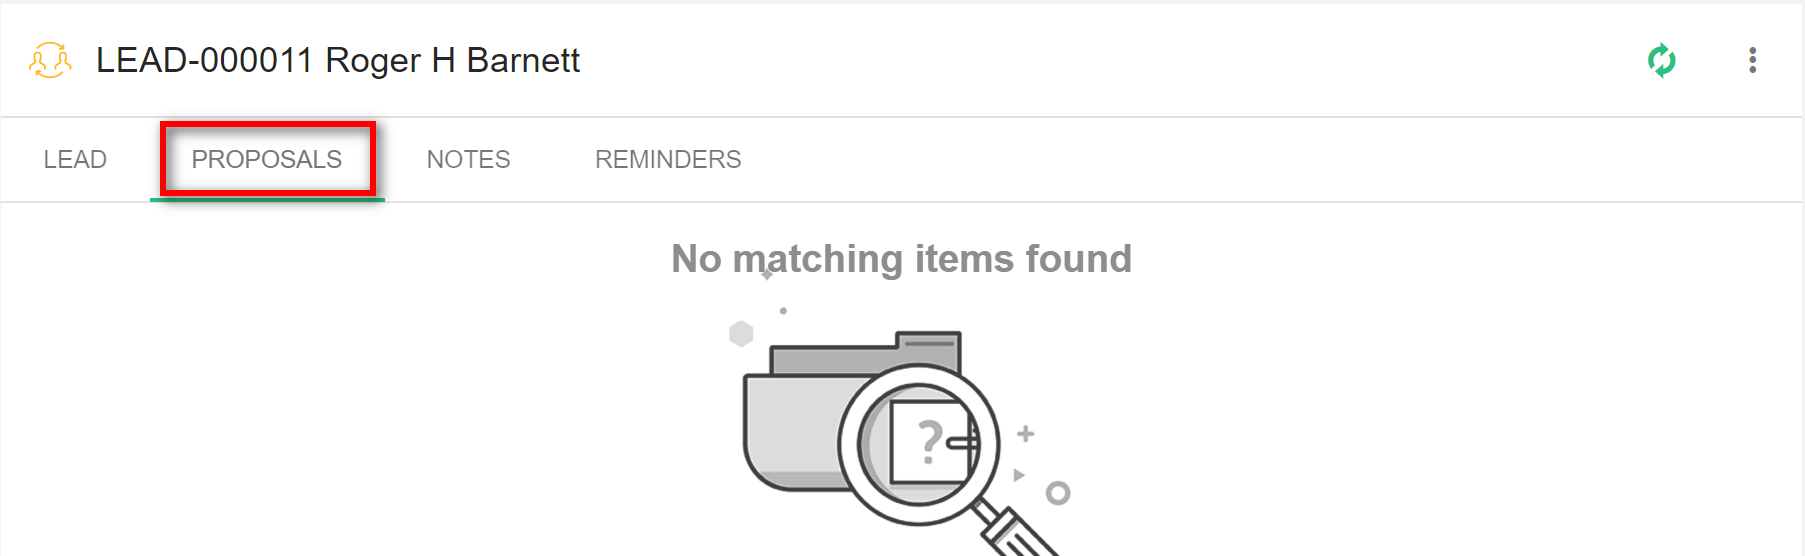
2. Proposals: This tab displays all the proposals made for the customer.
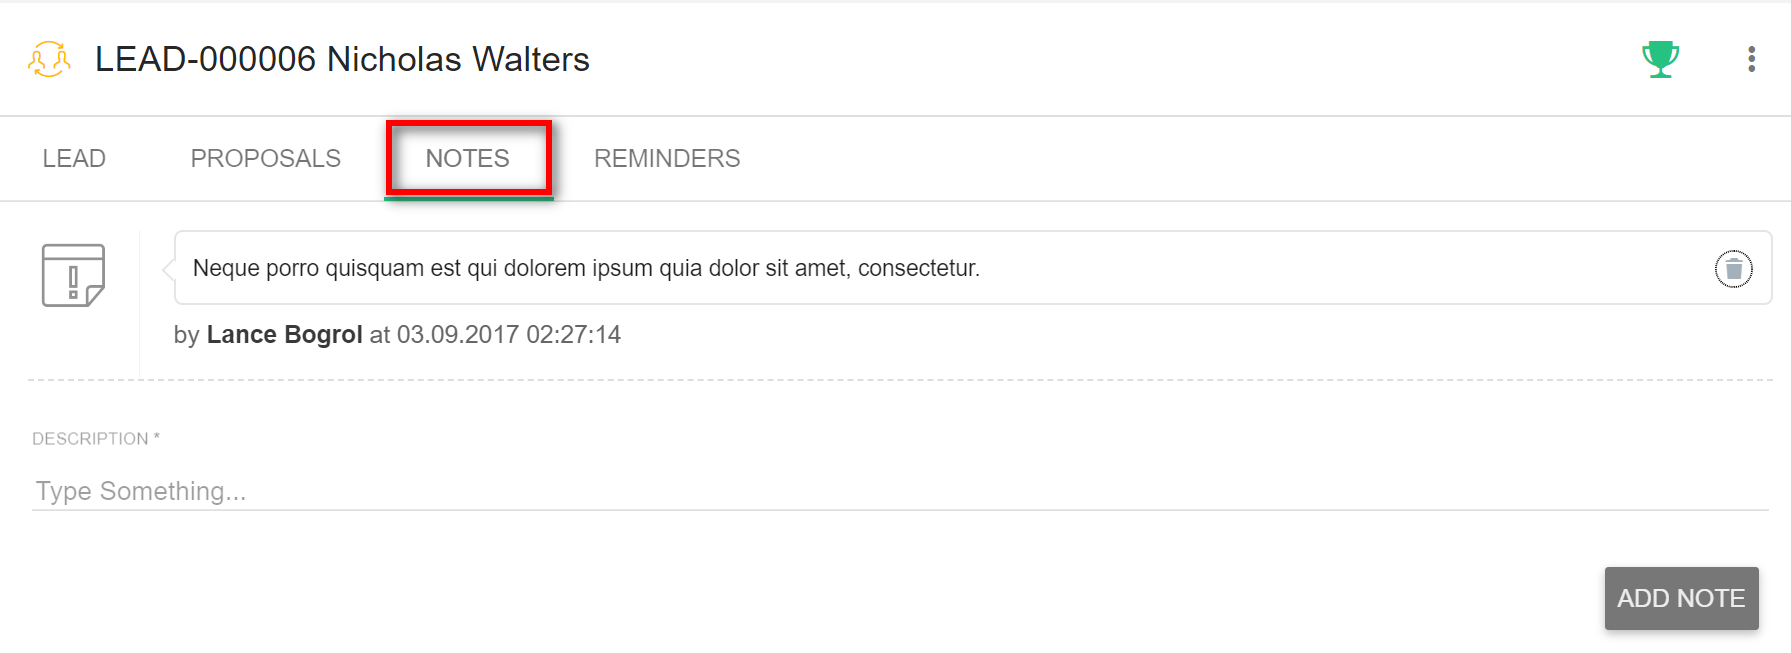
3. Notes: This tab displays all the notes created by the staff. Notes are internal and are not shown to the lead.
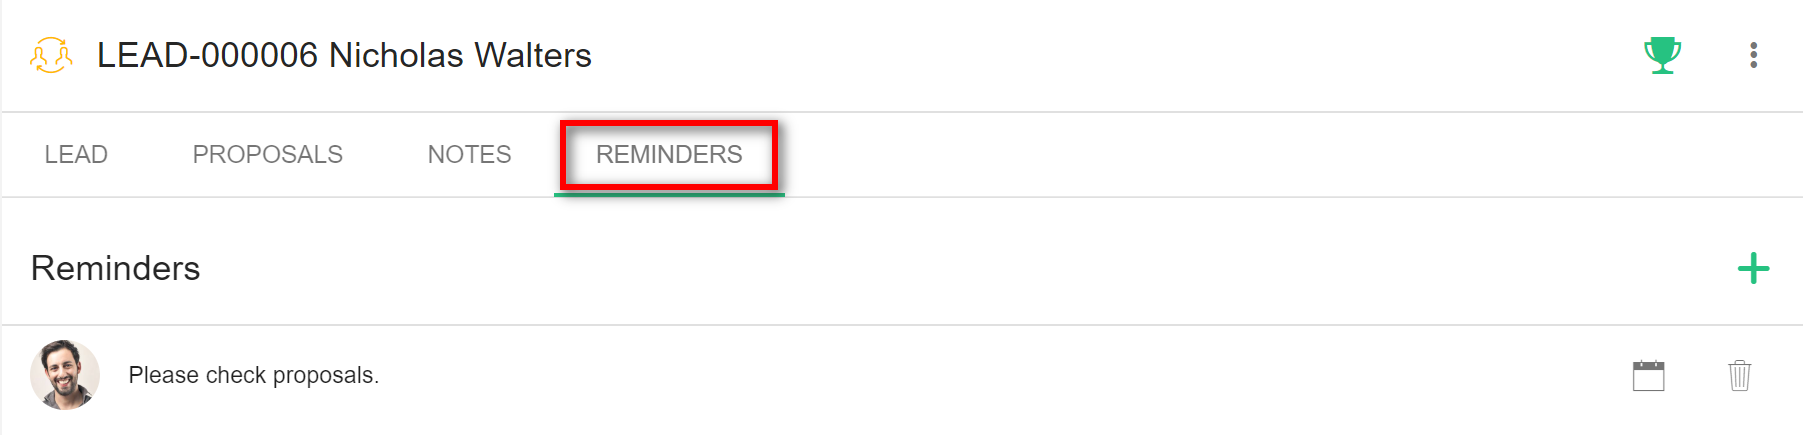
4. Reminders: This tab displays all the reminders set regarding this lead.
4.2.3 Leads Import, Export:
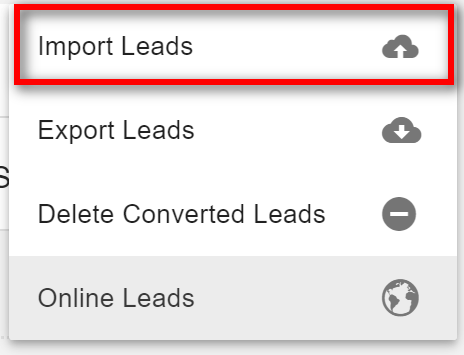
1. "More Option(10)" To access more options of Leads click on the "More Options Button" from the overview of the Leads page.
On your left-hand side, you will have a count of your leads based on the "Status" of the leads.
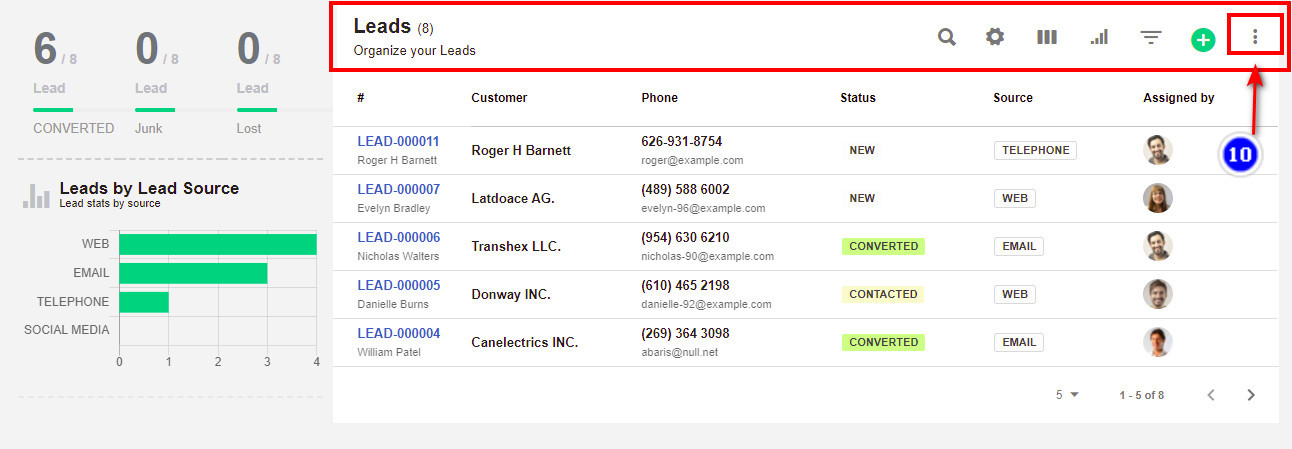
1. To Import the lead click on the more option then "Import Lead option" Download the sample before you import the .csv file to your application.
Referring to the example given import the file.
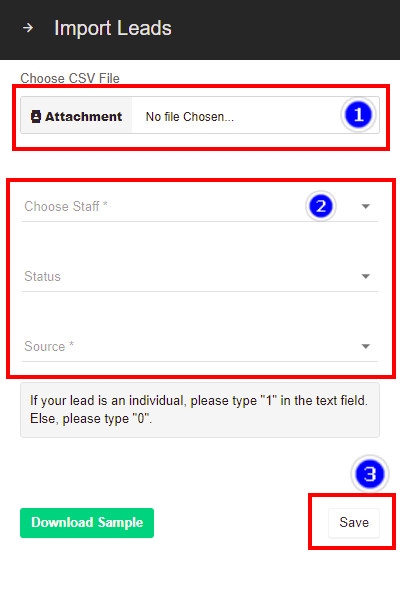
1. Attachment (1): Click on the "Attachment" browser over to your file from your local system and select the file to be imported.
2. Choose the staff to assign the lead details., also select the source and status from the drop-down.
3. Click on "Save", details from your local file will be imported into your application.
Note: To Import the leads please follow up the steps from 3.1.6 Import Customers.
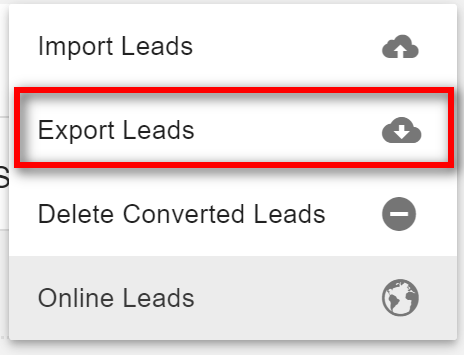
3. Export Leads: To Export the leads click on the "Export Leads". the leads created in your application will be exported to your local machine automatically.
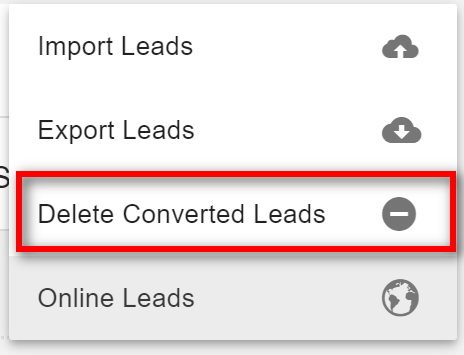
4. "Delete Converted Leads": To delete all converted leads click on the "Delete Converted Leads". the converted leads will be deleted.
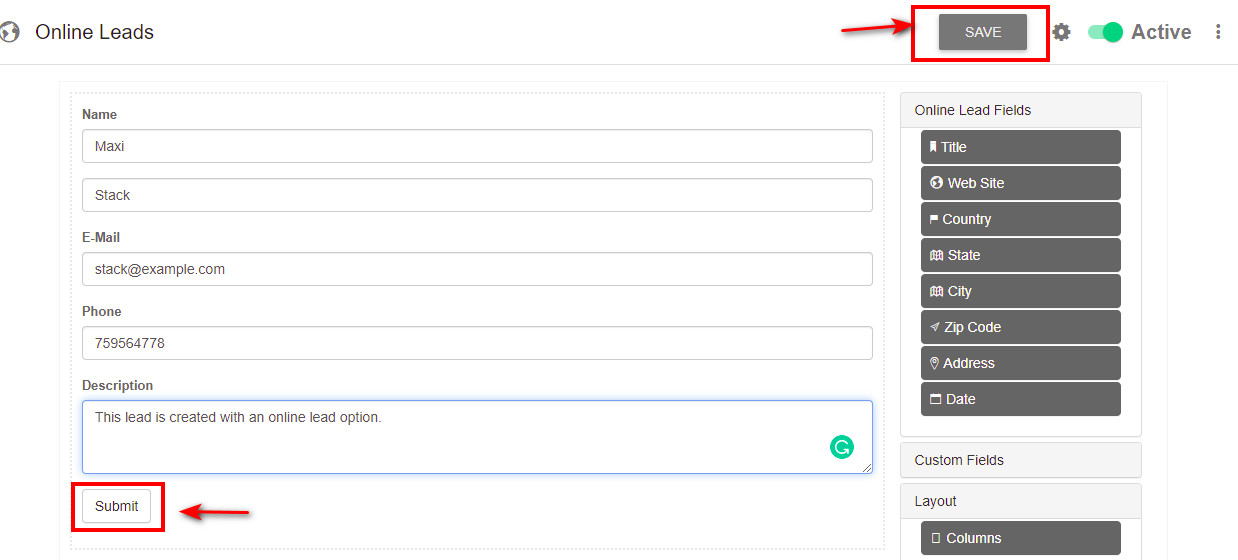
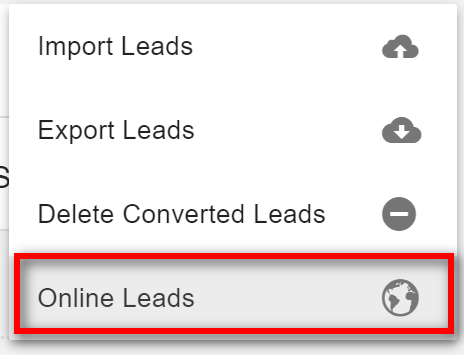
4.2.4 Online Leads:
1. To go to online leads click on the "Options"(10) icon and then on the "Online Leads".
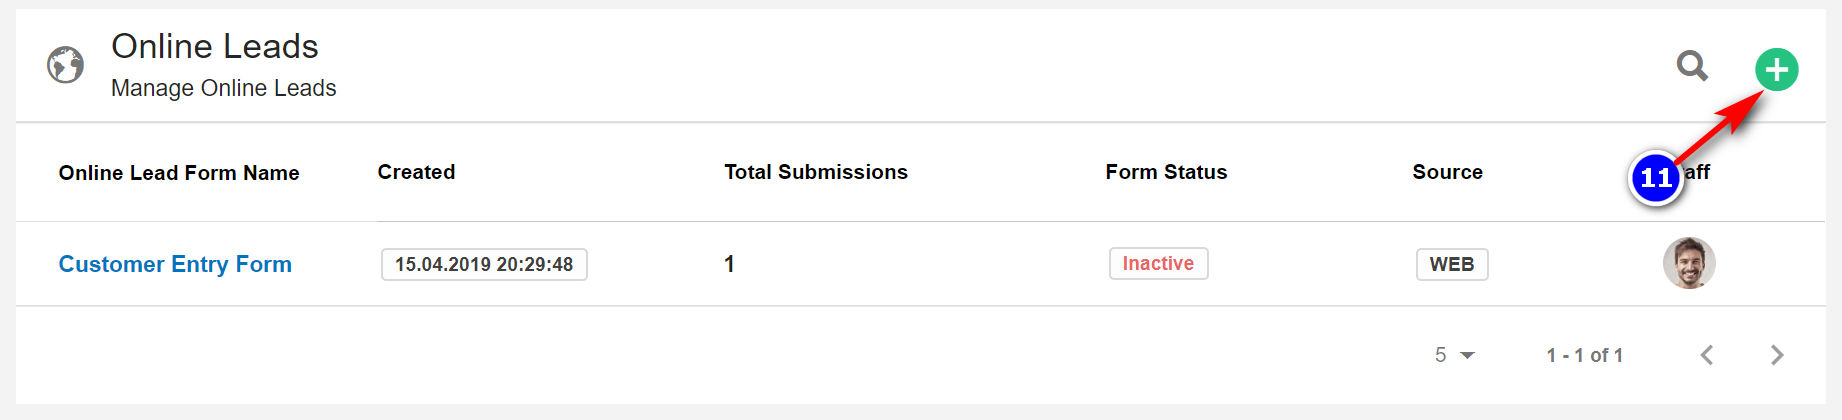
2. To create a new online lead form click on the "Create"(11) icon.
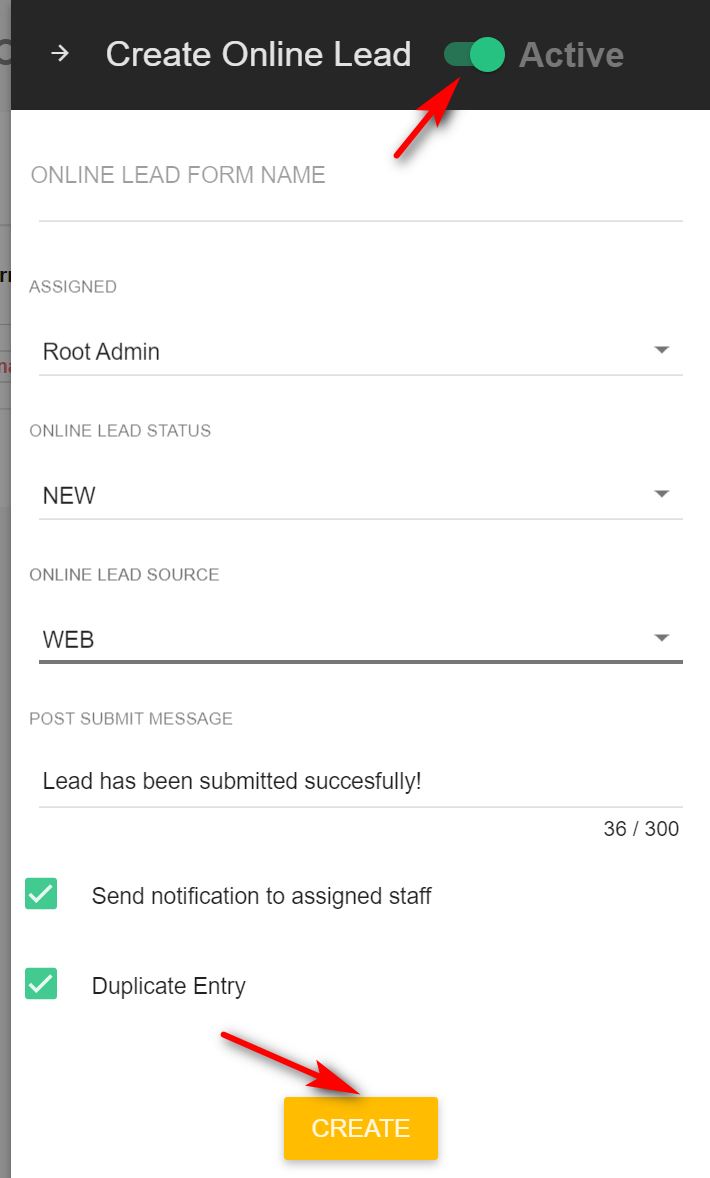
3. Enter the Basic Info for the form, enable or disable the button "Active" and click on "Create".
4. " Drag and drop(14) ": You will be redirected to a new page where you are given options to customize your lead form. Drag and drop the required lead form fields from the right to left. A pop-up window appears where you can customize each field.
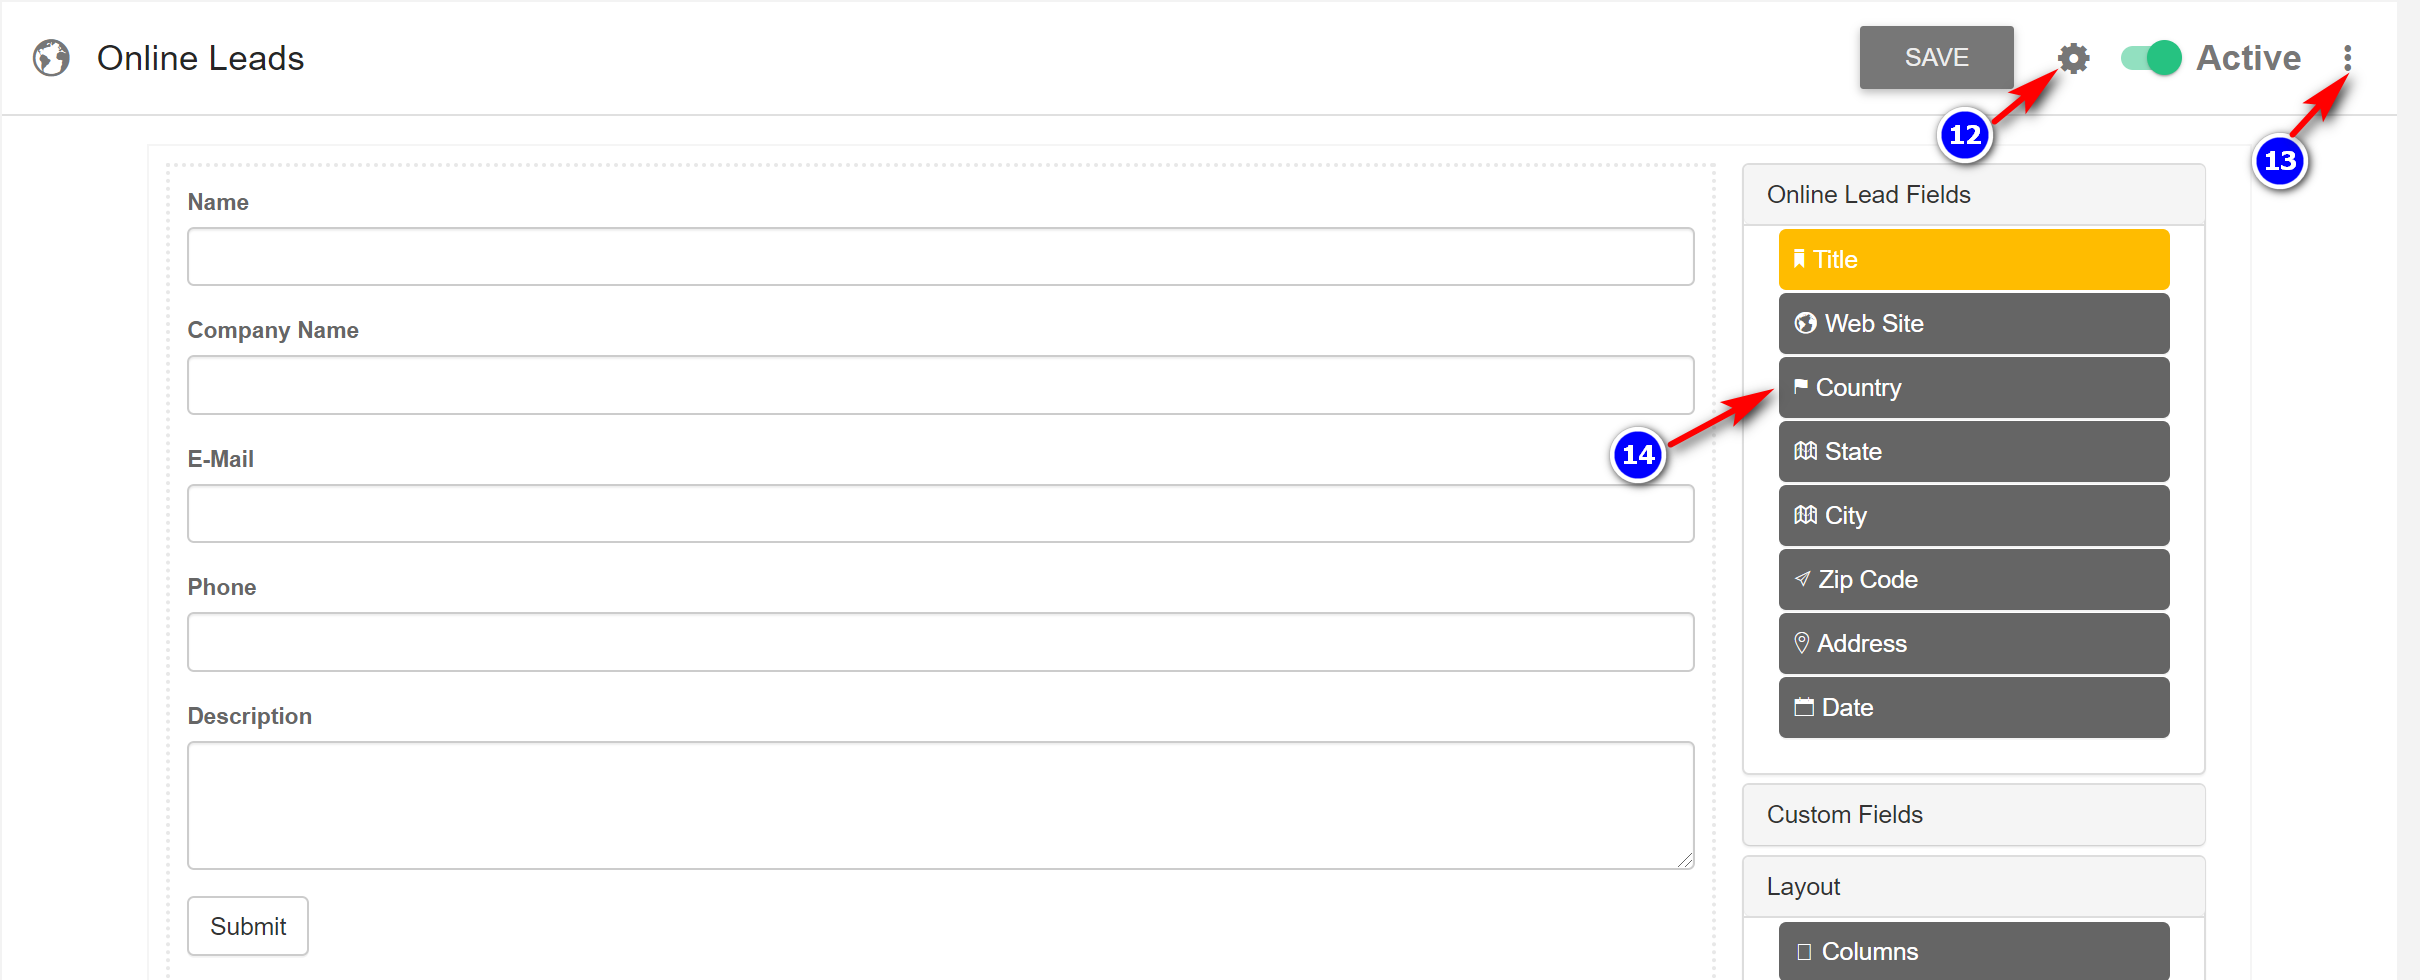
- "Options(13)" : To "Edit" or "Delete" the lead form click on the "Options" icon.
- "Embed (12)": To show the code, which you can embed in your site click on the "Embed" icon.
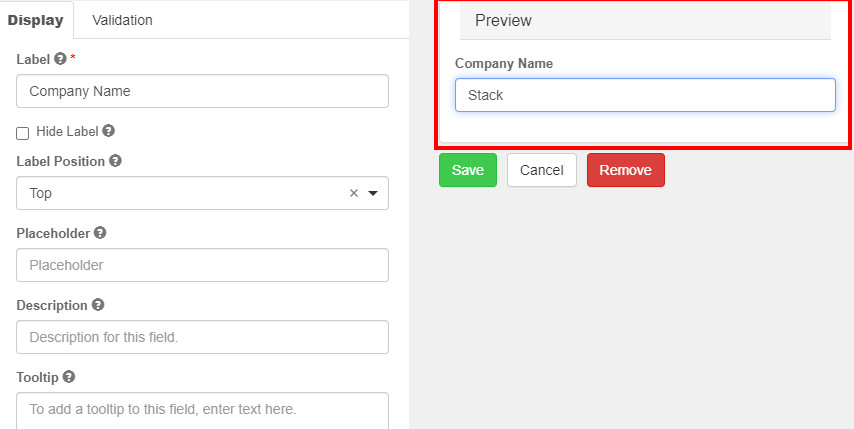
6. The "Display" section of the pop-up window contains the form customization settings for that individual form field. Make appropriate changes and check the preview area.
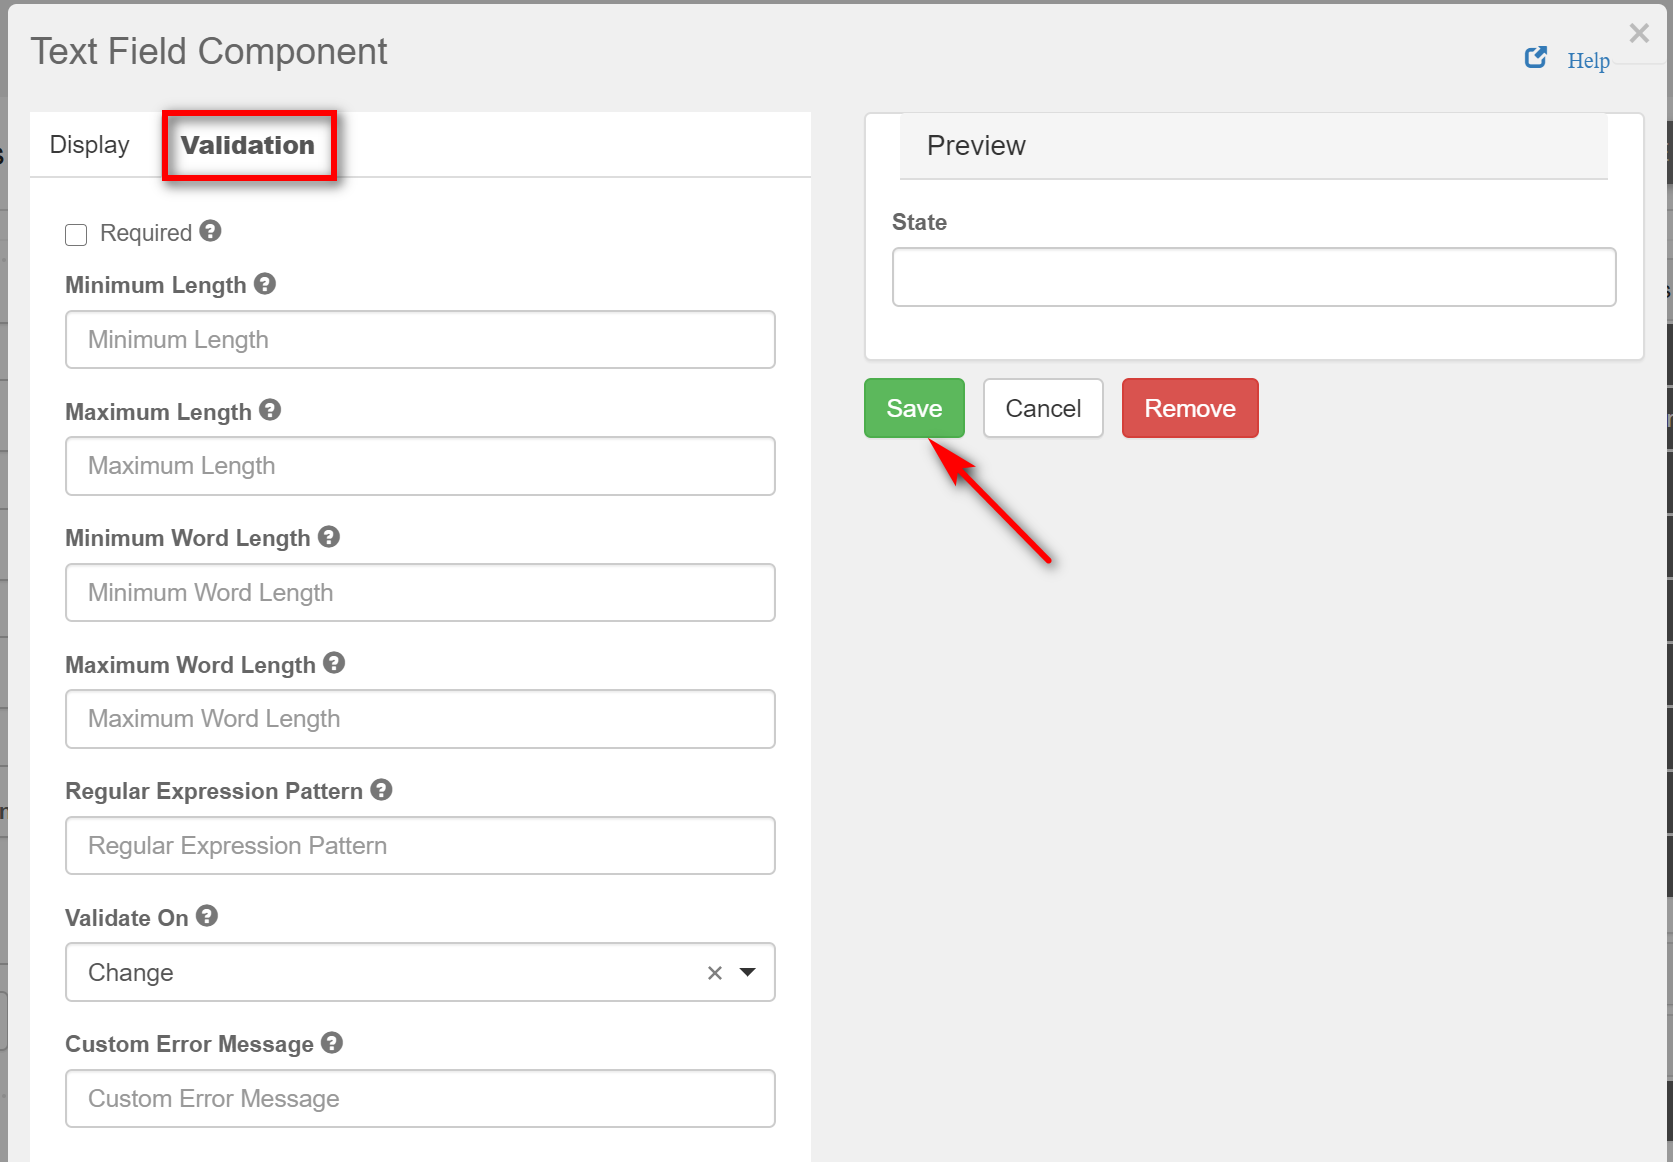
7. In the "Validation" section of the pop-up window, set the data validation parameters and click "Save".
- After customizing the online leads using form options, click "Submit". and click "Save".