8.1.1 Create Vendor:
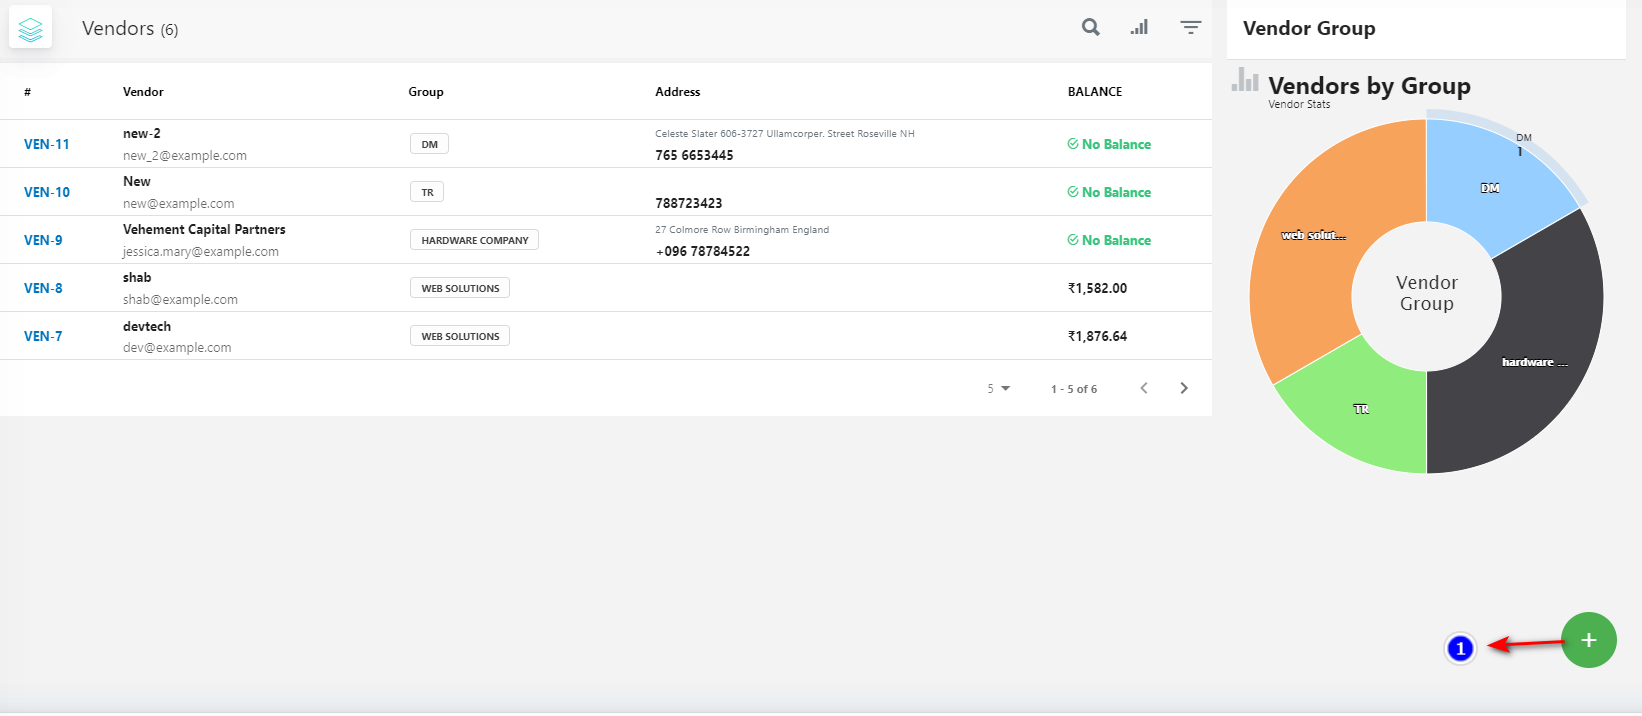
1. Vendors can be found under "Purchases" in the main menu.
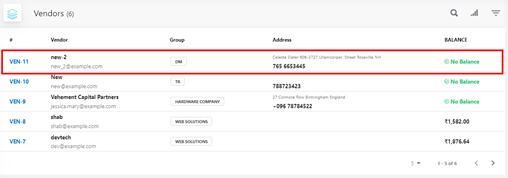
2. All the existing vendors can be found listed here.
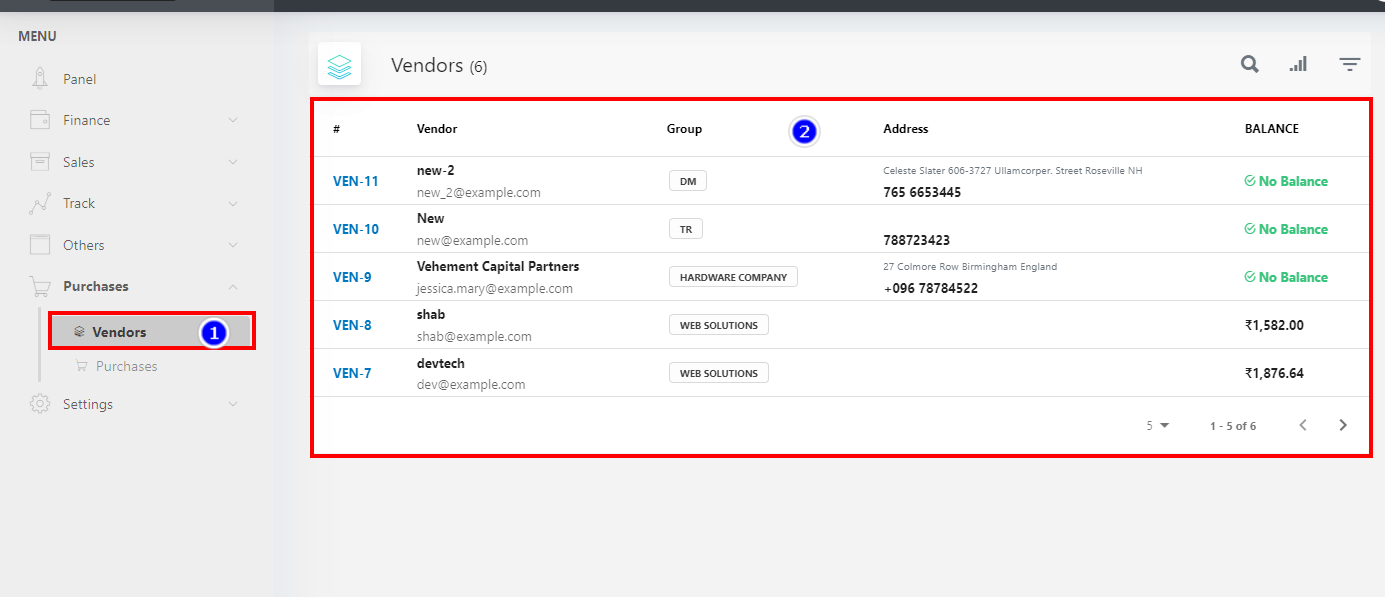
3. Search(1): To search the customer click on the "Search" icon.
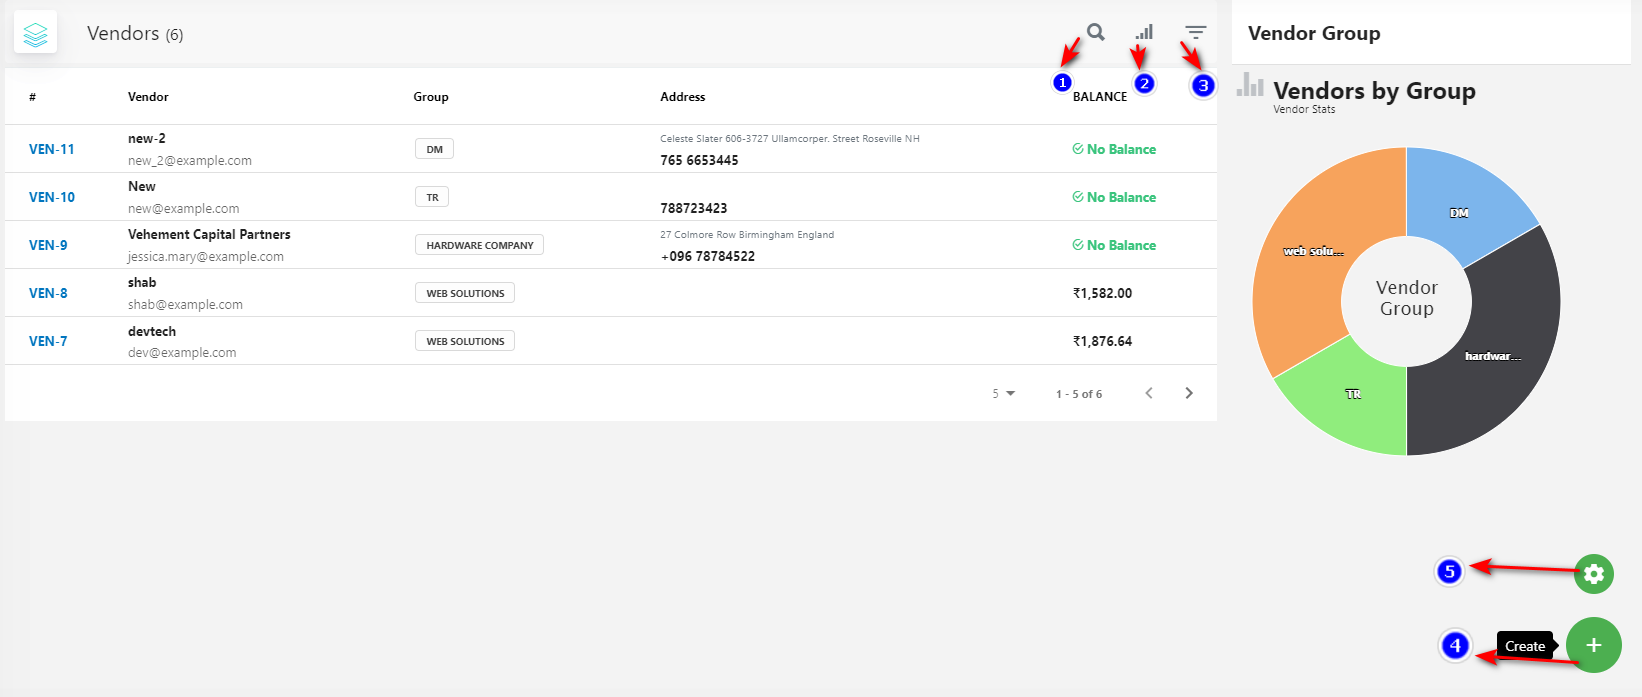
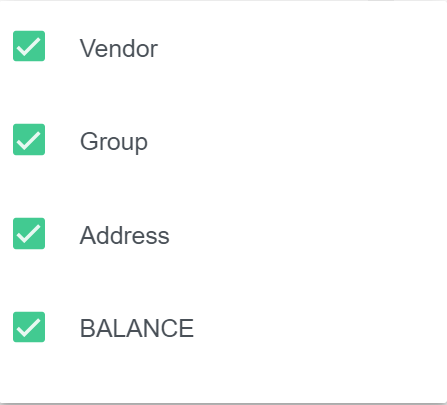
4. Filter Column(2): By default, all the columns for the vendor table are displayed. To manage what column needs to be displayed, click on the "Filter Column" icon, after you click on the icon a box will appear as shown in the below image, you can "Check" or "Uncheck" the fields you want to display on your vendor page.
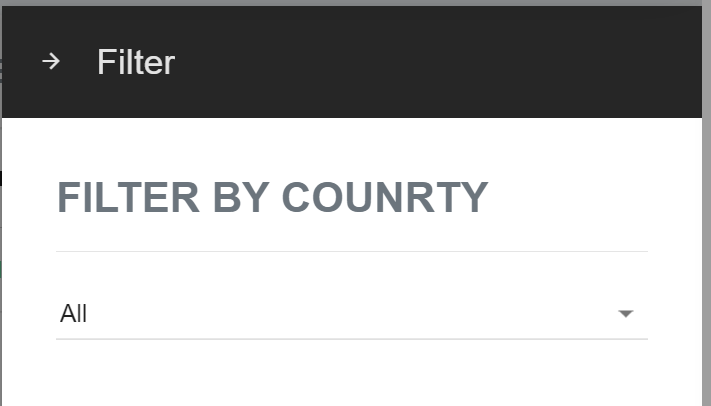
5. Filter(3): To filter the vendors by type or country click on the "Filter" icon.
1. To create a new vendor, click on the “Create (+) icon” from the bottom-right corner.
Once you click on create an icon, the vendor creation page appears, consist of three tabs simplified as:
1. General Tab:
1. Fill in the basic vendor details such as Vendor Name, Group, Phone number.
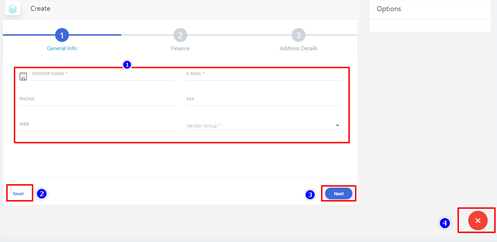
2. Click on the “Reset “button to clear the fields data.
3. To proceed to another tab after filling the general tab click on the “Next” button.
4. Click on the “Cancel” button to come back to the customer list page or to exit vendor creation.
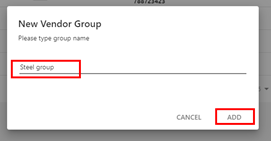
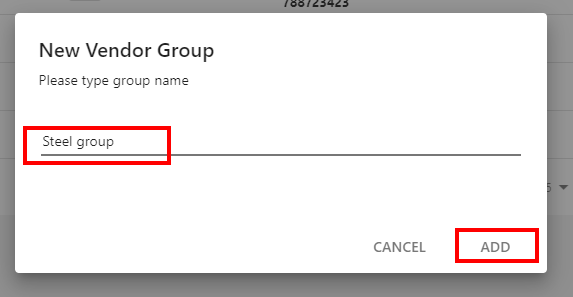
- You can also create a "Vendor Group" while creating a vendor.
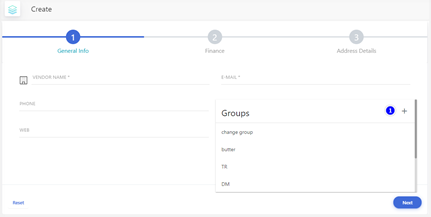
- Click on the "Vendor Group" either select from the existing group or to create a "New Group" click on the "(+)" icon.
- Give the name for the group and click on Add button the newly created group will be added in the dropdown.
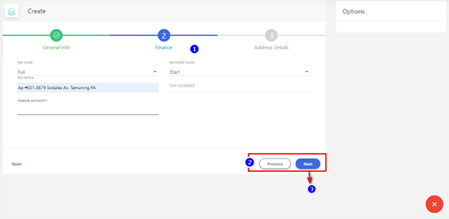
2. Finance Tab:
- Fill in all the Tax-related details and Currency related details.
- Click on the “Previous” button to go back to the previous tab.
- Click on the “Next” button to proceed with the vendor creation.
3 . Address Tab : Fill in the "Address Details" for the vendor.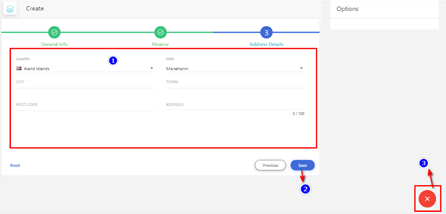
Click on “Save” button to create a vendor.
Click on “Cancel” button to exit vendor creation.
8.1.2 Create Vendor Group:
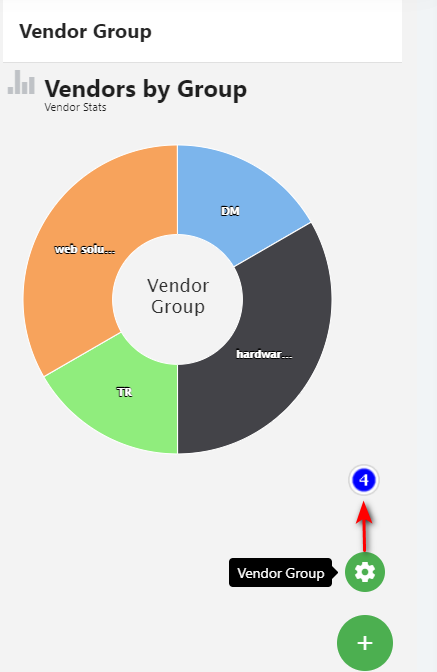
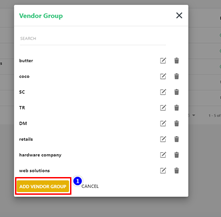
1. . Vendor Group Option(4): To add/ create “Vendor Group” click on the “Settings” icon it appears once you hover over the create (+) icon.
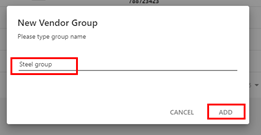
3. Enter the group name and click on "Add".
4. You can see the list of vendor group that is added, to add the second vendor click on the "Add Vendor Group" Button.
5. Enter the group name and click on the “Add” button the vendor group will be added.
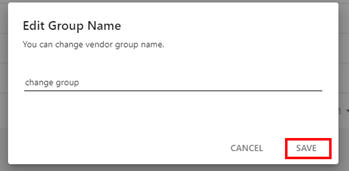
6. The created vendor group will be displayed if you want to Edit/Update the vendor group clicks on the “Pencil” icon next to the group name.
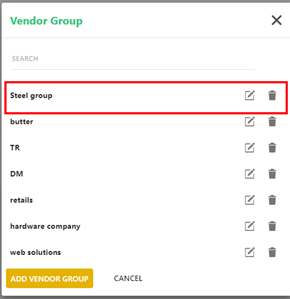
6. Edit the vendor group name and click on the “Save” button.
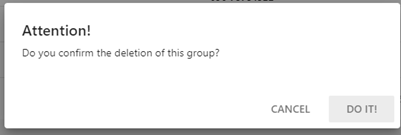
7. To delete the vendor group, click on the “Delete icon”.
 8. Click on the “DO IT!” button and the vendor group will be deleted.
8.1.3 Vendor Update page:
- To update the created vendor, click on the particular vendor.
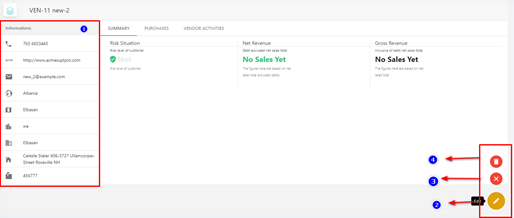
1. On the left side you can see the information of the vendor.
2. Click on the “Pencil icon” from the bottom right corner. Update vendor wizard appears. Which also consist of three tabs: General Tab, Finance Tab, Address Details Tab.
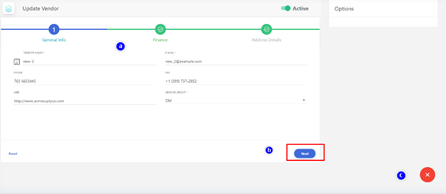
General Tab:
- You can update the name of the vendor /email or change the vendor group by selecting it from the drop down in General Tab.
- Click on the “Next” button to proceed with your changes.
- Clicking on "Cancel" will exit you from updating the vendor.
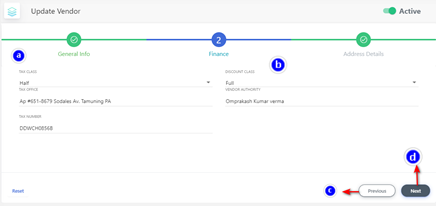
Finance Tab:
- Select the Tax -related details from the drop-down to change its values.
- Change the discount class from the drop-down.
- Click on the “Previous” button to go back to the general tab.
- Click on the “Next” button to move to the Address details tabs.
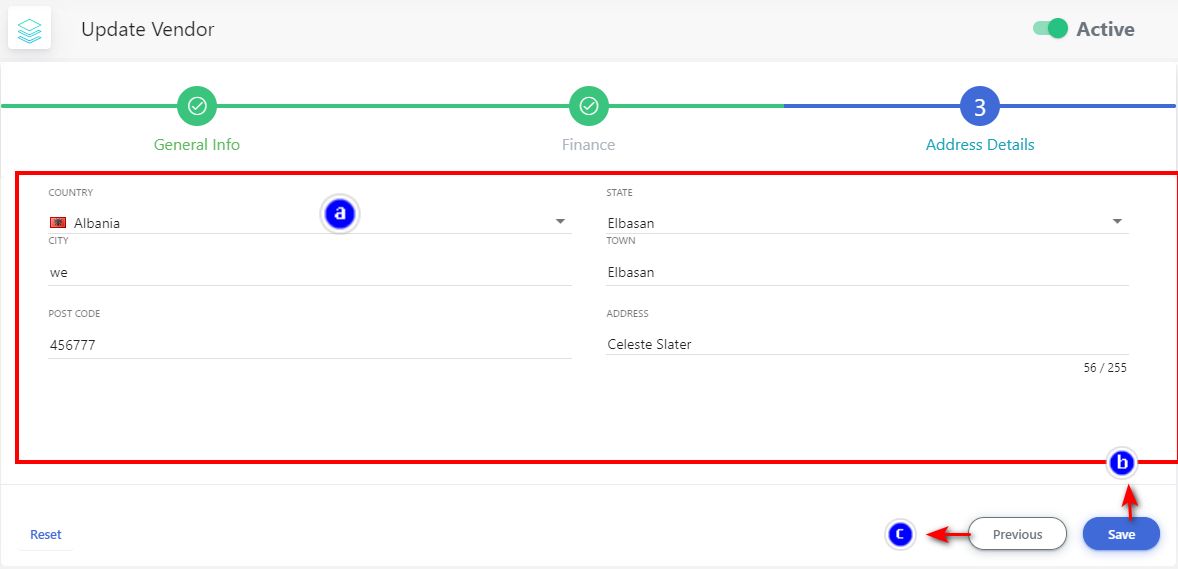
Address Details Tab:
- Change the address details of the vendor by selecting Country, State, or by changing the city name.
- Click on the “Save” button to save your changes.
- Click on previous to go back to the previous tabs.
3. Click on the "Cancel " button from the bottom right corner to exit the updations of the vendor
4. Click on the "Delete" icon from the bottom right corner to delete the vendor.
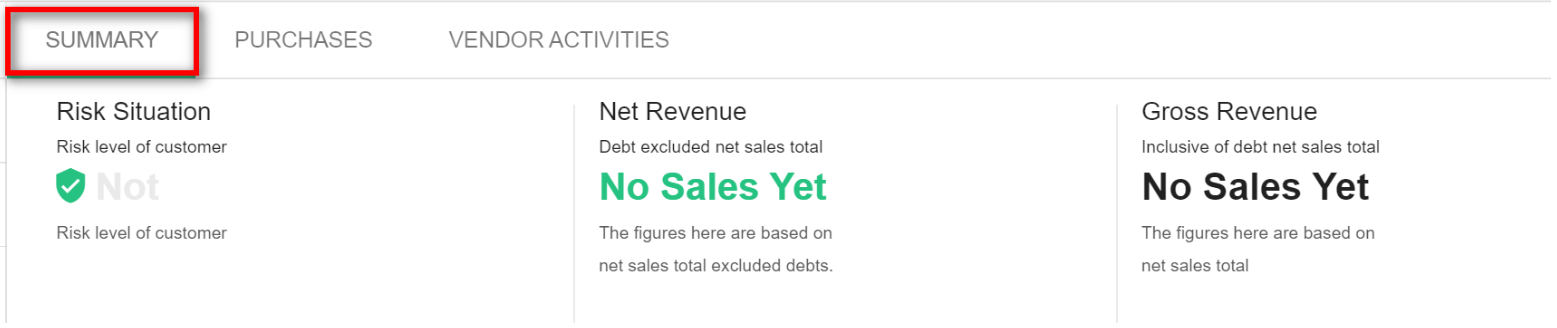
8.1.4 Vendor Page Details:
1. Summary: This tab displays all the transactions made by the vendor.
2. Purchases: This tab displays all the purchases pertaining to the vendor.

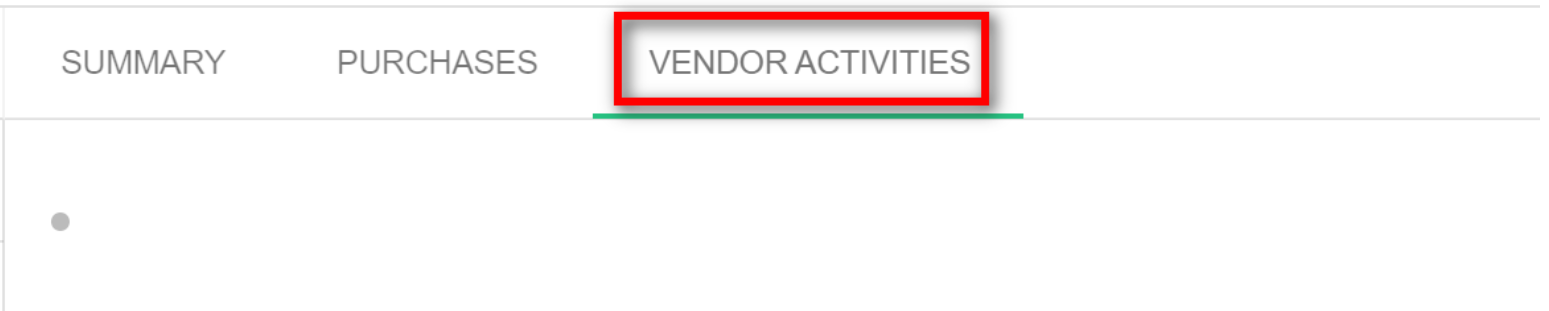
3. Vendor Activities: This tab displays all the vendor activities.