

7.2.1 How to manage calendar?
1. The calendar can be found as shown in the main menu.
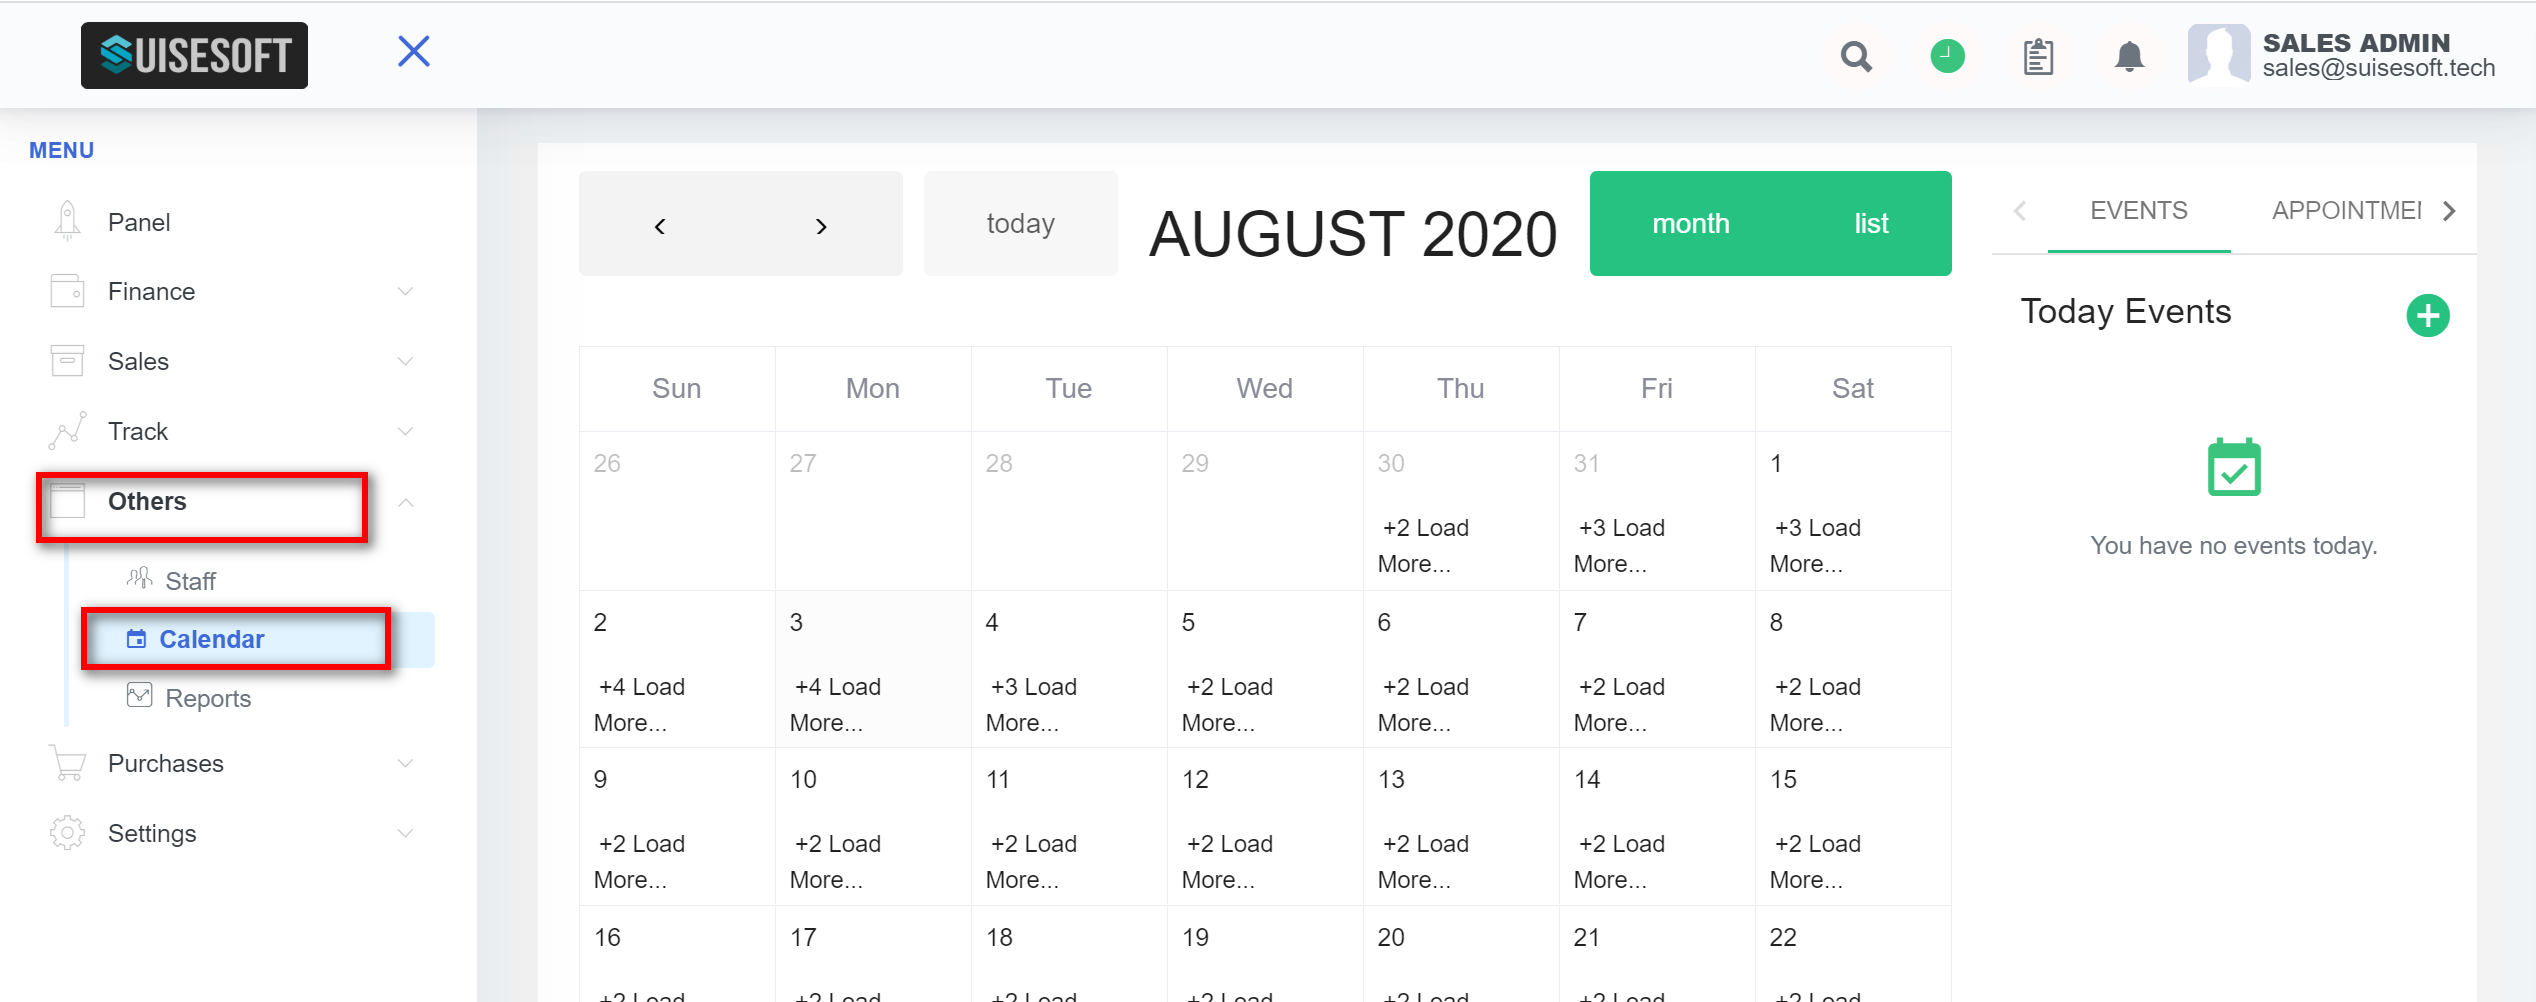
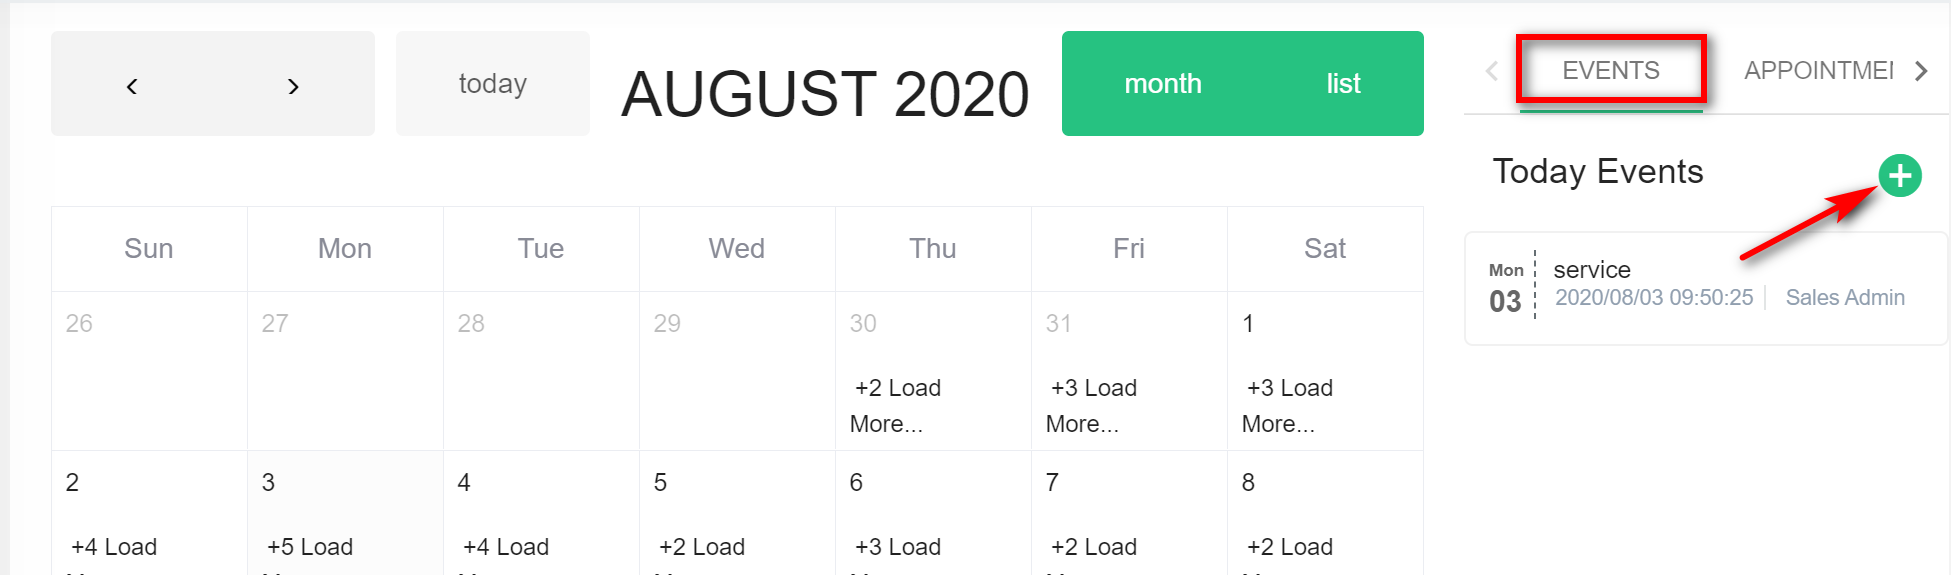
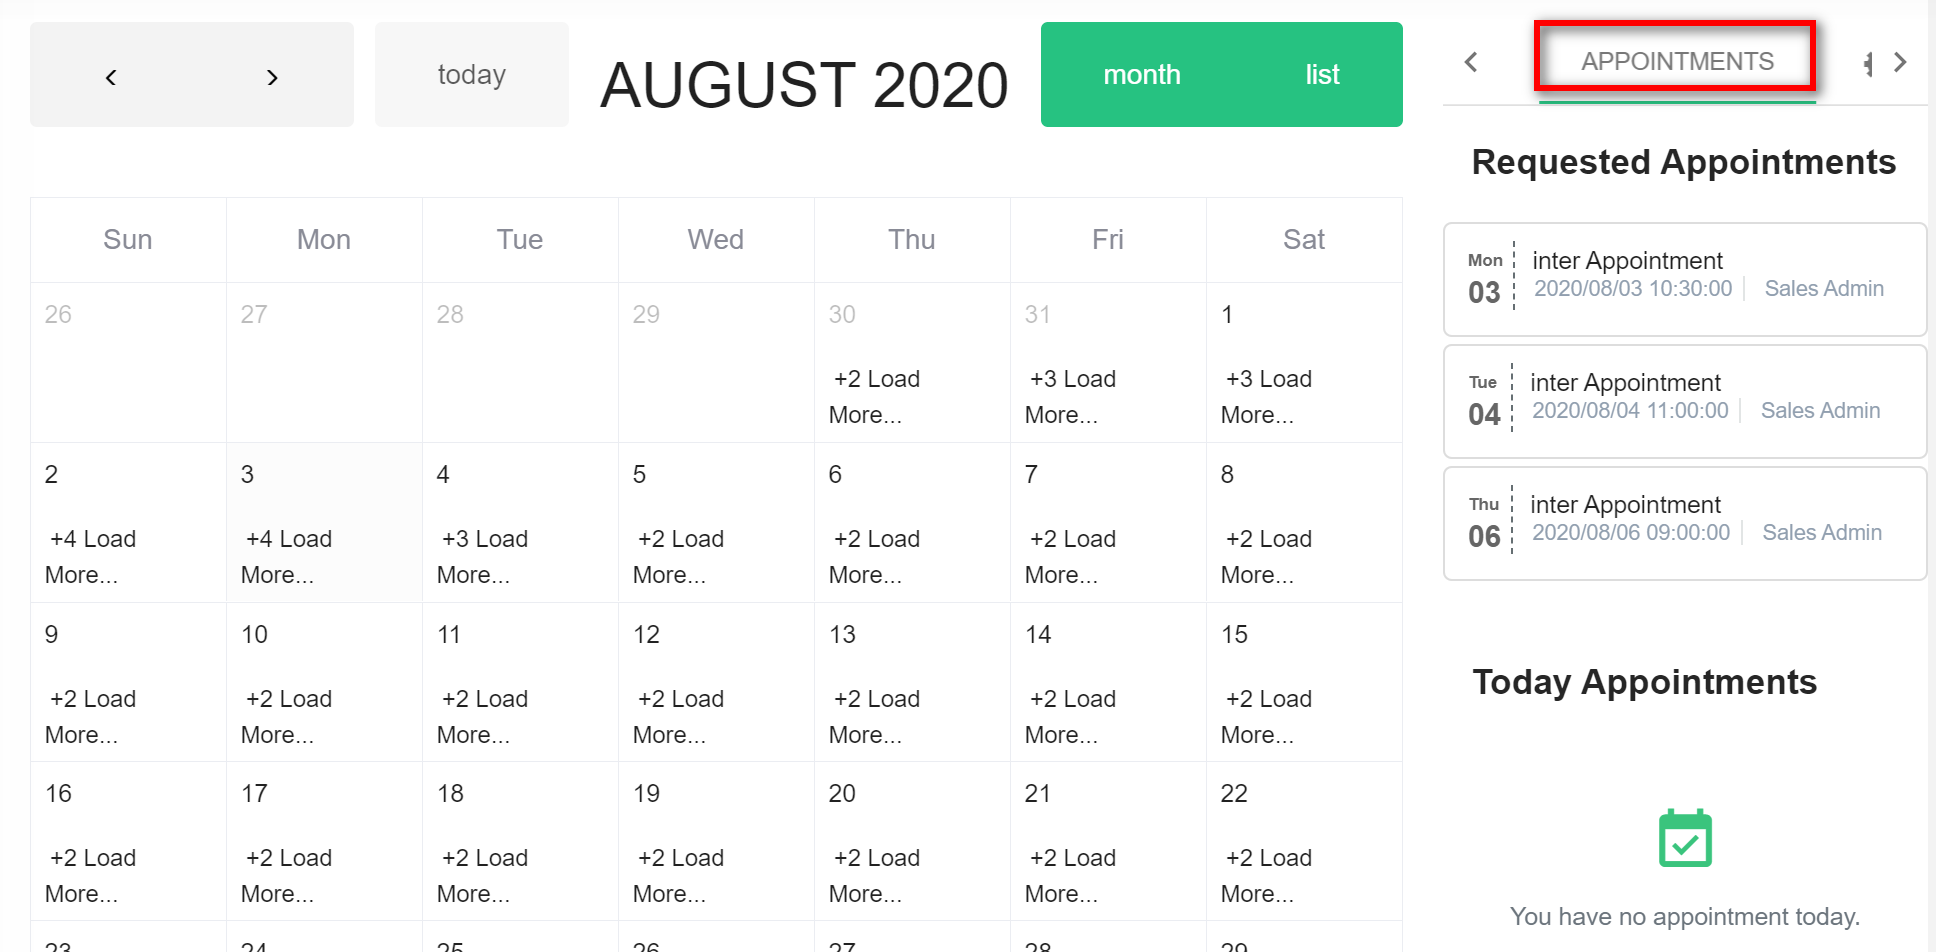
2. All the events are displayed on the calendar as shown. You can see your calender in view month or list.
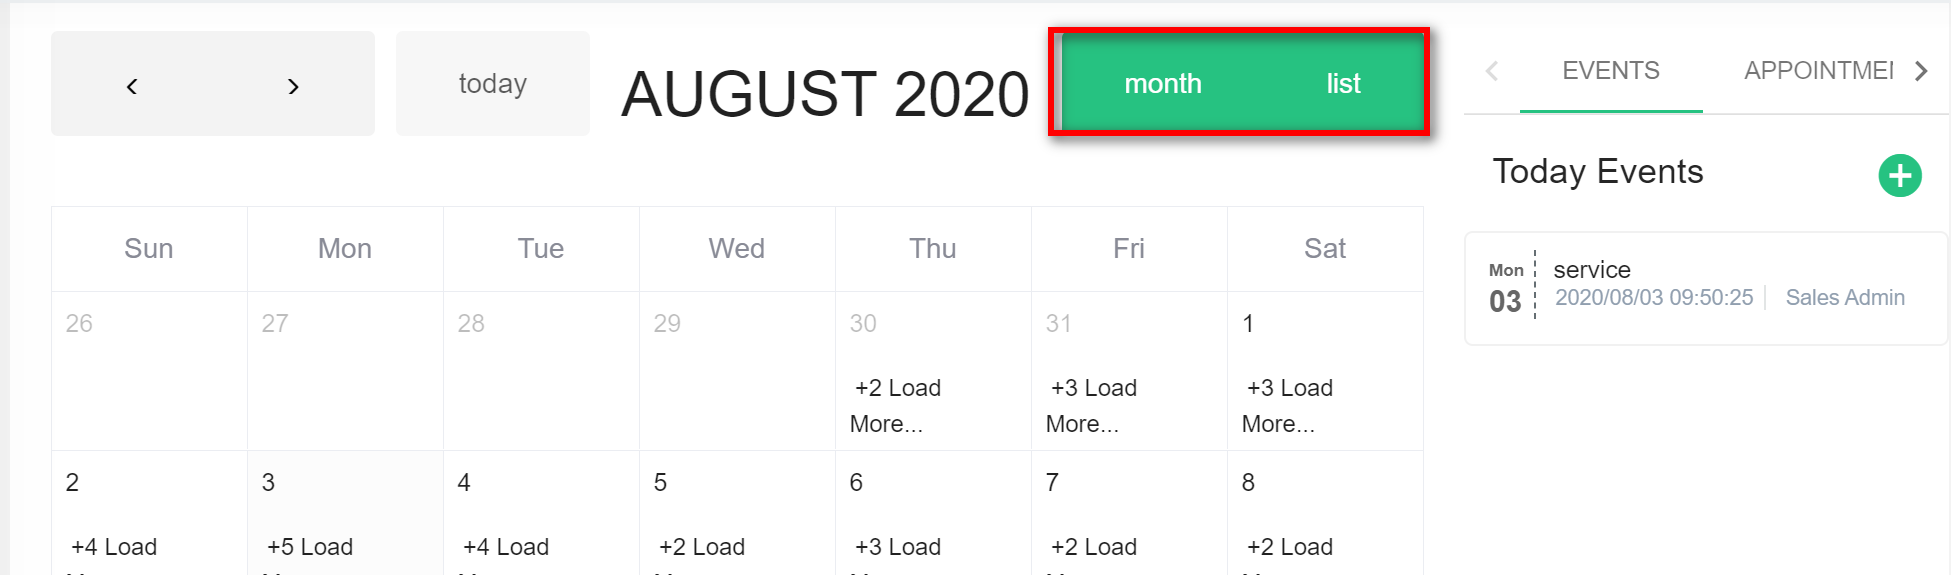
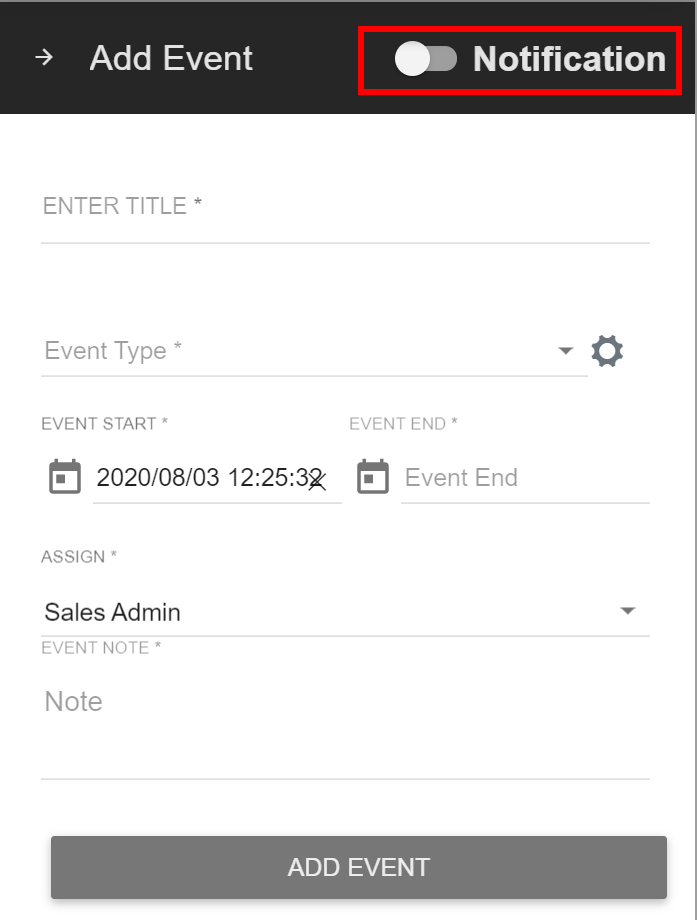
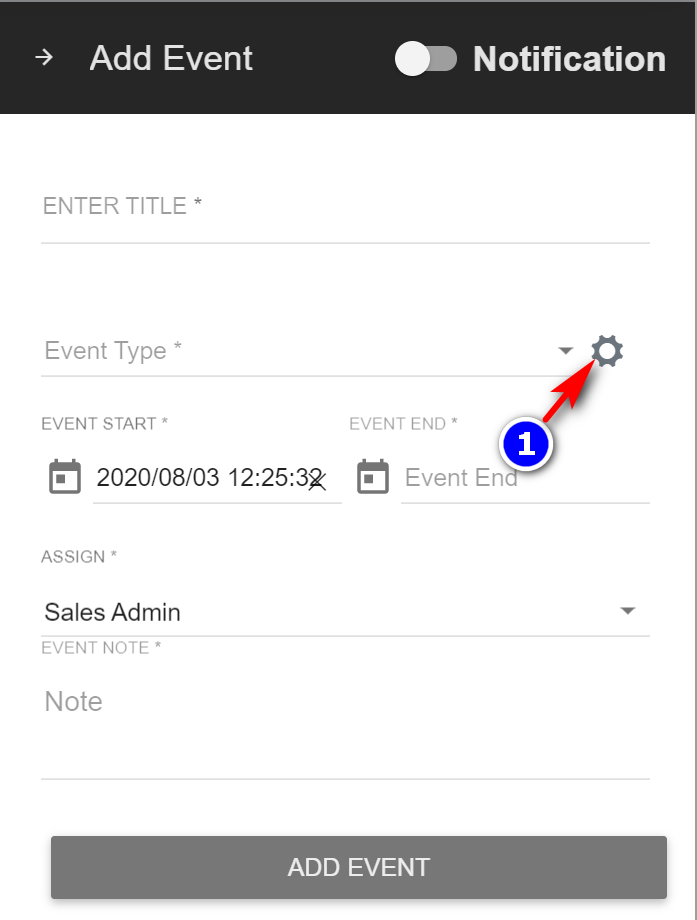
3. To create a new event, click on the "Add Event" icon on the "Event" tab.
- Toggle the "Notification" toggle button, if you want a notification to be sent to you as a reminder for the event.
7.2.2 Create Event Type:
1. While on the create event side nav, click on the "Create Event Type"(1) icon.
2. Enter the details, choose an event color and click on Add Event Type.

3. Check the Public Event checkbox to make the event type, a public event type. A public Event is visible to all staff.
7.2.3 Appointments:
1. Requested and today appointments you can see in the tab "Appointments".
2. Click on the appointment you want see.
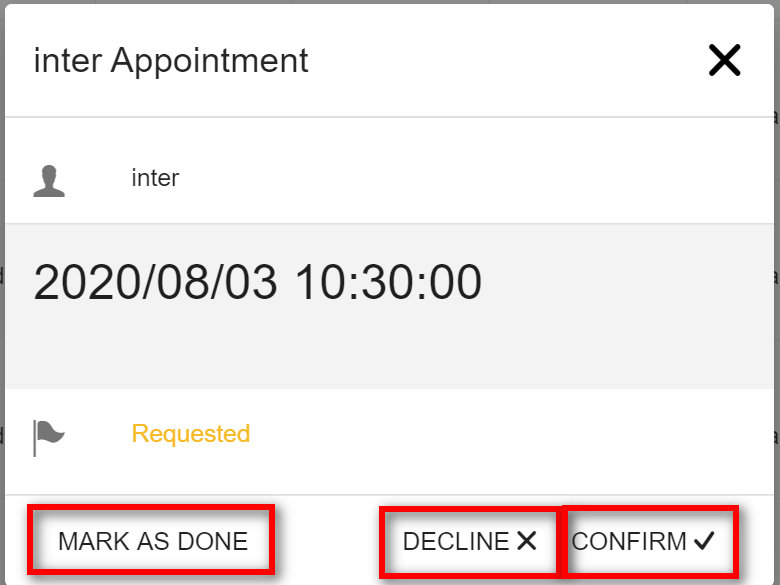
3. You can "Confirm", "Decline" or "Mark as Done" by clicking on the appropriate buttons.
7.2.3 Settings:
1. You can pick the color for projects, tasks and appointments by clicking on the "Settings"(3) icon.
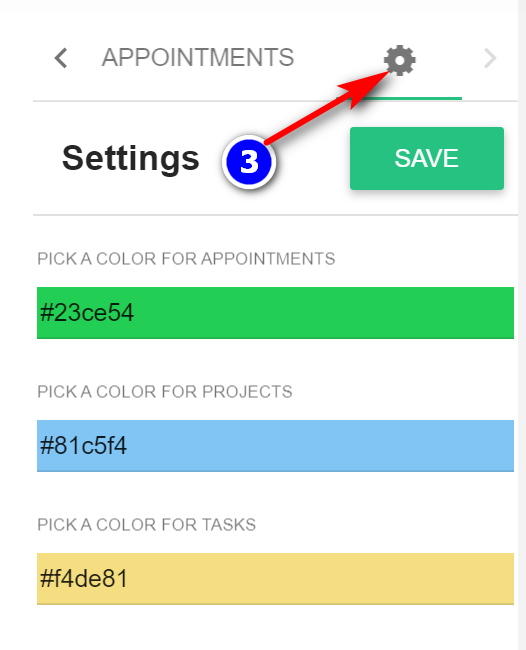
2. Choose the color and click on "Save".