

6.1.1How to manage a project?
1. Projects can be found under Track in the main menu.
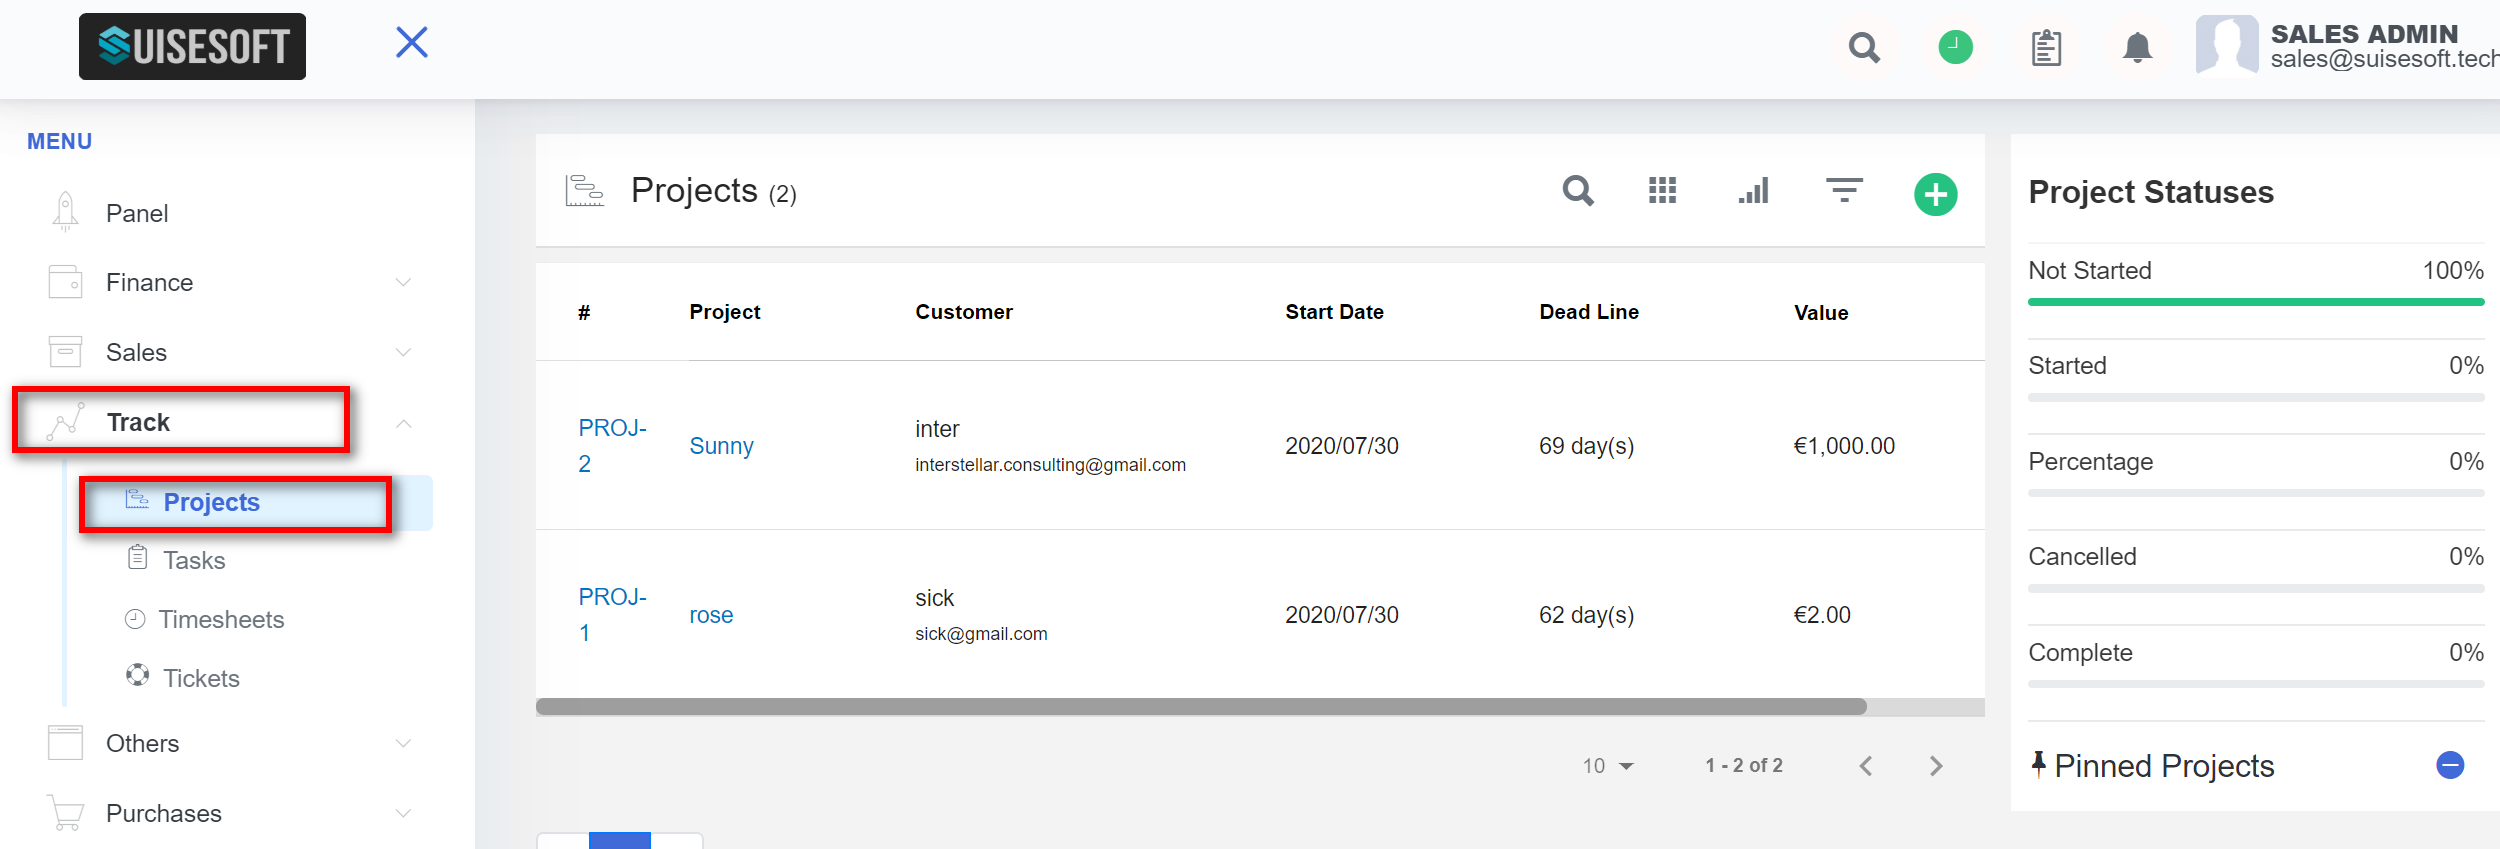
2. All the existing projects are listed here.
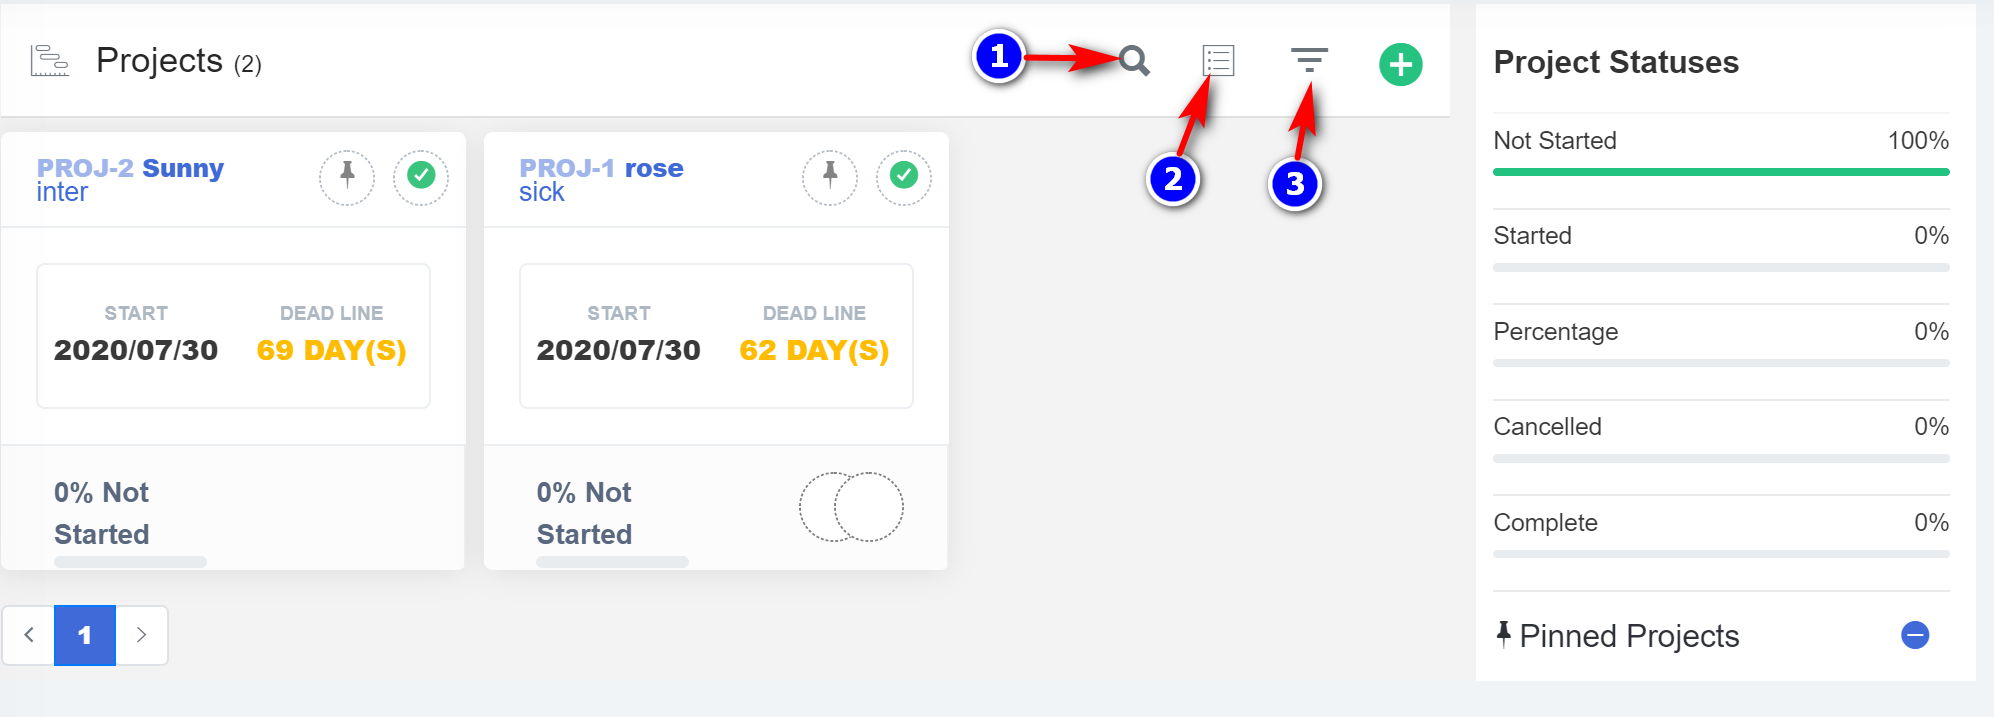
3. You can "Search"(1) and "Filtern"(3) the projects. To go to the list view click on the "Show list"(2) icon.
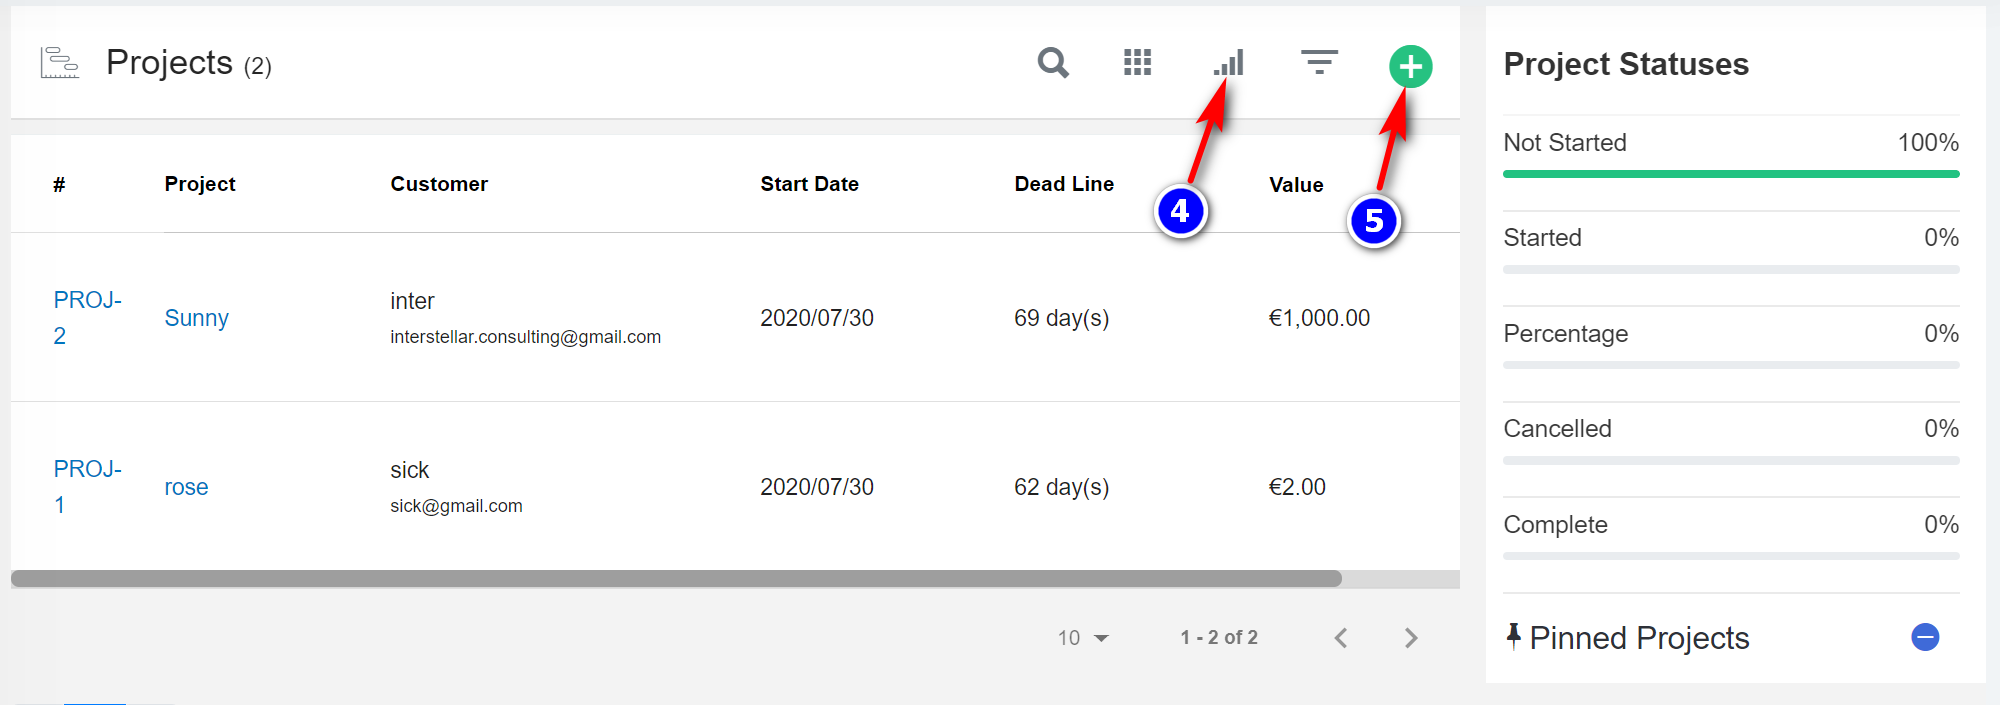
4. By default, all the columns for the table are displayed. To manage the columns to be displayed, click on the "Filter Column"(4) icon in the list view.
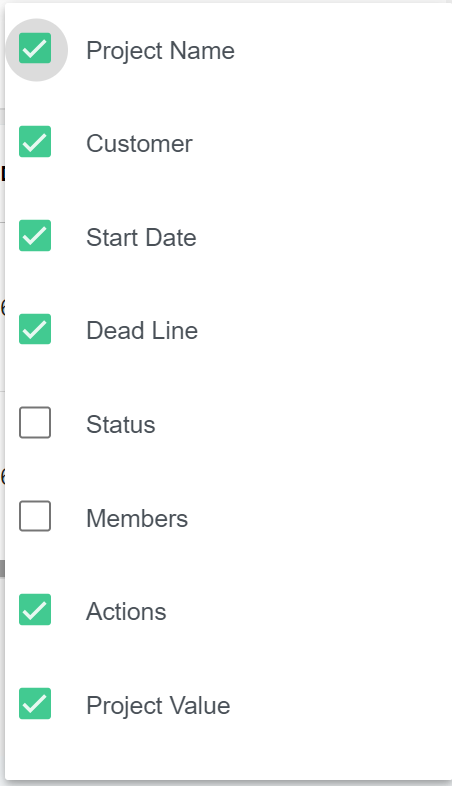
5. The list of columns will be displayed. Check the columns you want to be displayed. This option will be saved.
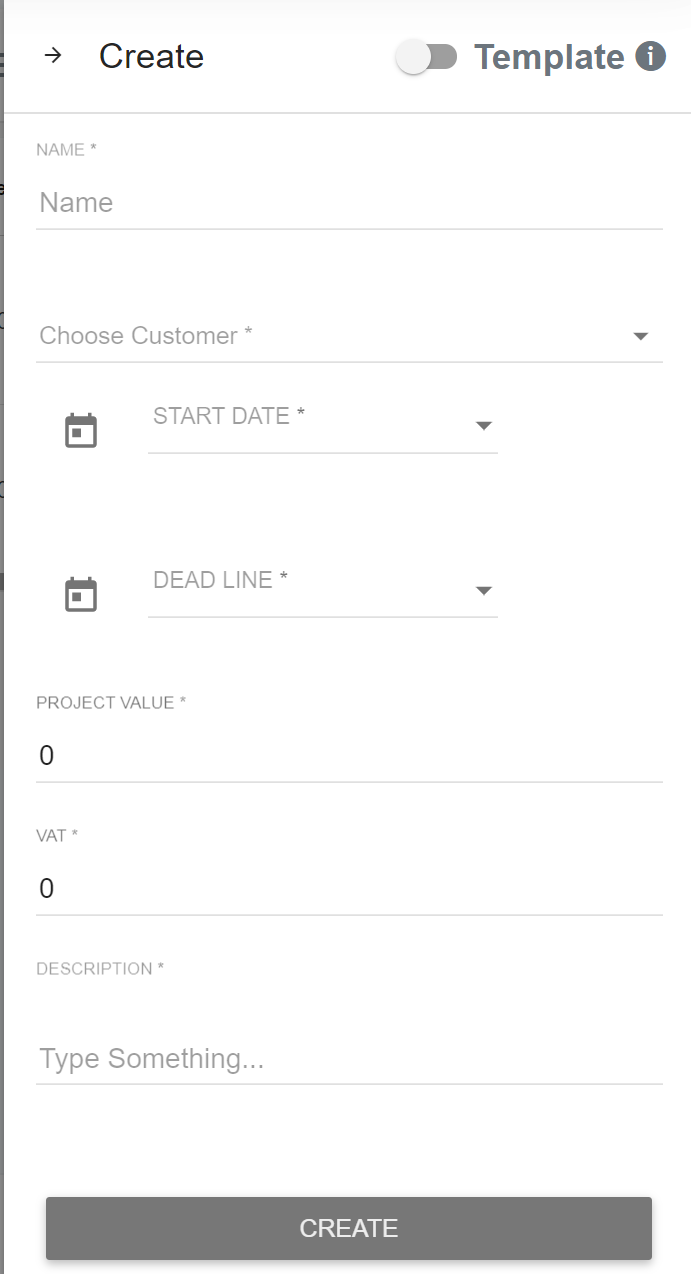
3. To create a new project, click on the "Create"(5) icon. Enter the details and click on create.
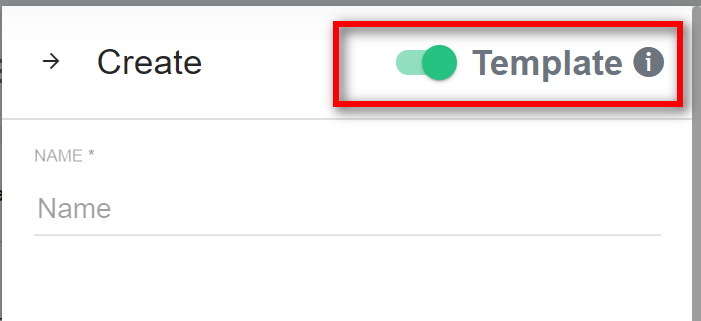
- To create a project template, toggle the template toggle button.
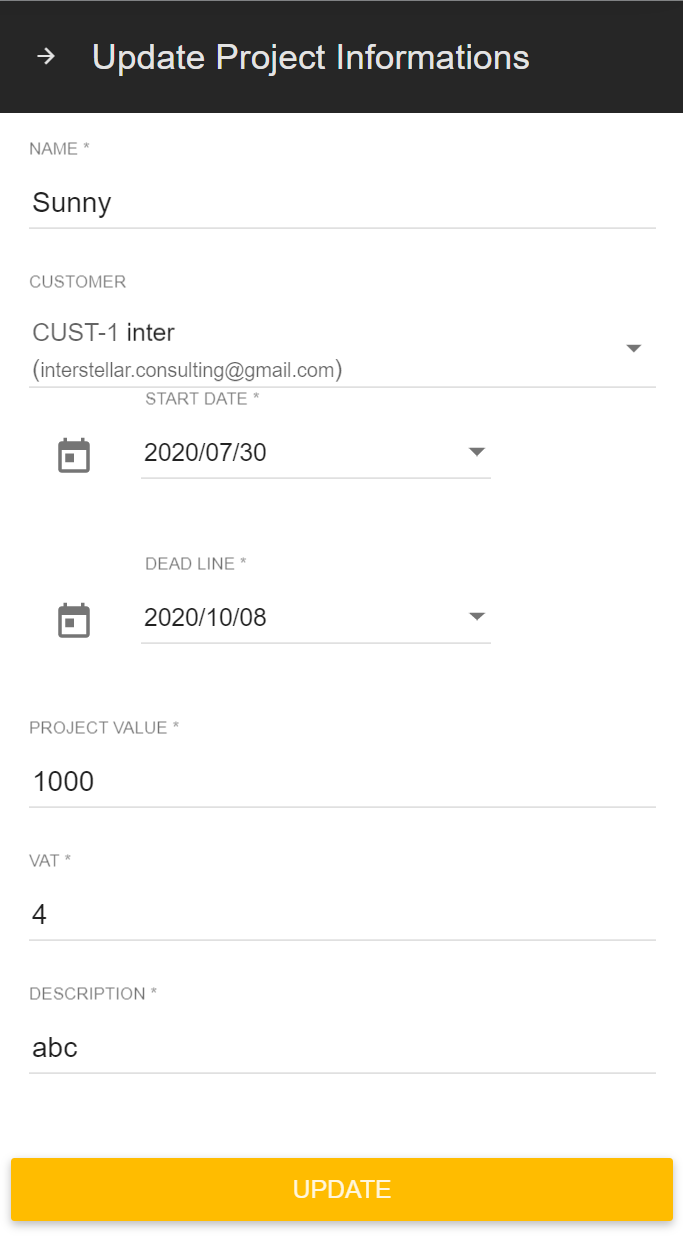
6.1.2 Edit Project
1. Click on the project you want to edit.
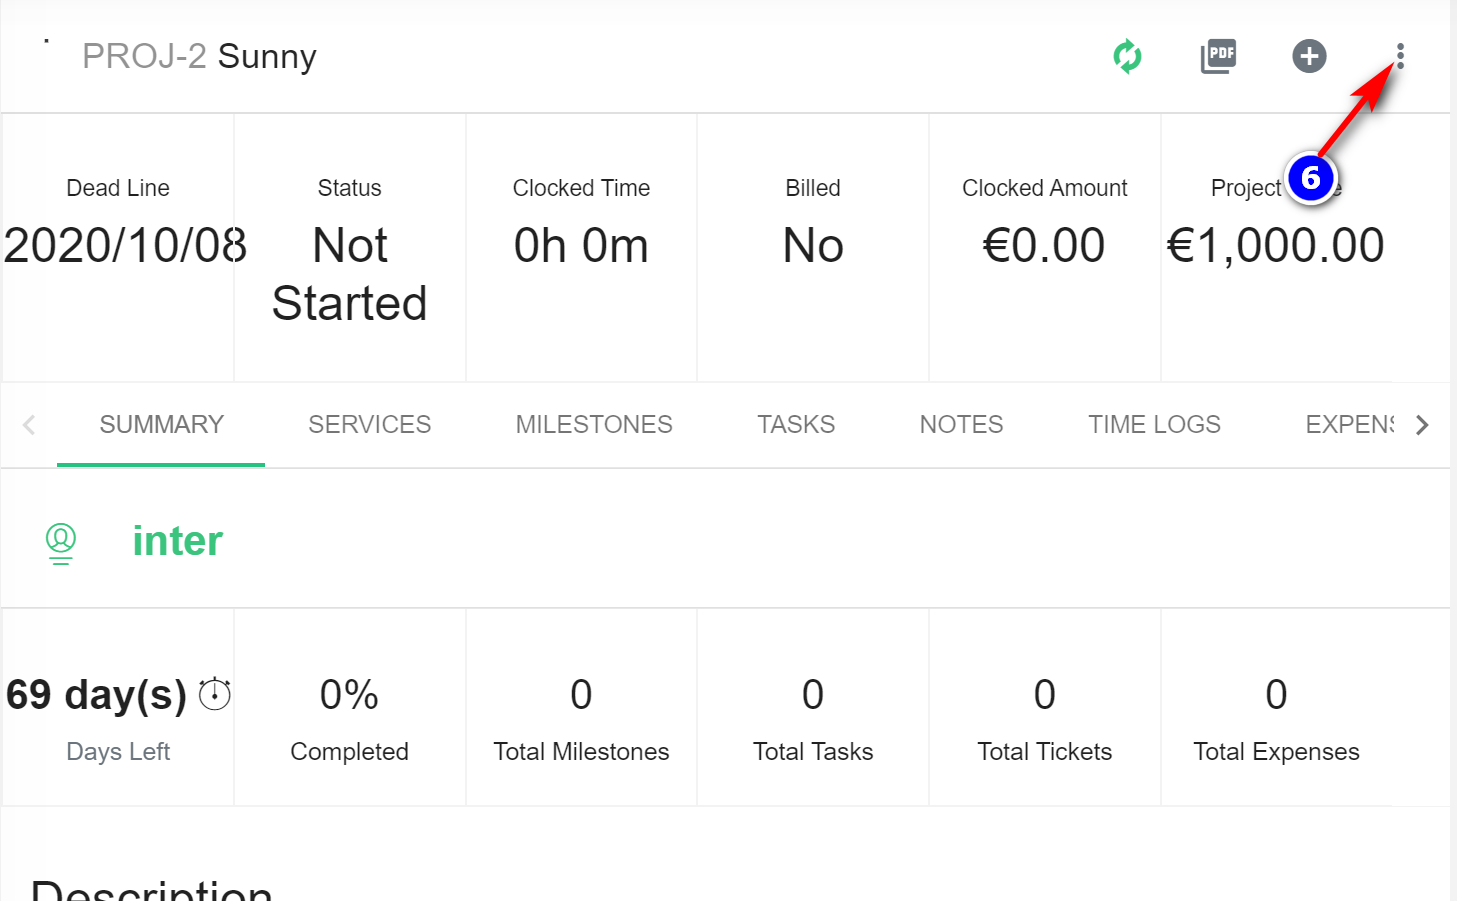
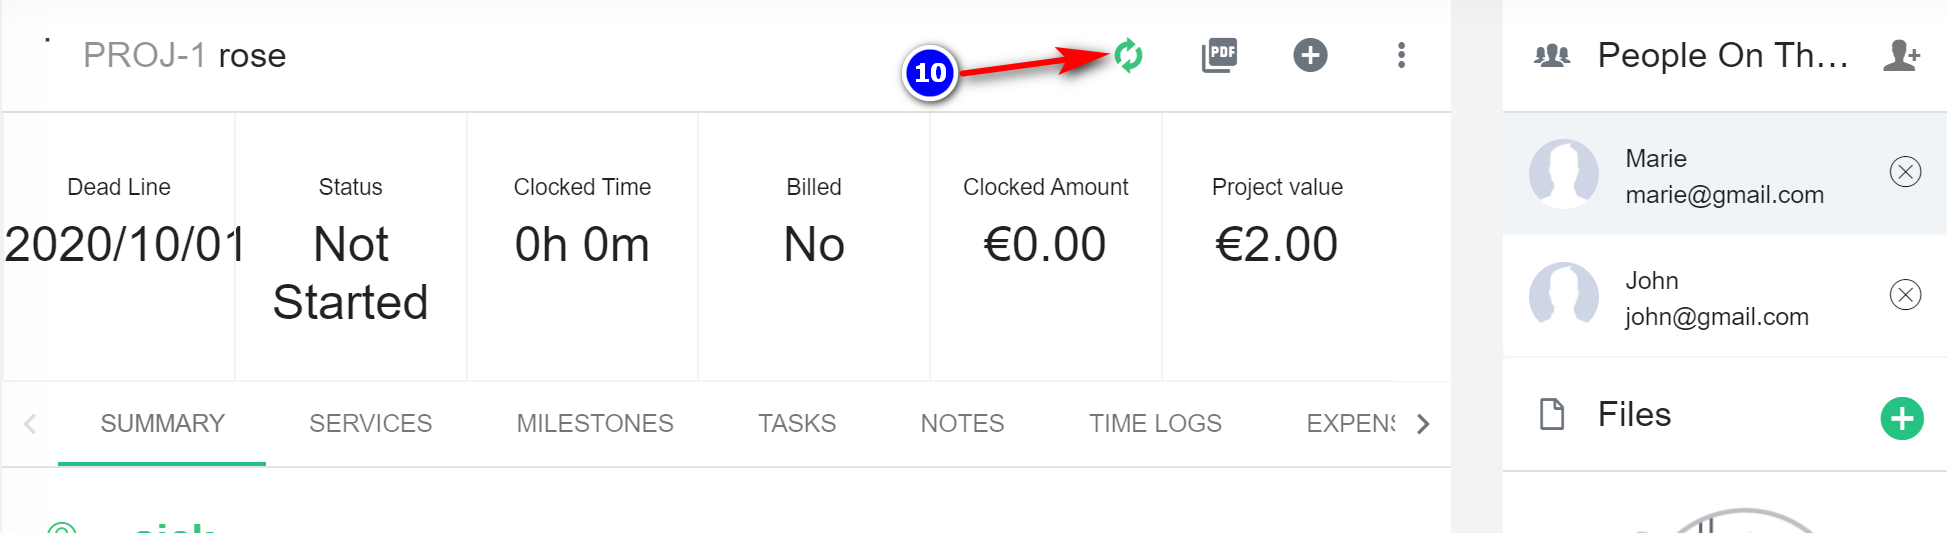
2. To update the project, click on 3 vertical dots (1) that are on the right side of the page.
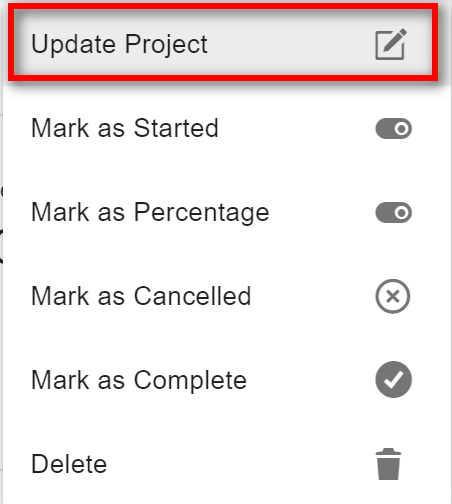
3. Once you click "Update Project", you can update the information and click on "Update".
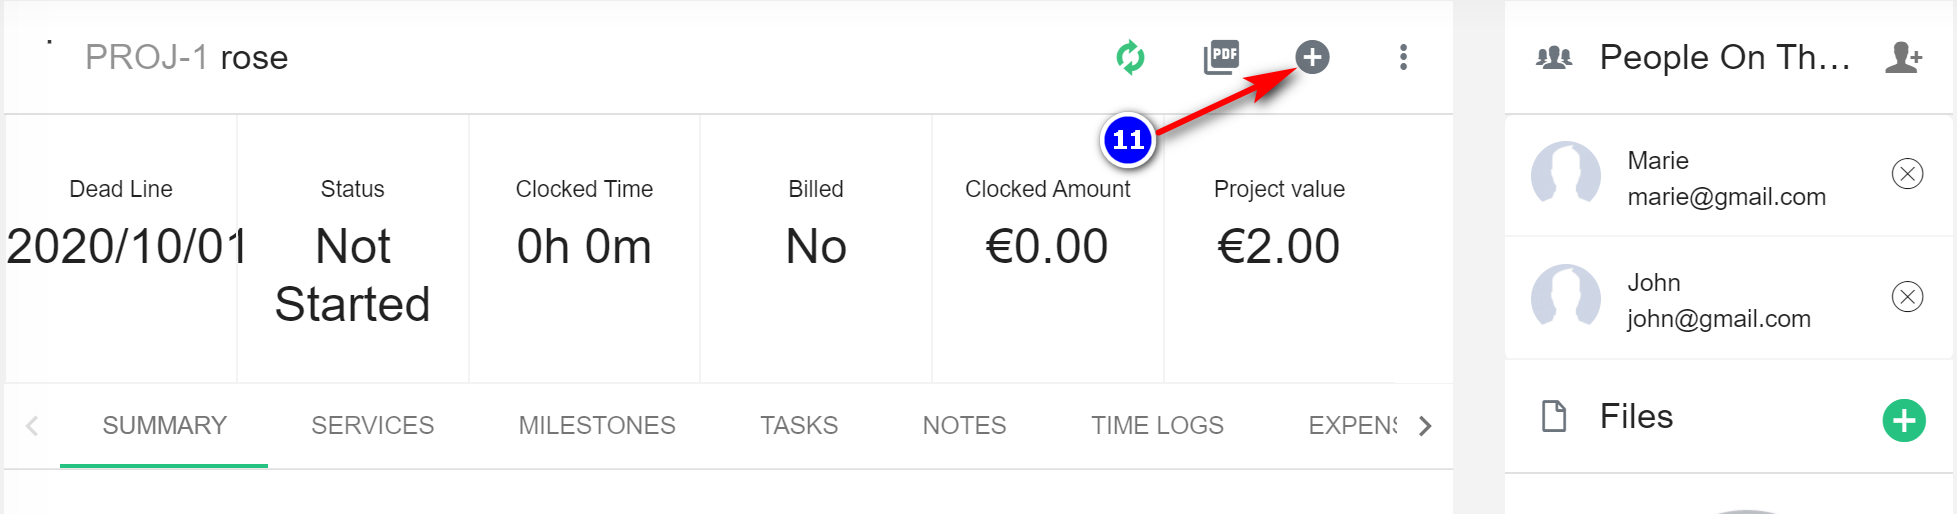
4. To add people on this project click on the "Add Staff"(8) icon. To add files to the project click on the "Add"(9) icon.
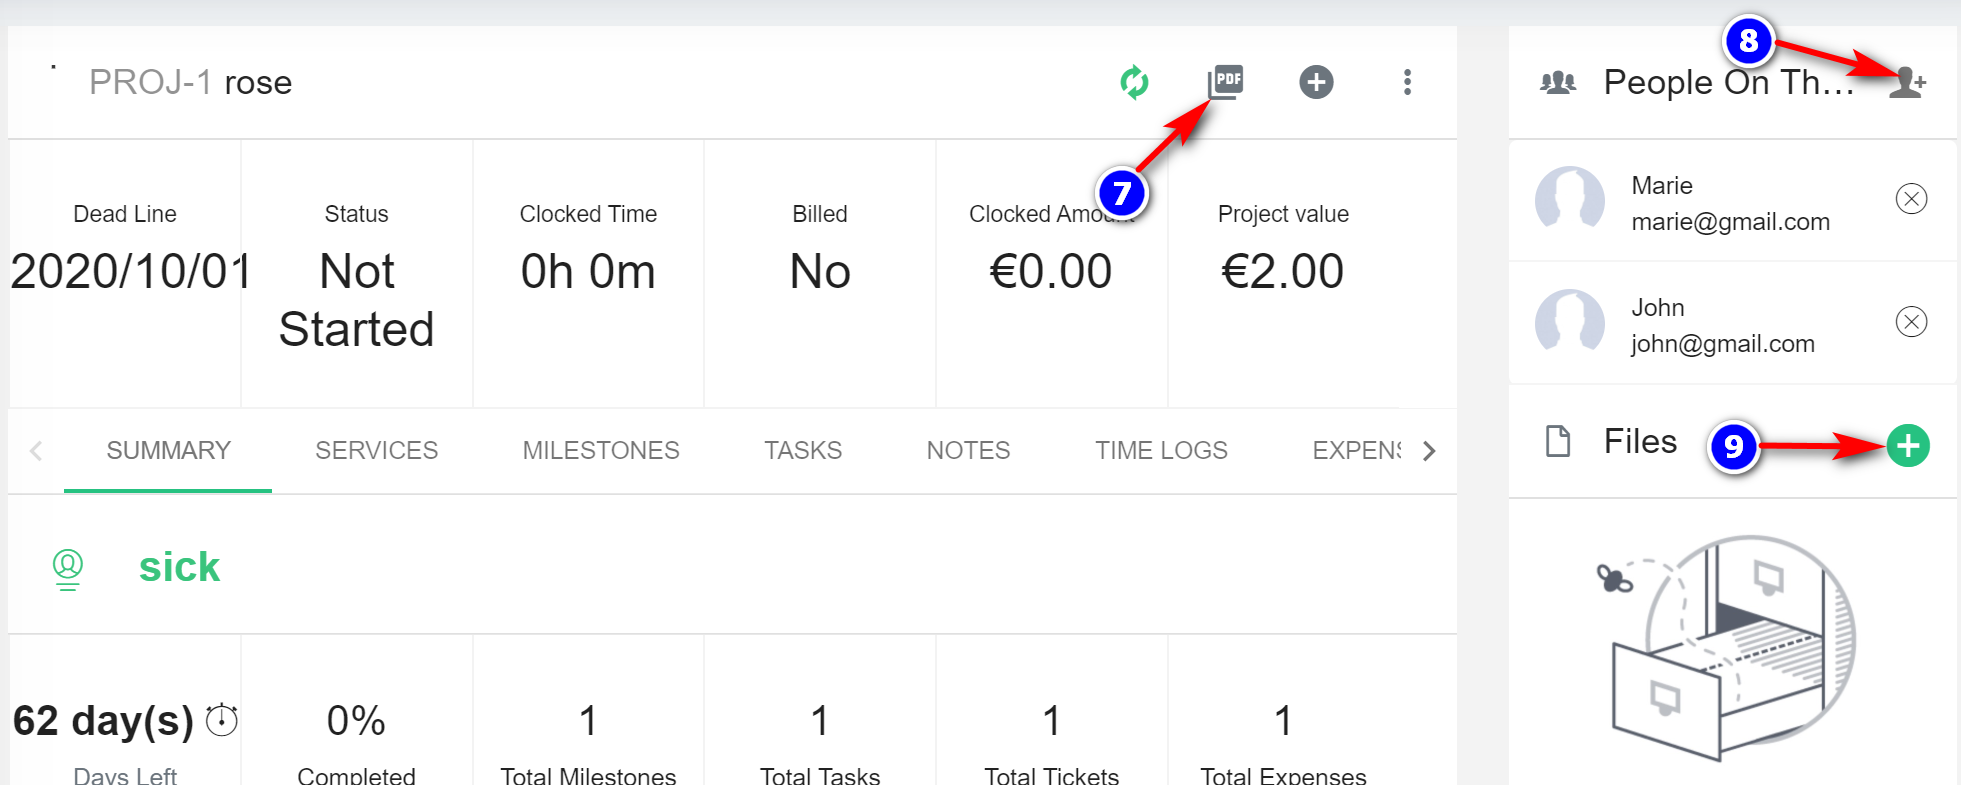
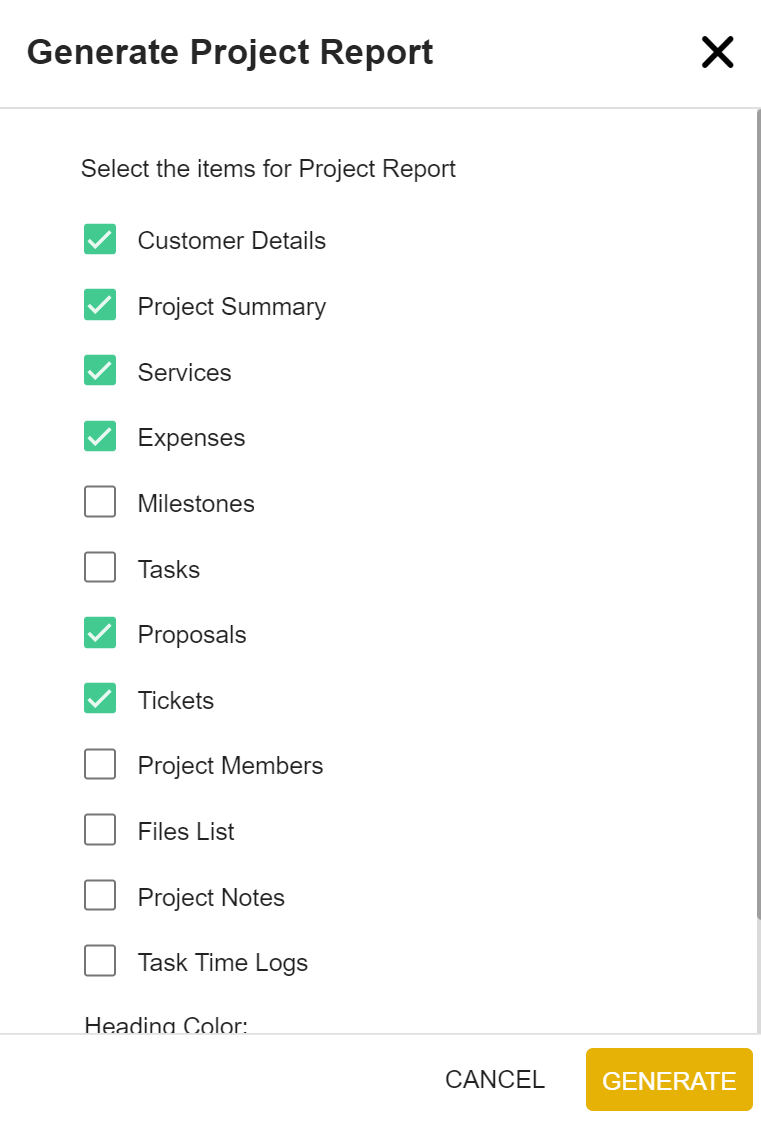
5. You can generate a project report by clicking on the "PDF"(7) icon. The list of items for the project report will be displayed. Choose the items which you need and click on "Generate".
6.1.3 Convert project to invoice
1. You can "Convert a project"(10) into an Invoice as follows:
2. You can choose between "Service invoice" or "Project invoice".
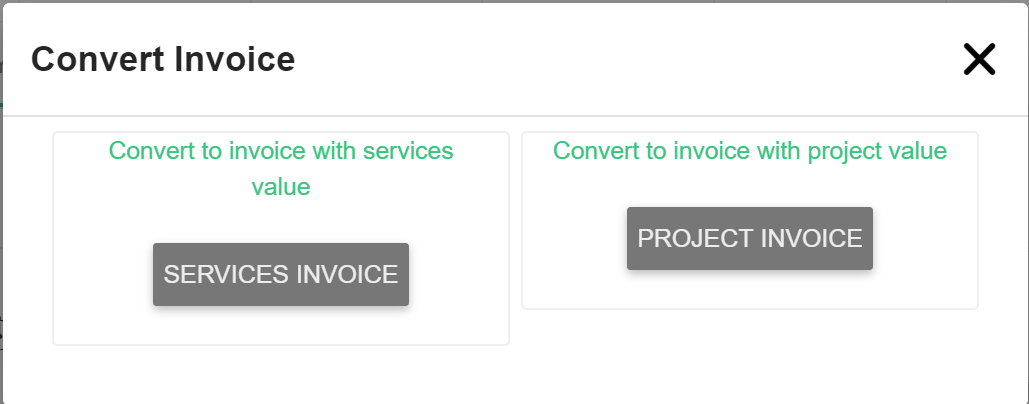
3. Once you hit "Convert invoice", the system will take you to the page where you can input all the details. Simply follow the "Create Invoice" steps to create an Invoice.
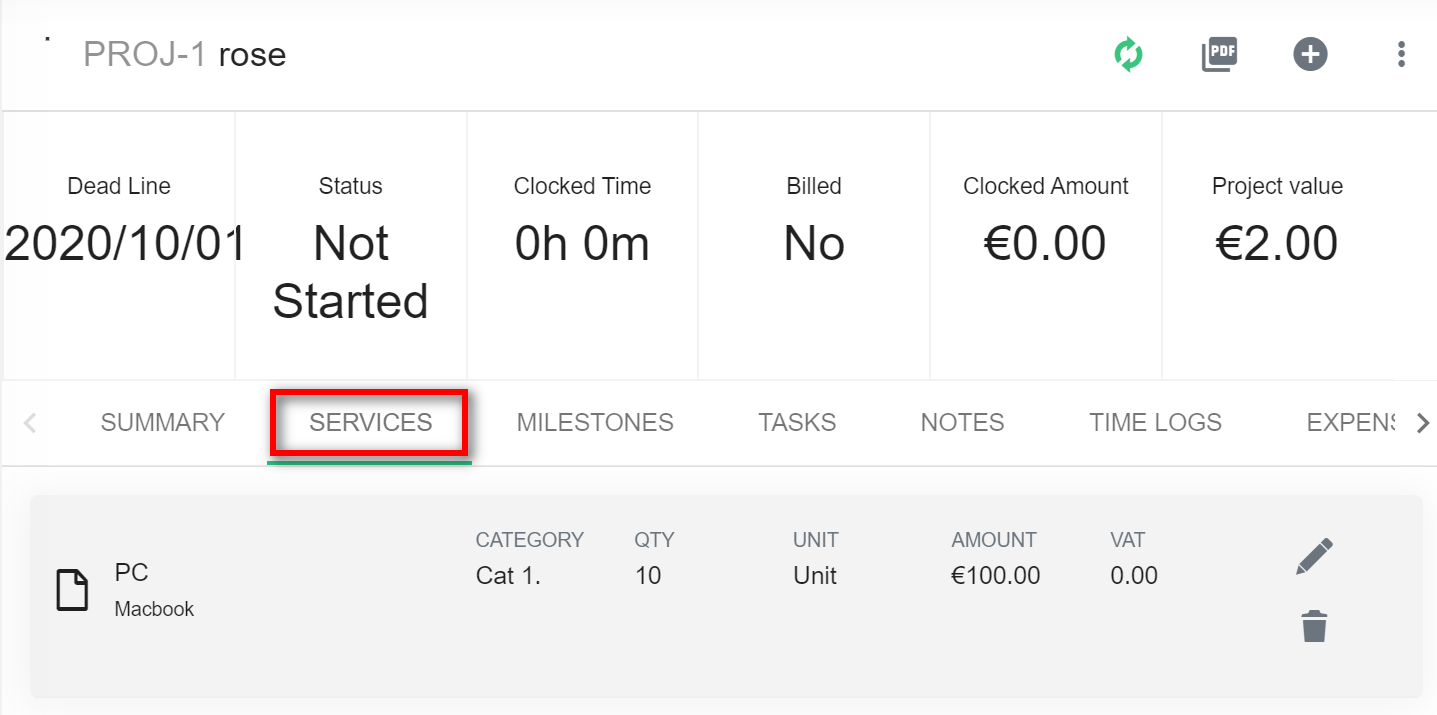
6.1.4 Add Service
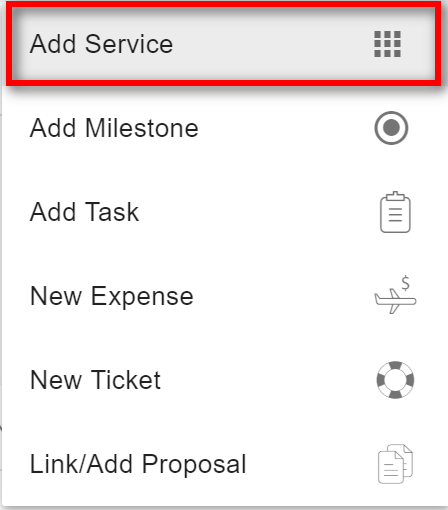
1. You can add a service to your project as follows:
2. Enter the details and click on "Add".
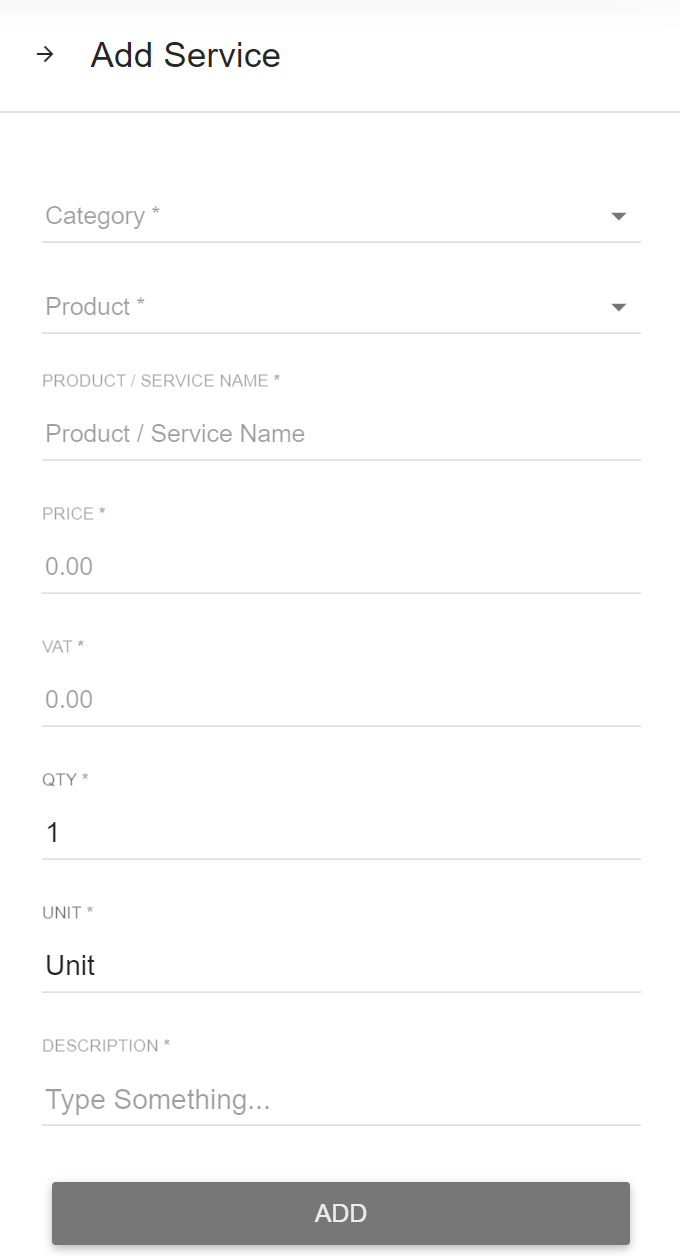
3. You can check all details of the service in the "Service" subsection.
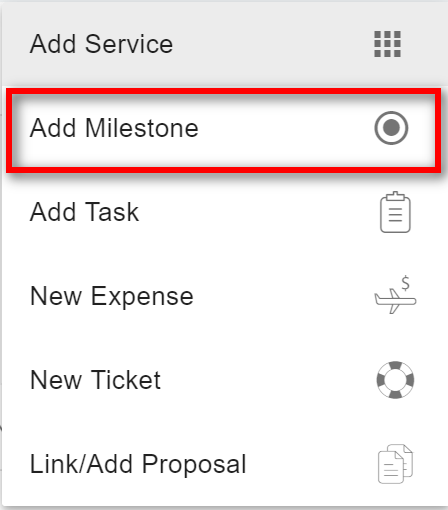
6.1.5 Add Milestone
- You can add a milestone to your project as follows:
2. After you click on Add Milestone, the system will ask you to enter all the details. Once the details are entered, click "Add".
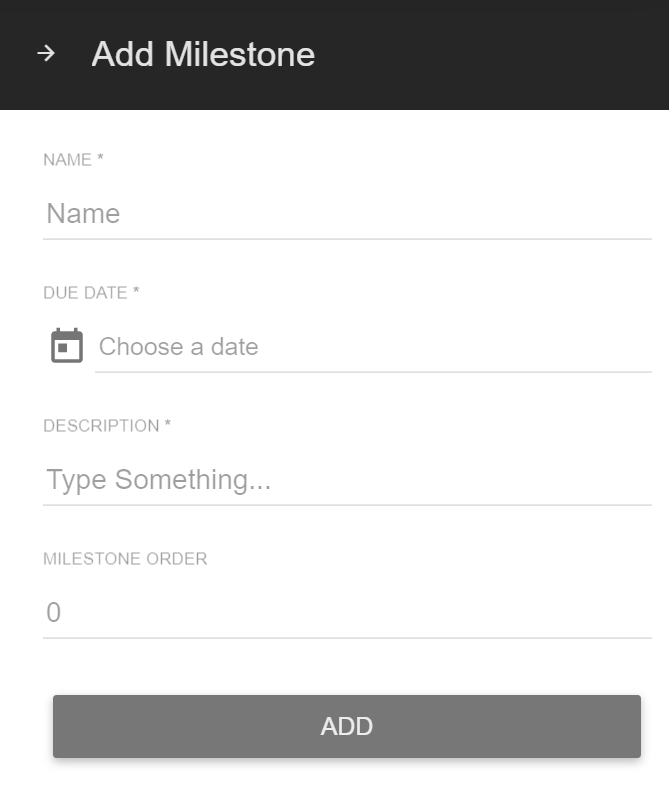
3. You will be able to view it under the "Milestones" section under Project details.

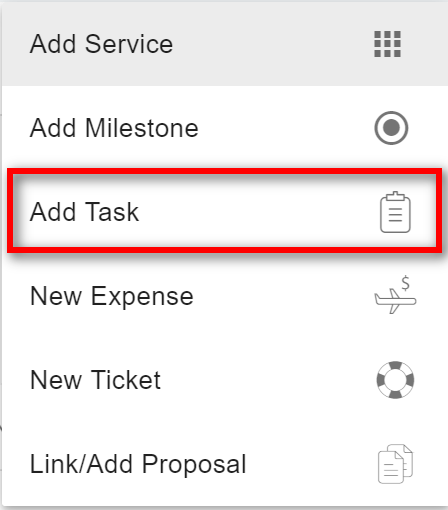
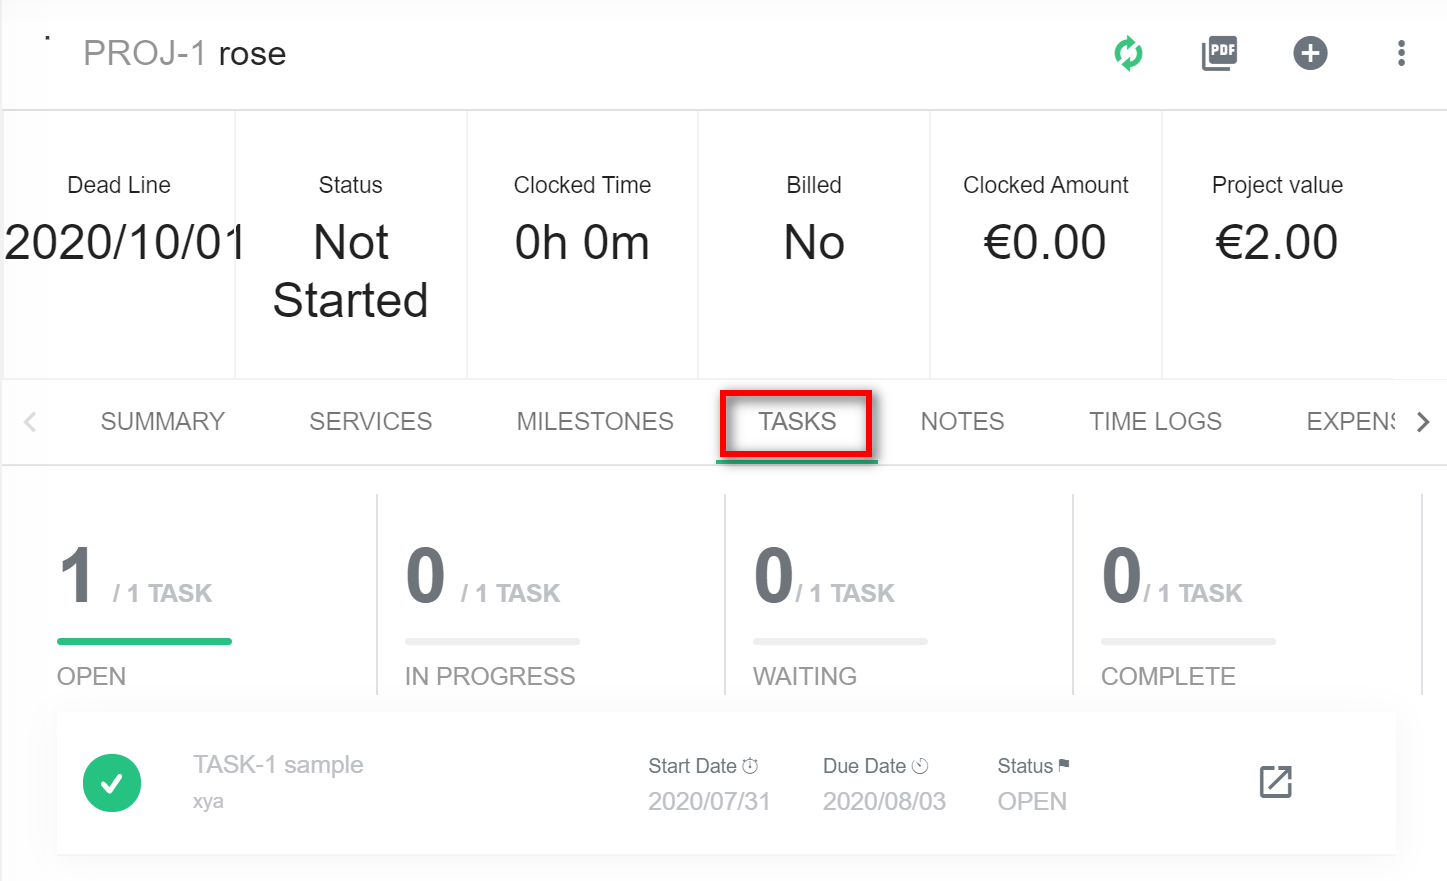
6.1.6 Add Task
1. You can add a task by clicking the "Add task" option.
2. Enter the details and click on "Add".
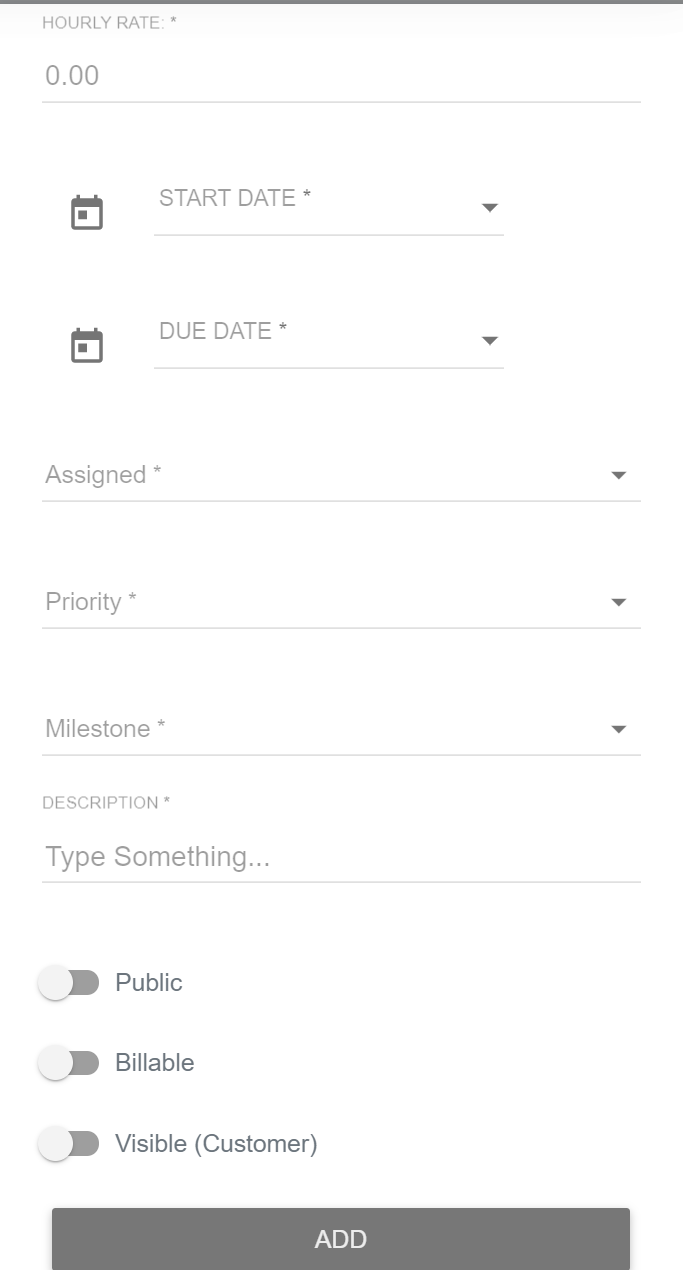
- You can create a task as public or private, billable or non-billable, visible or not using the toggle bars above the "Add" button as shown in the following screenshot.
3. You can check the details of the task in the mentioned milestone and/or "Tasks" subsection in the project details page
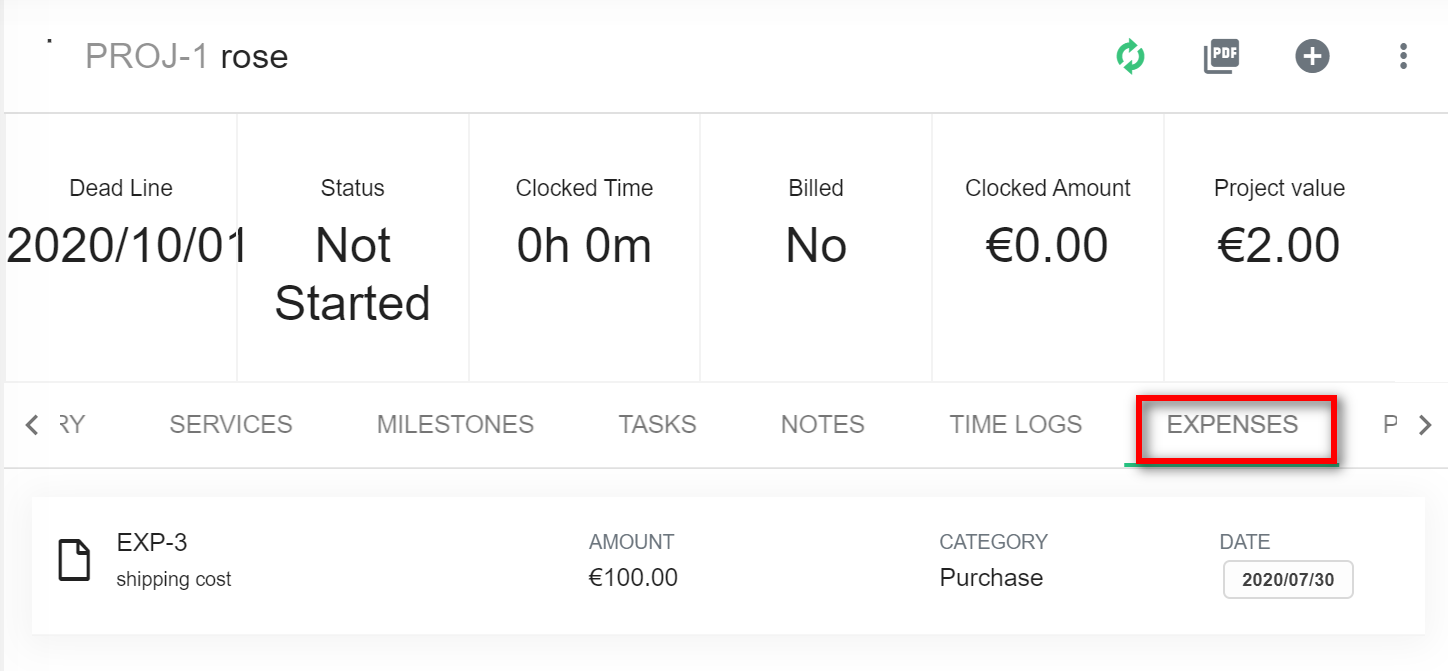
6.1.7 Add Expenses
1. You can also add a "New Expense" to your project to track any new expense that comes up in the project while fulfilling your customer’s needs.

2. Once you hit "New Expense", you can fill in all the details and click on "Add".
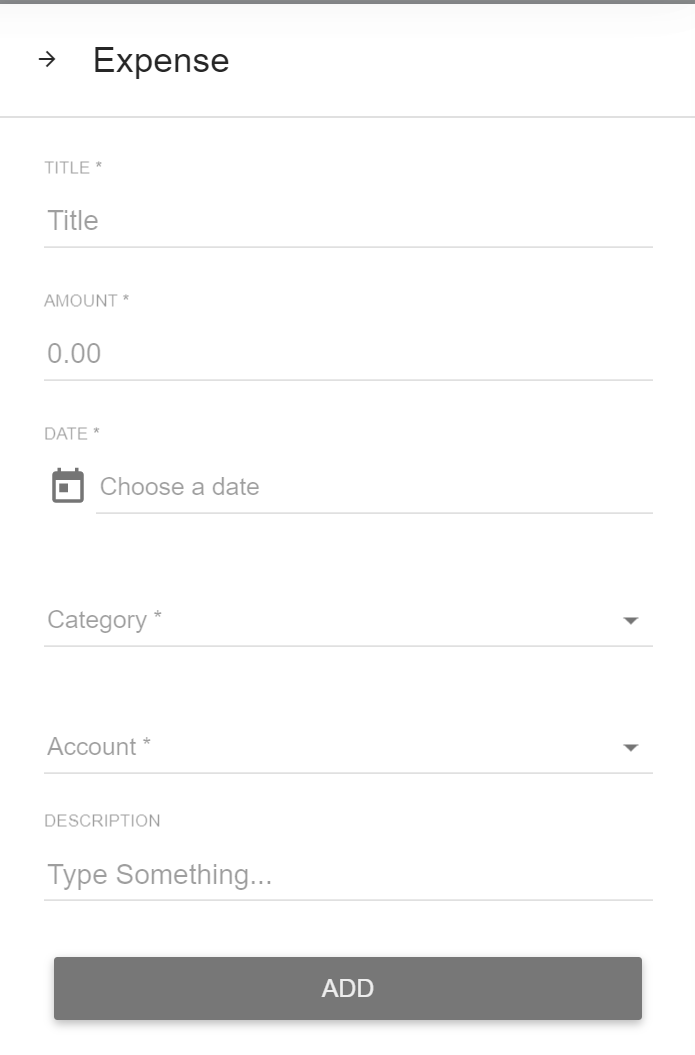
3. You can check all details of the expenses in the "Expenses" subsection.
6.1.8 Add New Ticket
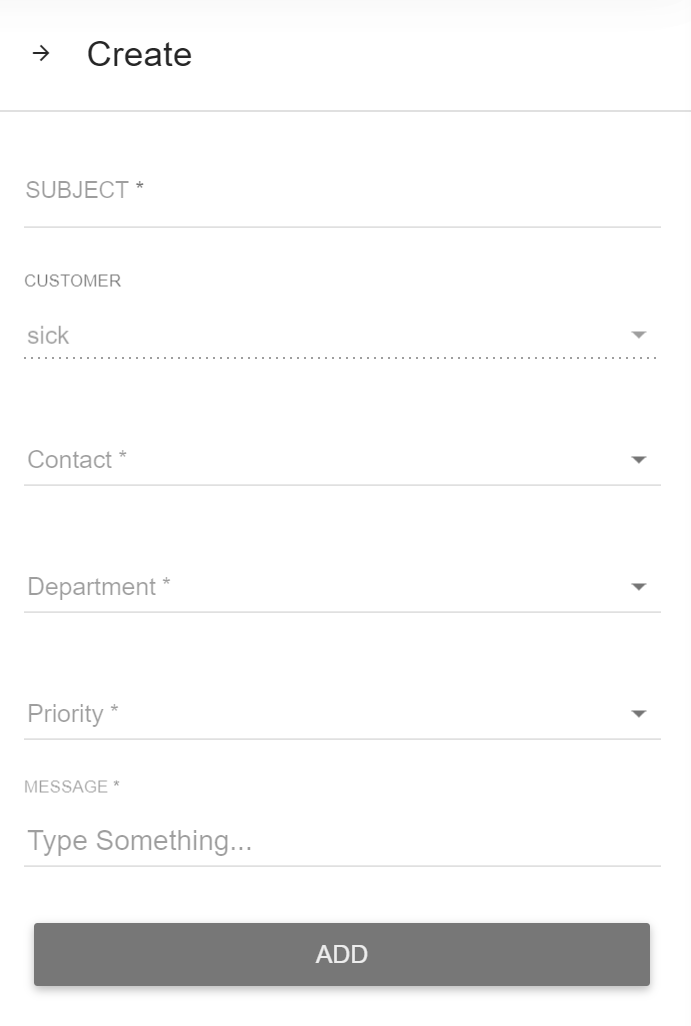
1. You can add a ticket by clicking the "Add ticket" option.
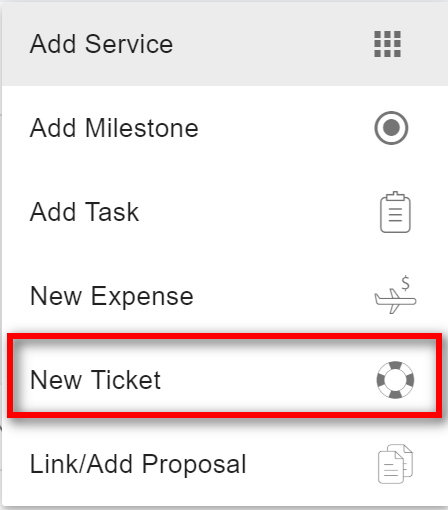
2. Enter the details and click on "Add".
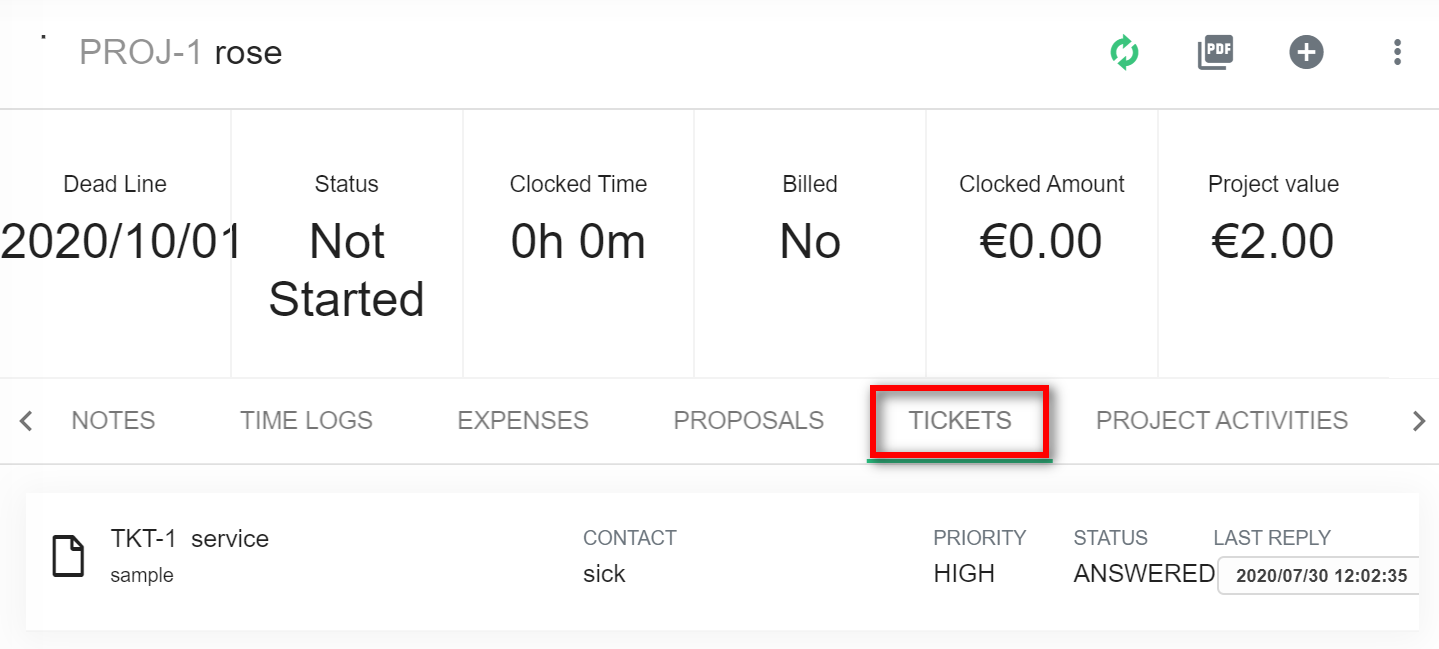
3. You can check all details of the ticket in the "Tickets" subsection.
6.1.9 Add Link/Add Proposal
1. You can add/link the proposal by clicking the "Link/Add proposal" option.
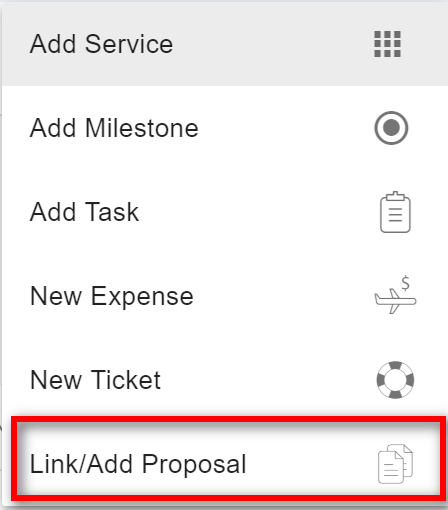
2. To add the existing proposal choose the proposal and click on "Link". To create the new proposal enable the "New Proposal" button.
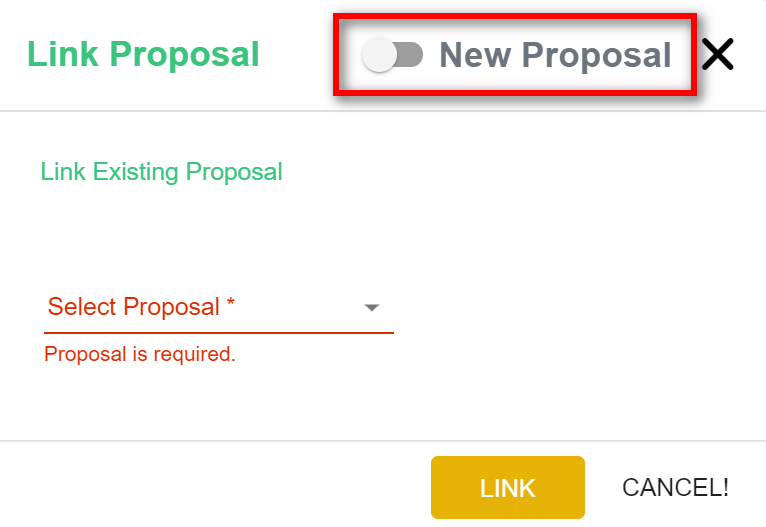
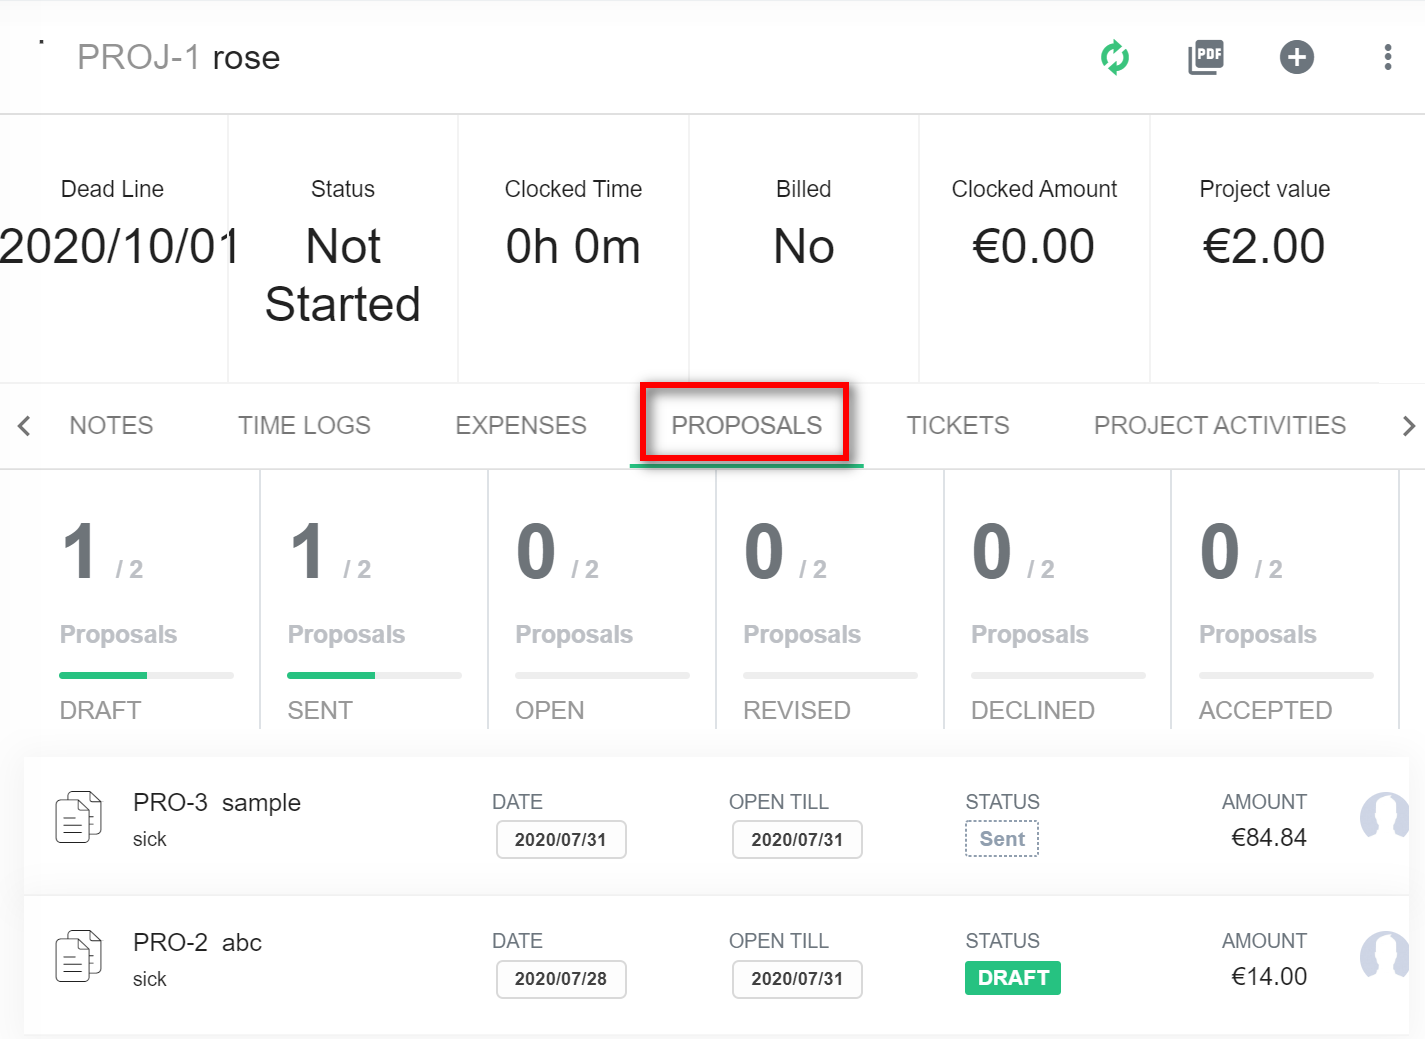
3. You can check all details of the proposals in the "Proposals" subsection.
6.1.10 Project Page Other Details
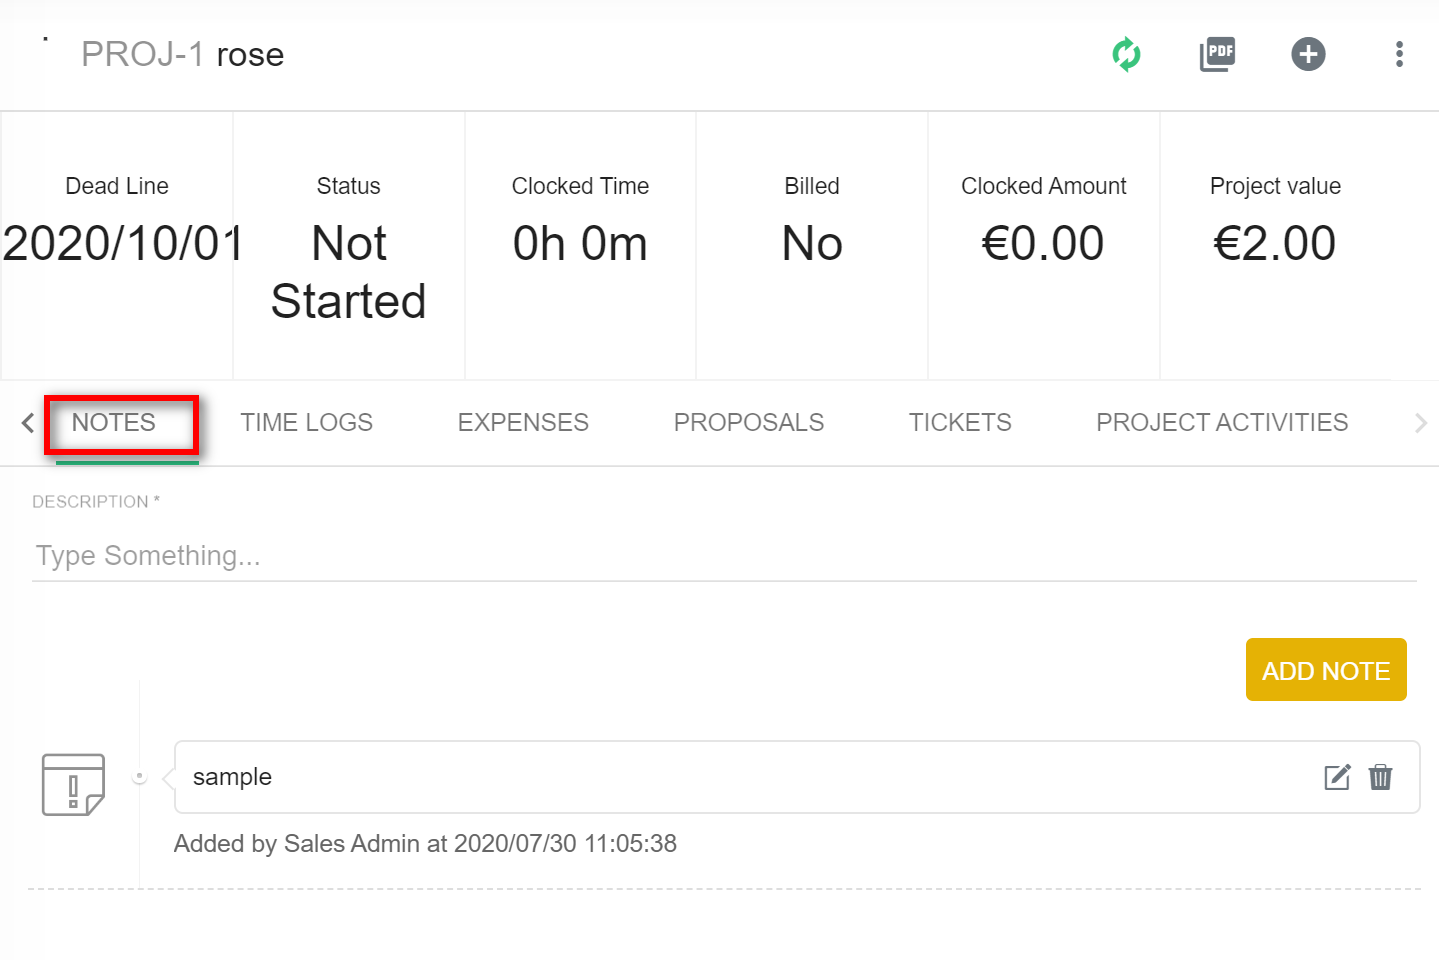
1. You can add the note in the "Notes" subsection.
2. You can check the time logs in the "Time Logs" subsection.

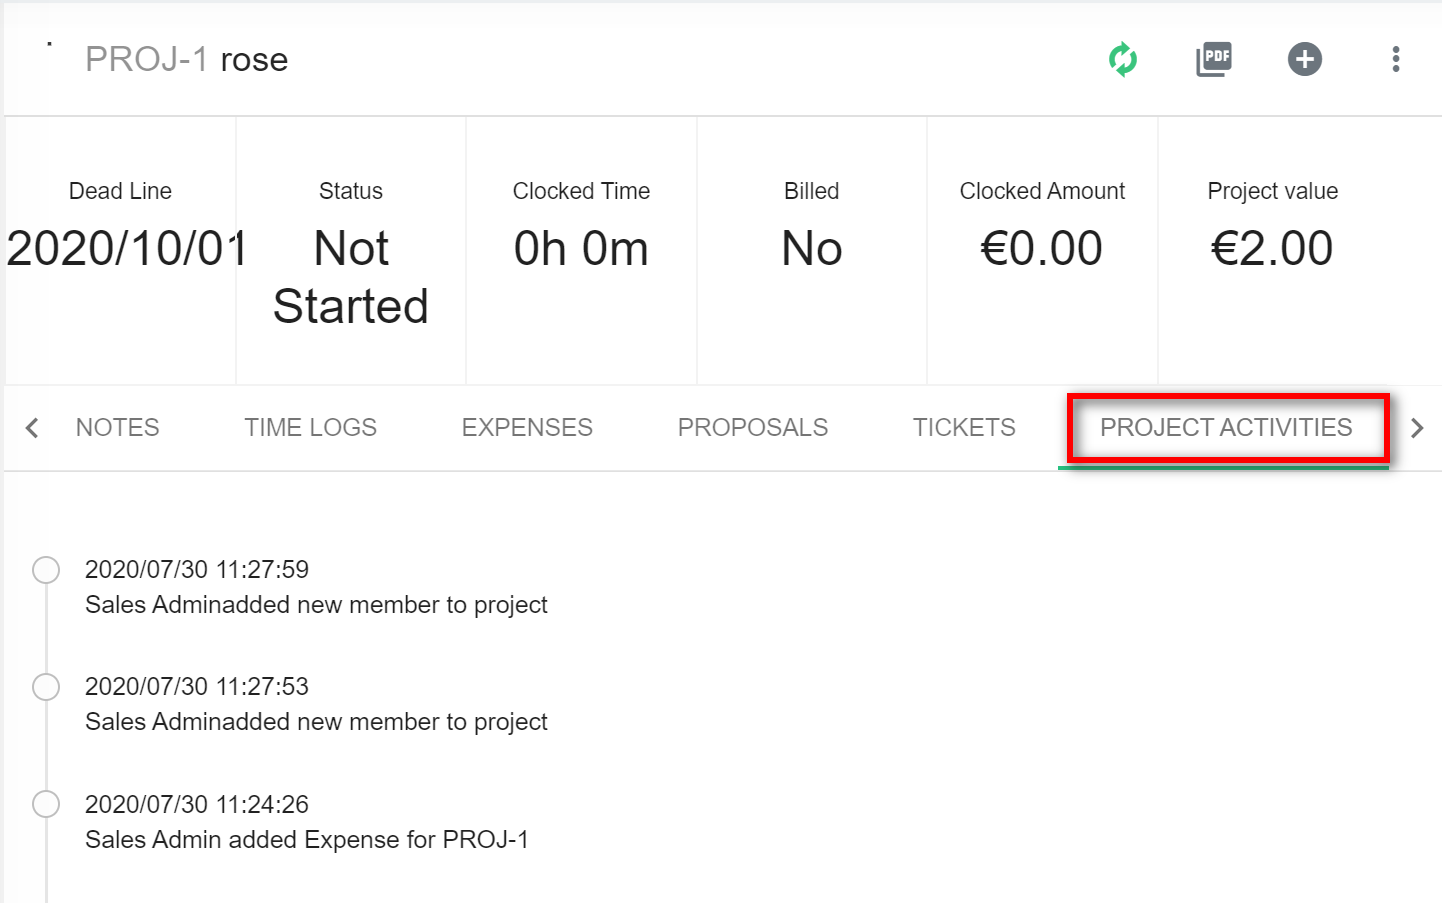
3. You can see all the project activities in the "Project Activities" subsection.
6.1.11 Mark Project
1. You can "Mark" a project as Not Started, Started, Percentage, Cancelled, Complete as shown below:
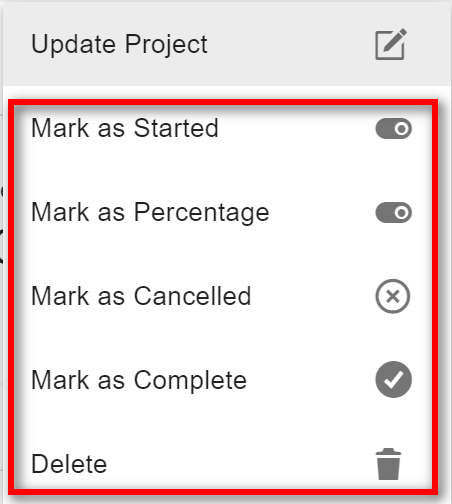
2. Finally, you can delete a project using the delete option above.
6.1.12 Project Status
1. The status of the pinned projects you can see on the right side.
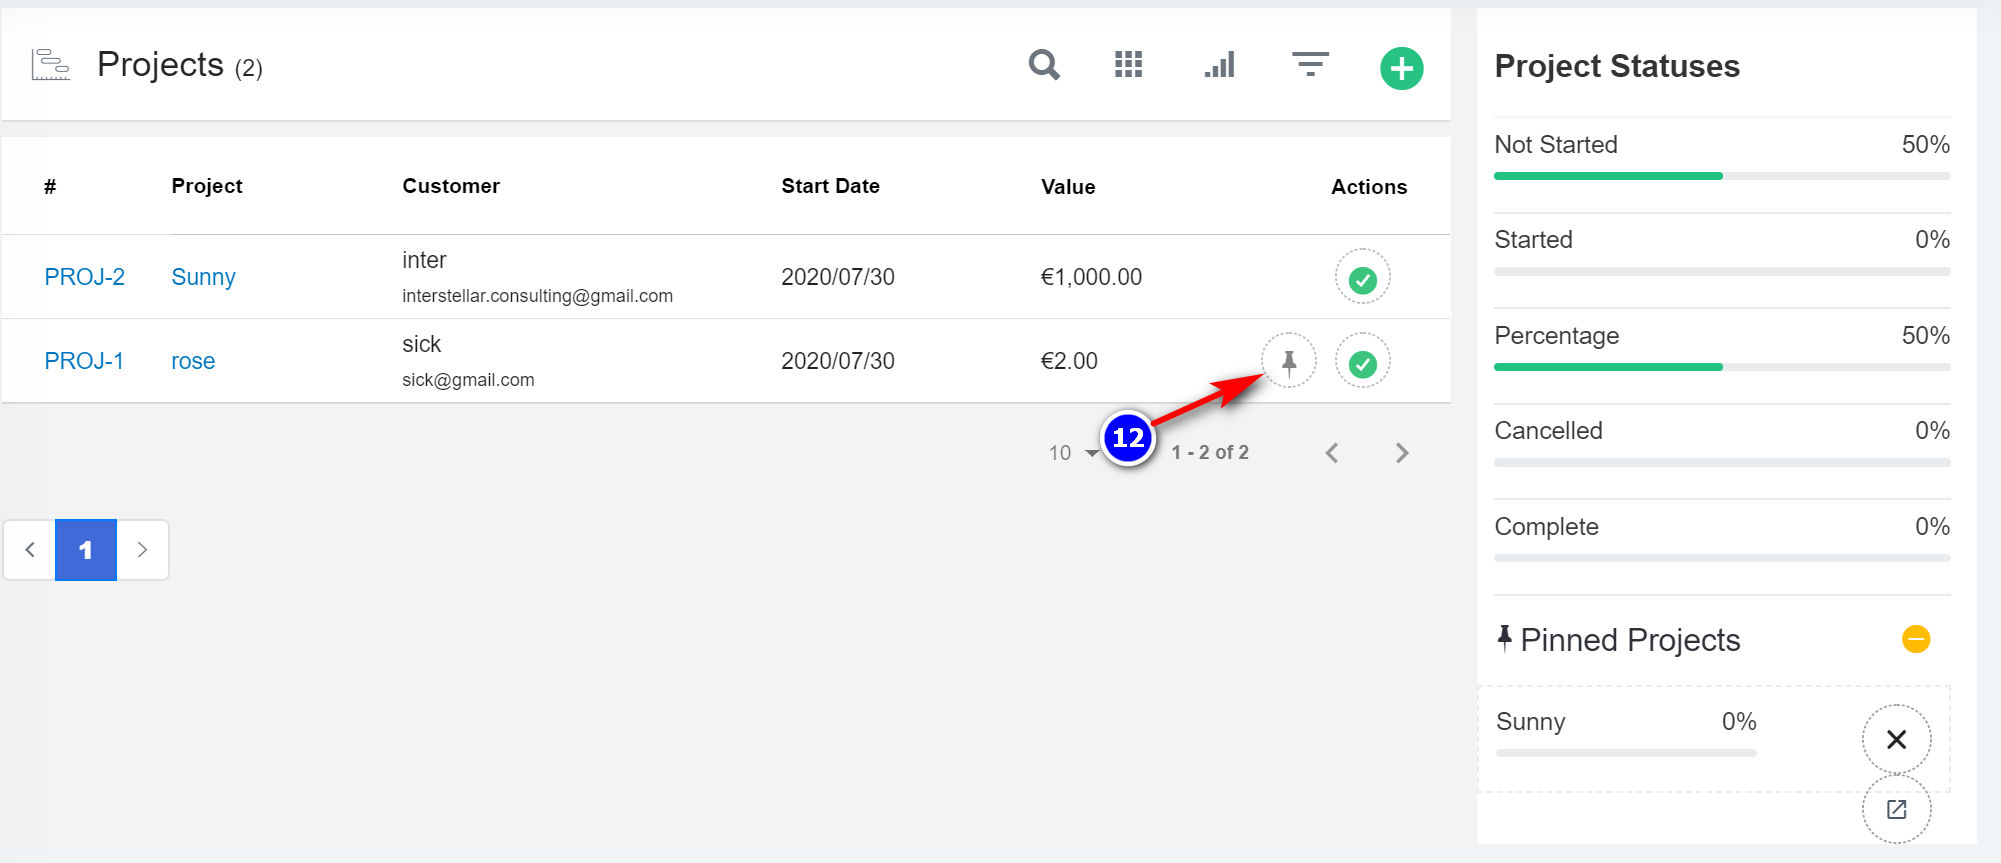
2. You can find that the percentage of the completed bar is updated.
3. To pin the project click on the "Pin Project"(11) icon.
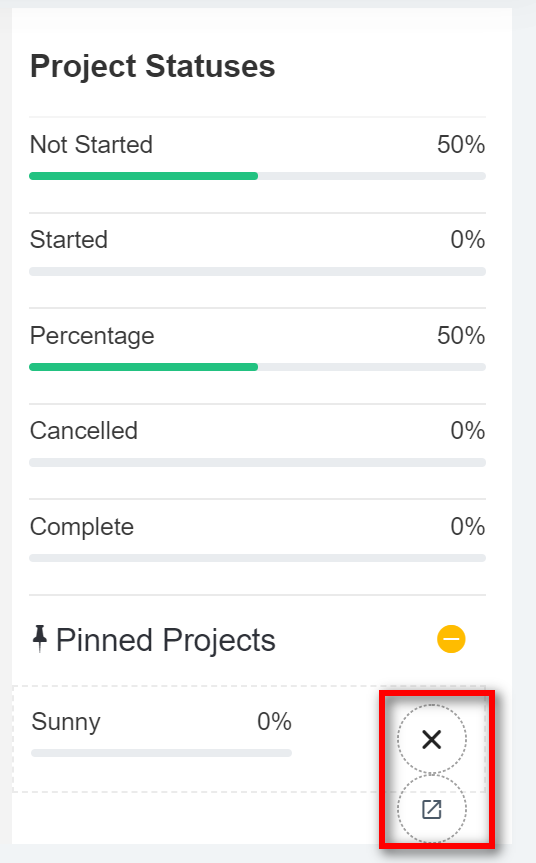
4. You can go directly to the project or delete the project from the list of pinned projects by clicking on the relevant icons.