4.4.1 Lead Page Options:
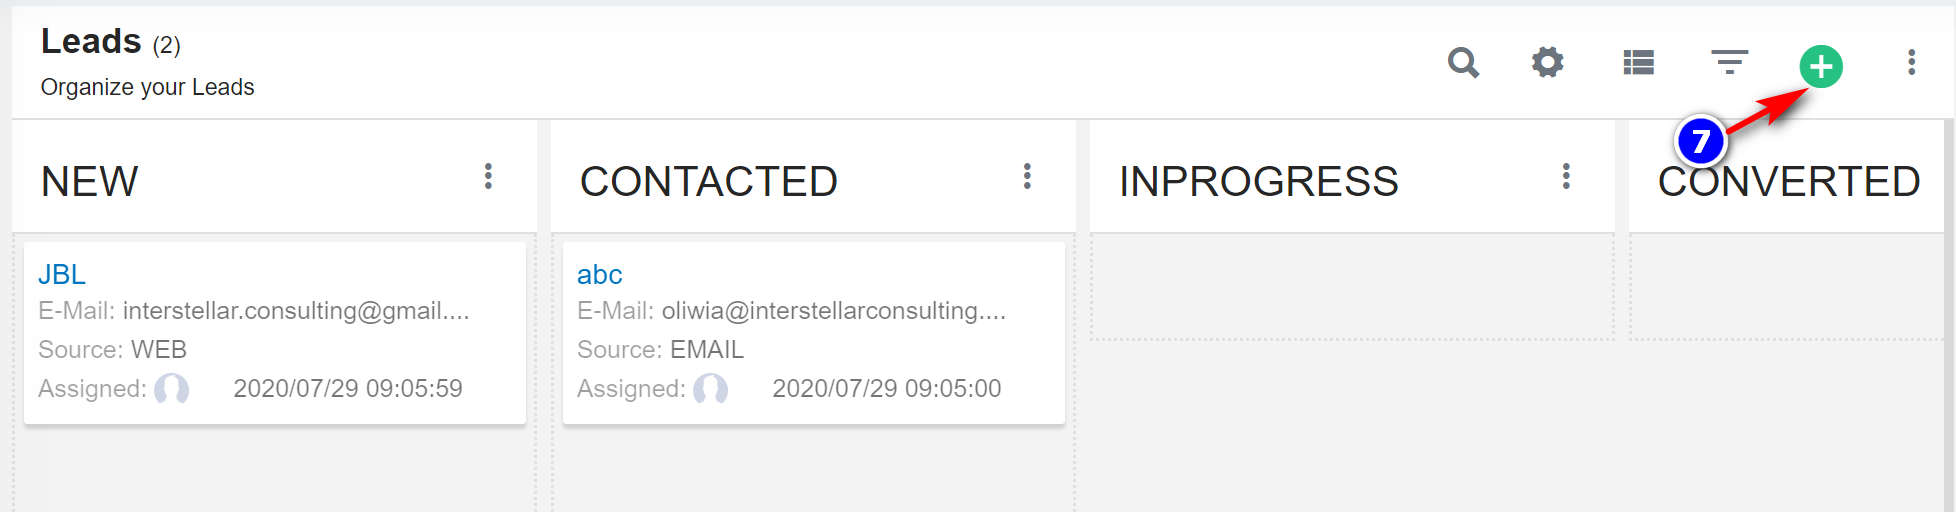
1. Lead can be found under Sales in the main menu.
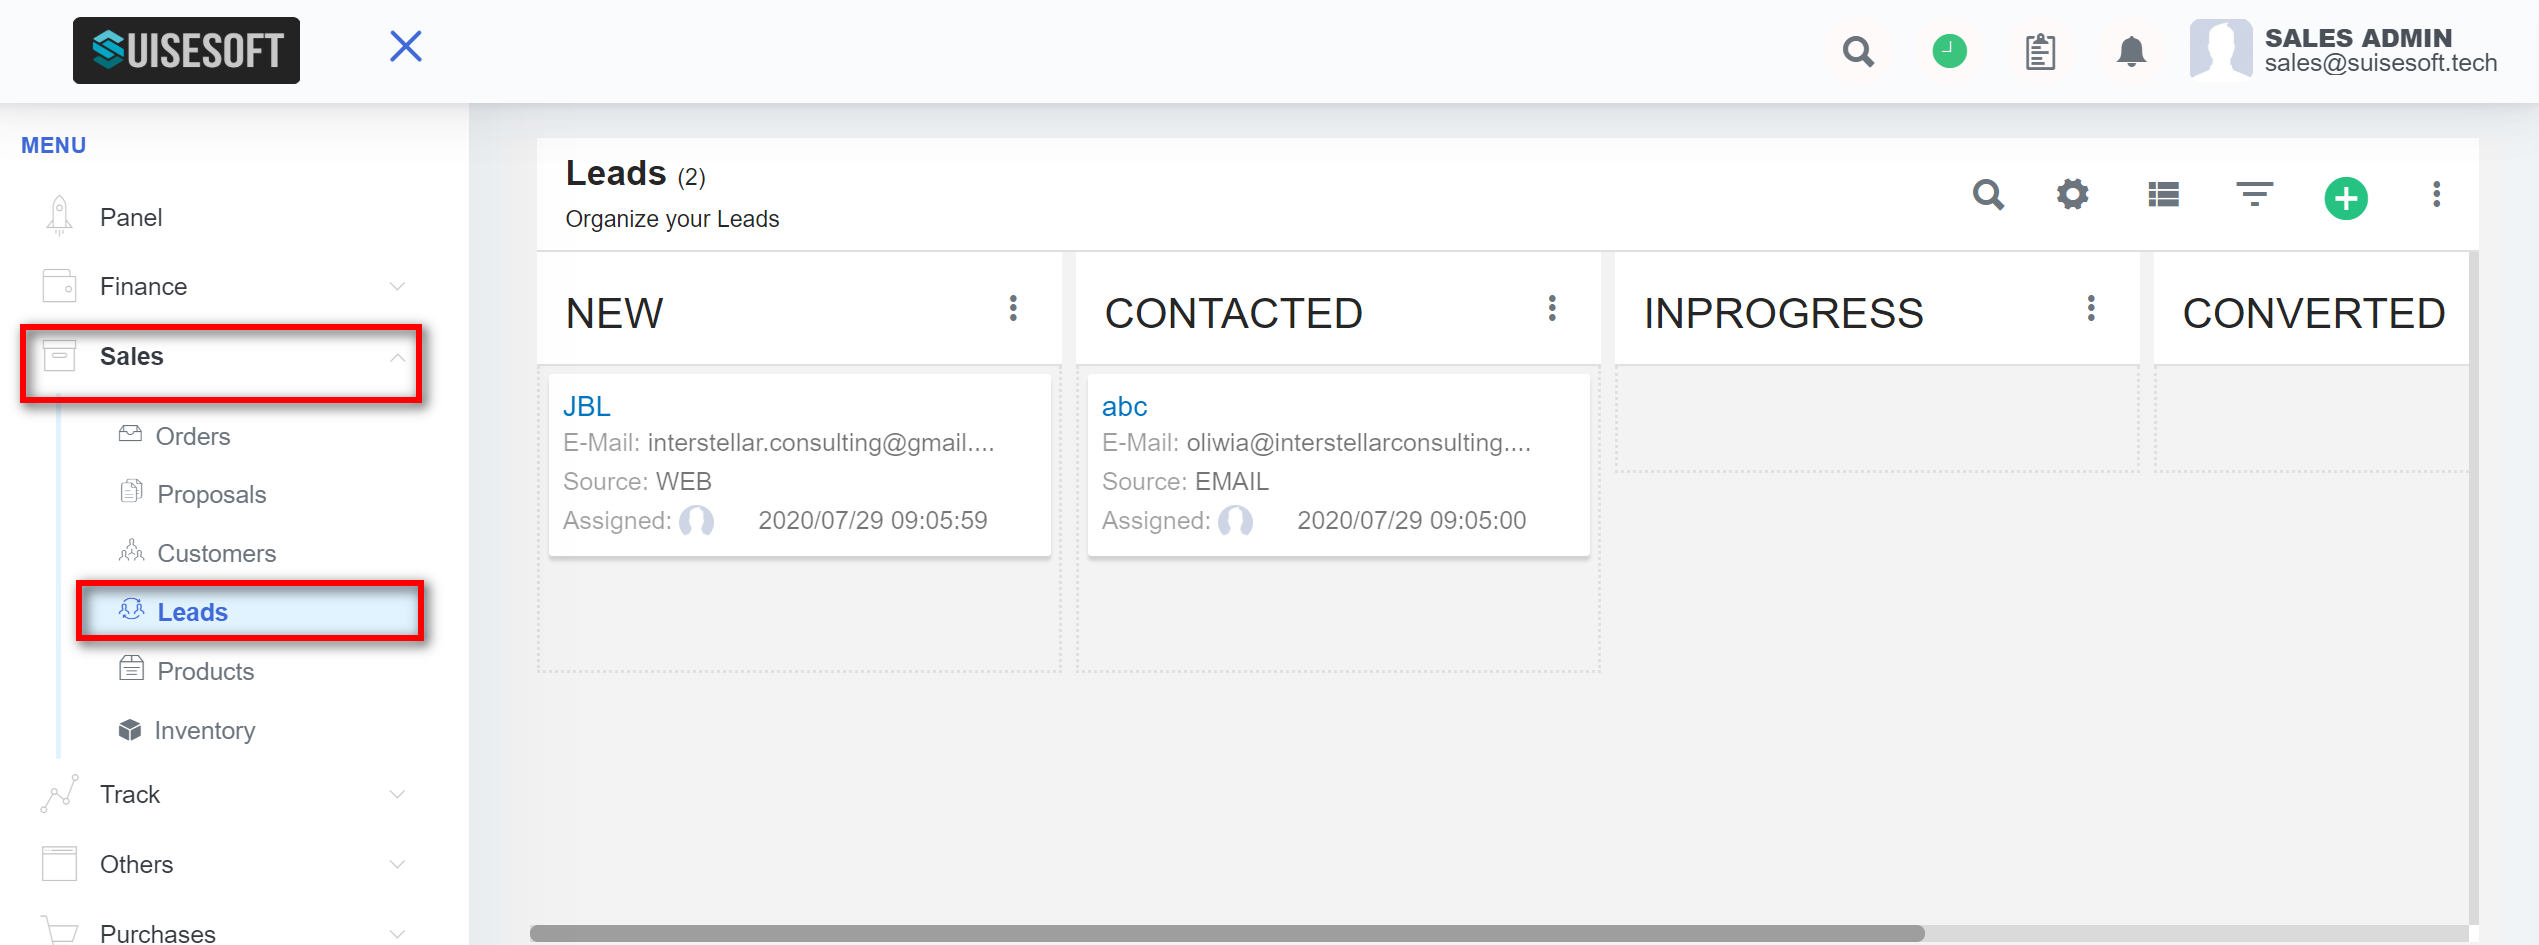
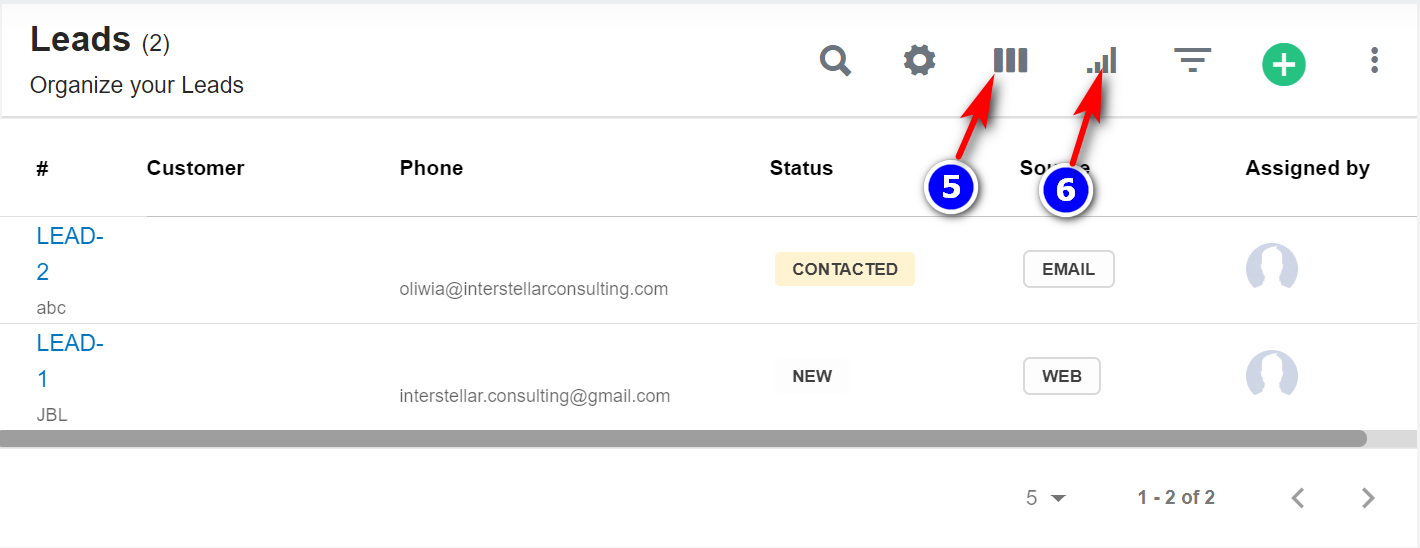
2. All existing leads and their details are listed here. You can access other options using the below options for the leads’ page.
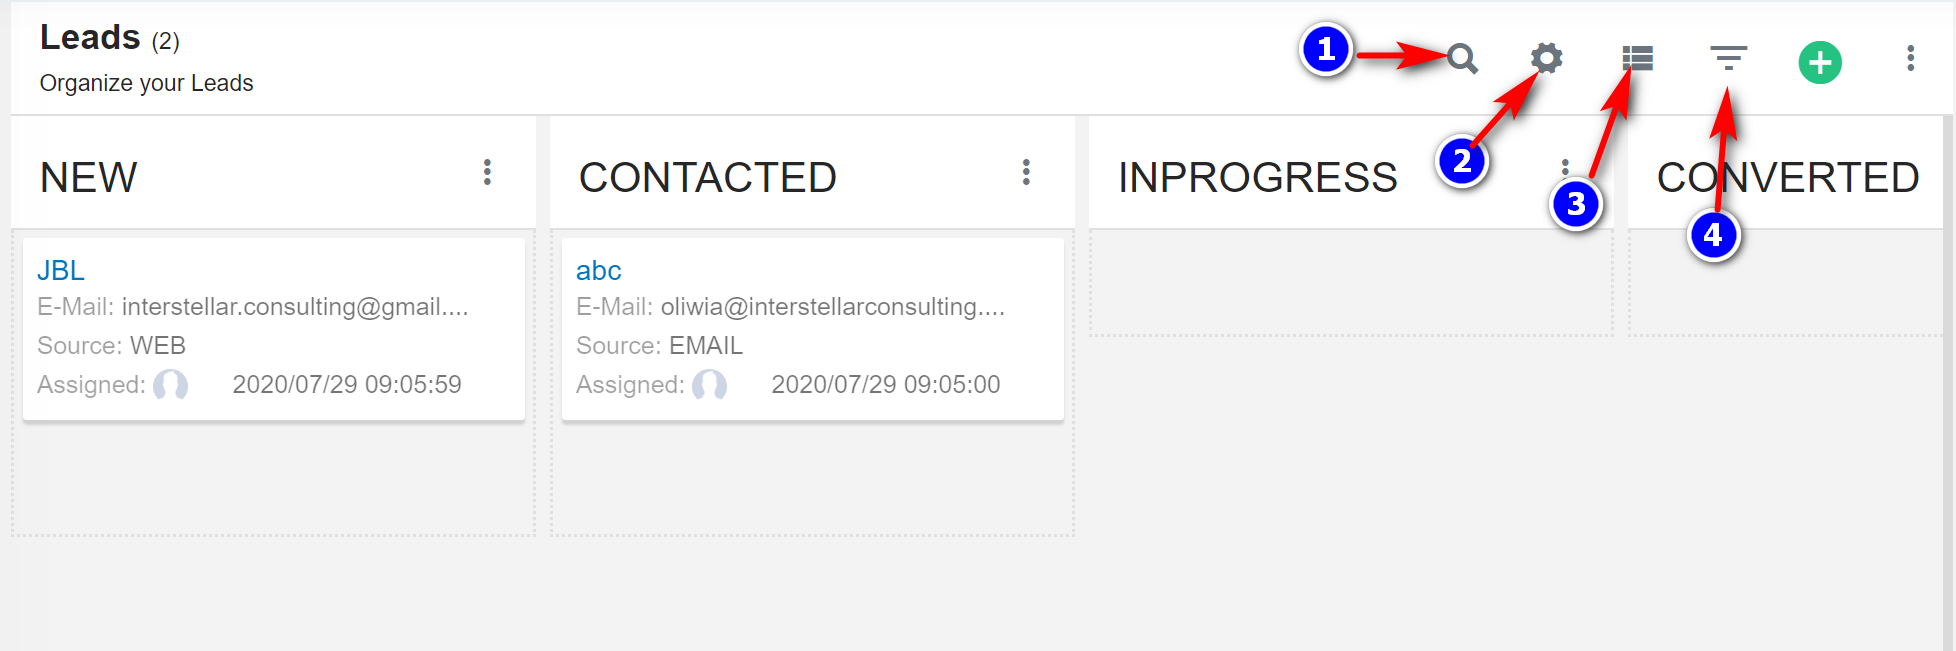
3. To search the lead click on the "Search"(1) icon.
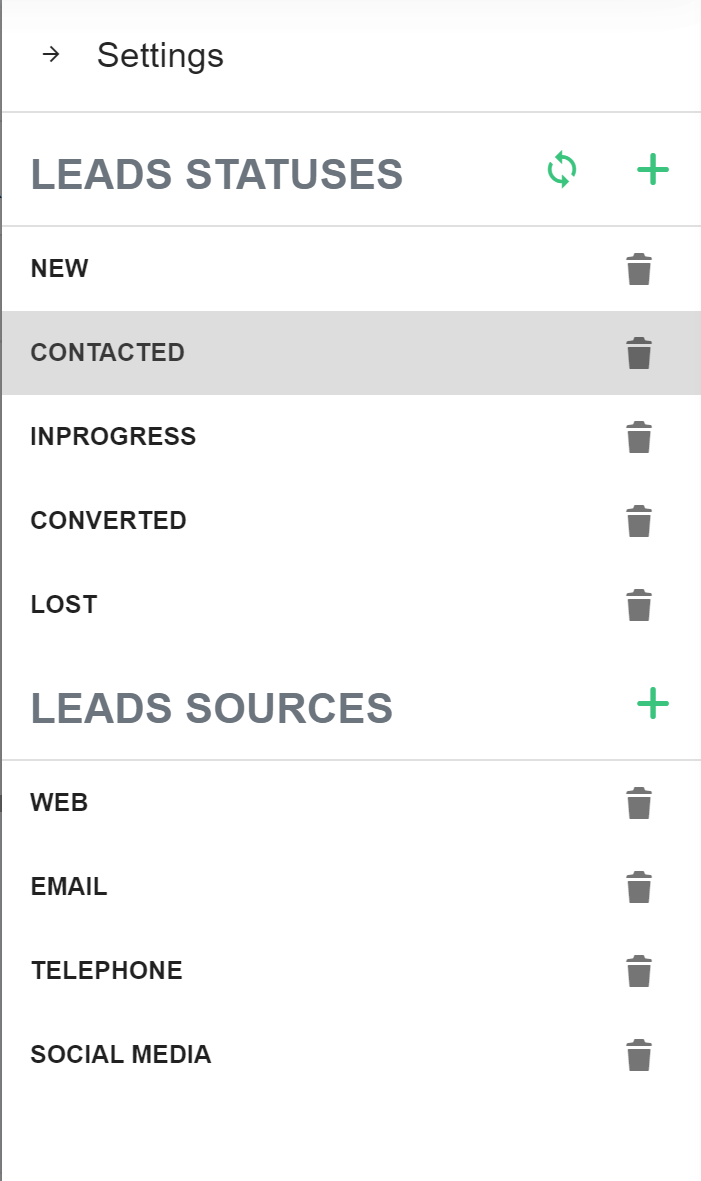
4. To create, delete, convert the new lead's status or lead´s source click on the "Settings"(2) icon.
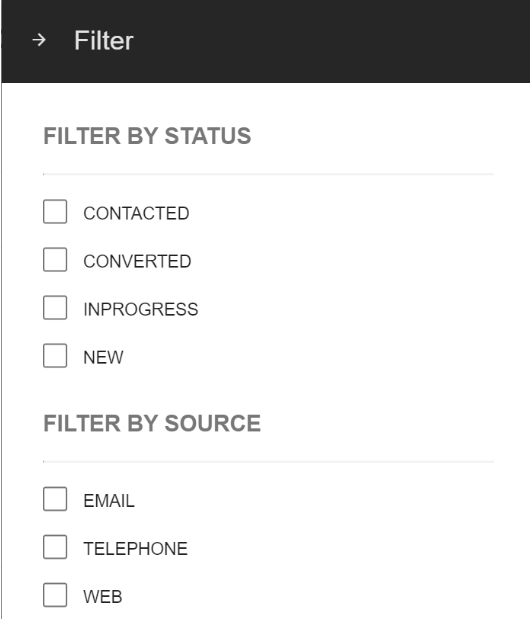
5. To filter the leads by status or source click on the "Filter"(4) icon.
6. To change the view click on the "See list"(3) icon.
6. To go back to the kanban view click on the "Show kanban"(5) icon. In this view leads are displayed based on their status. To change the lead status name click on the "Edit Status" icon.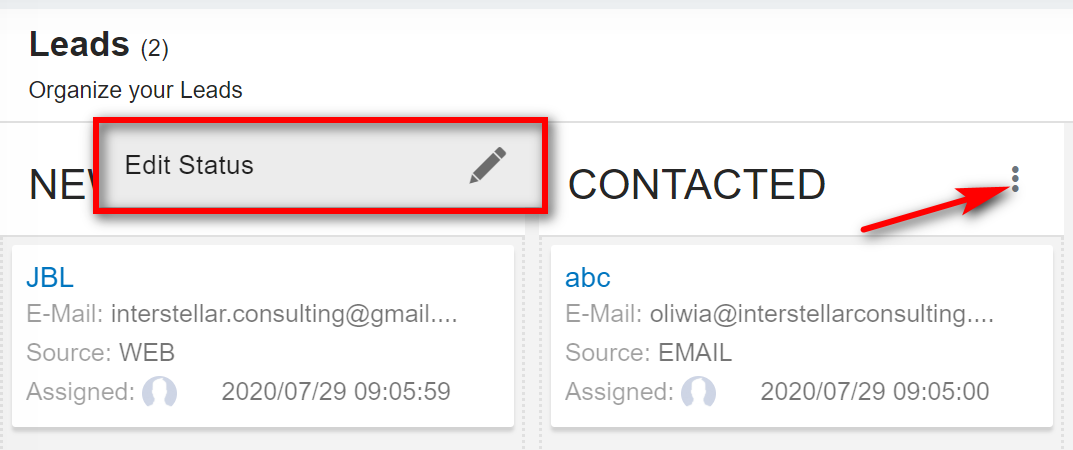
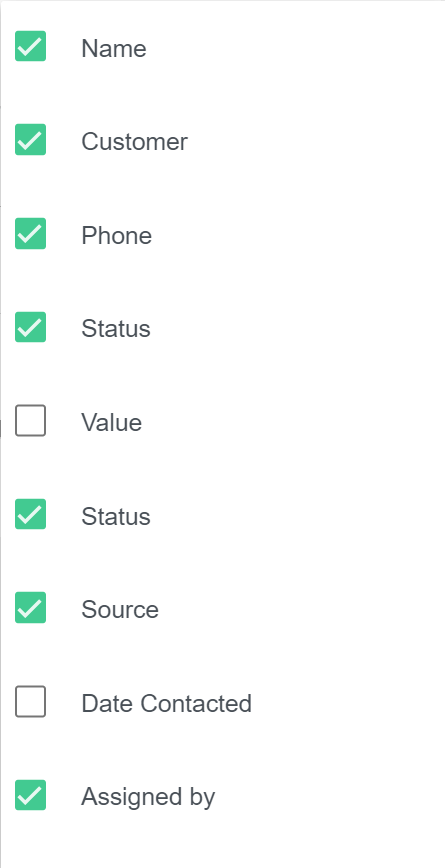
7. By default, all the columns for the table are displayed. To manage the columns to be displayed, click on the "Filter Column"(6) icon in the list view.
8. The list of columns will be displayed. Check the columns you want to be displayed. This option will be saved.
4.4.2 Create Lead:
1. To create the new lead click on "Create"(7) icon.
2. Enter the lead Information, select the lead status and click "Create".
4.4.3 Leads Page Details:
1. Lead: This tab displays all details of the lead.
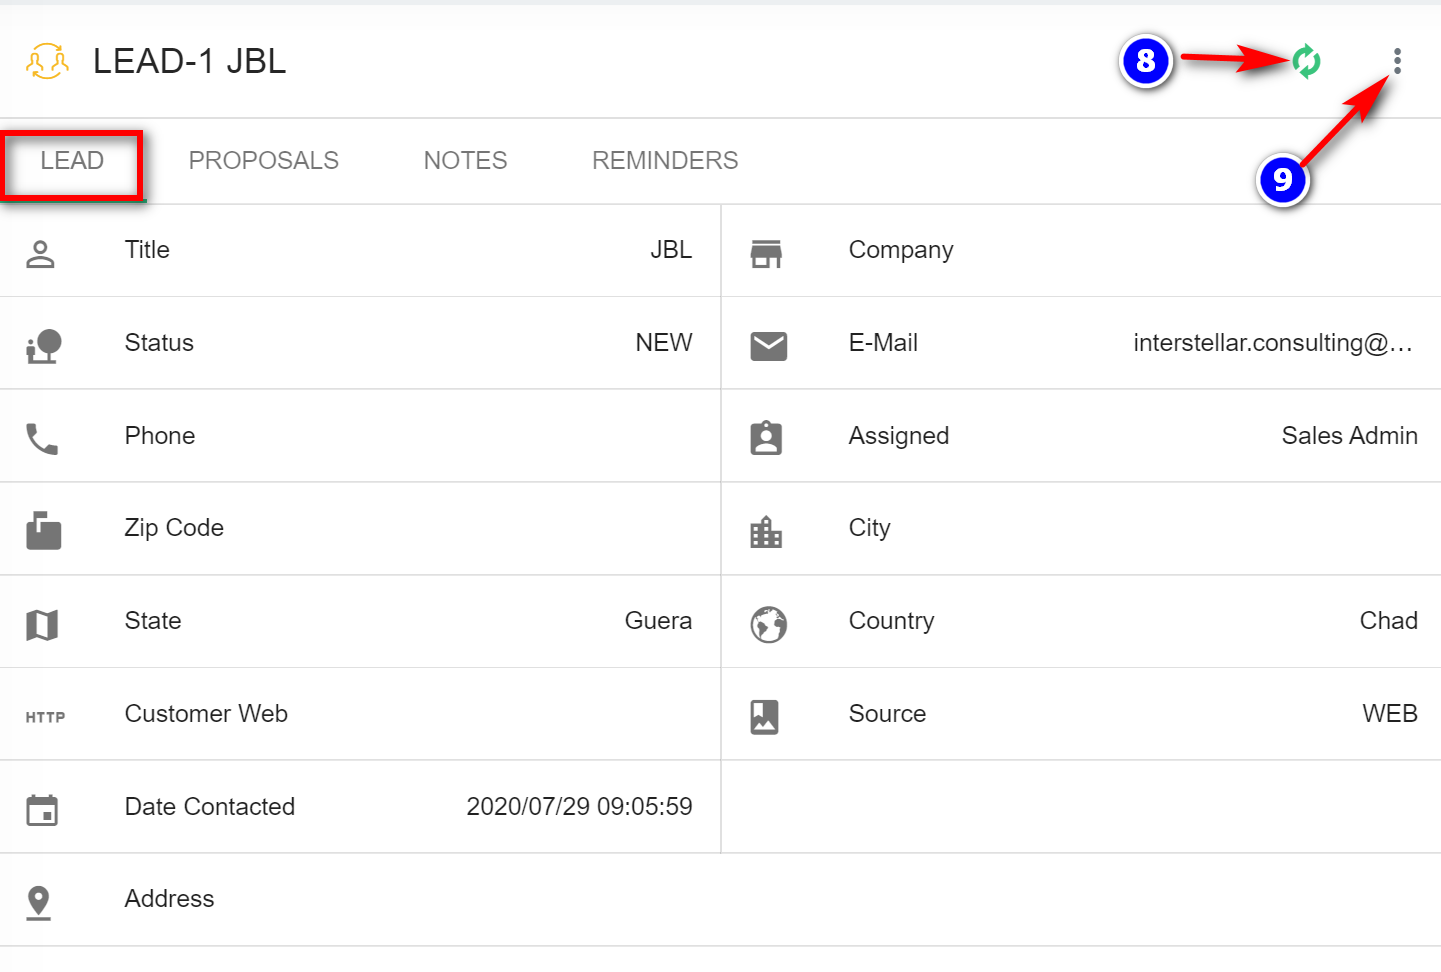
- To convert the lead to customer click on the "Convert"(8) icon.
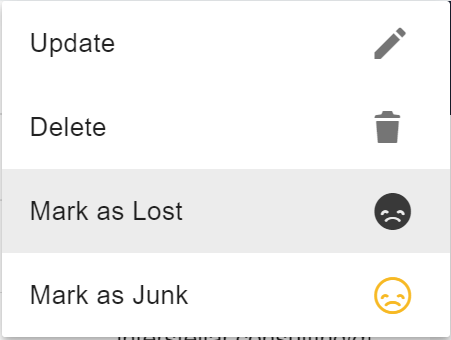
- To update, delete, unmark lead as lost click on the "Options"(9) icon.
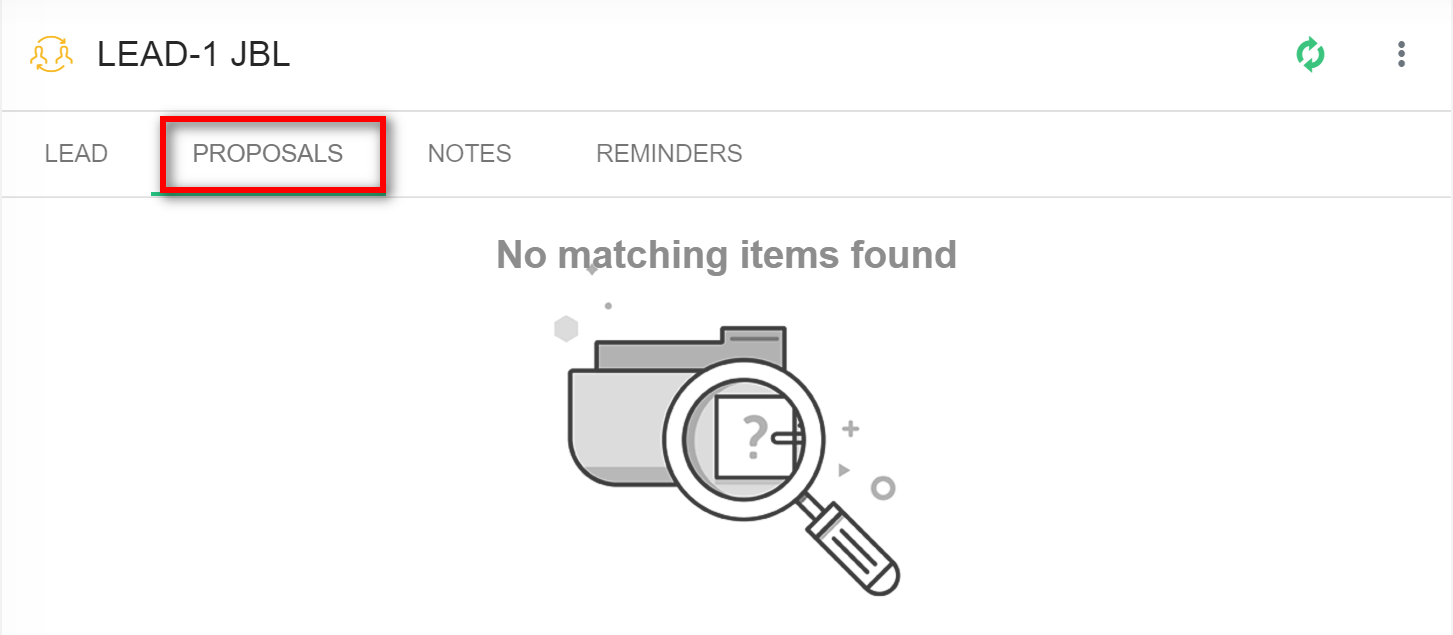
2. Proposals: This tab displays all the proposals made for the customer.
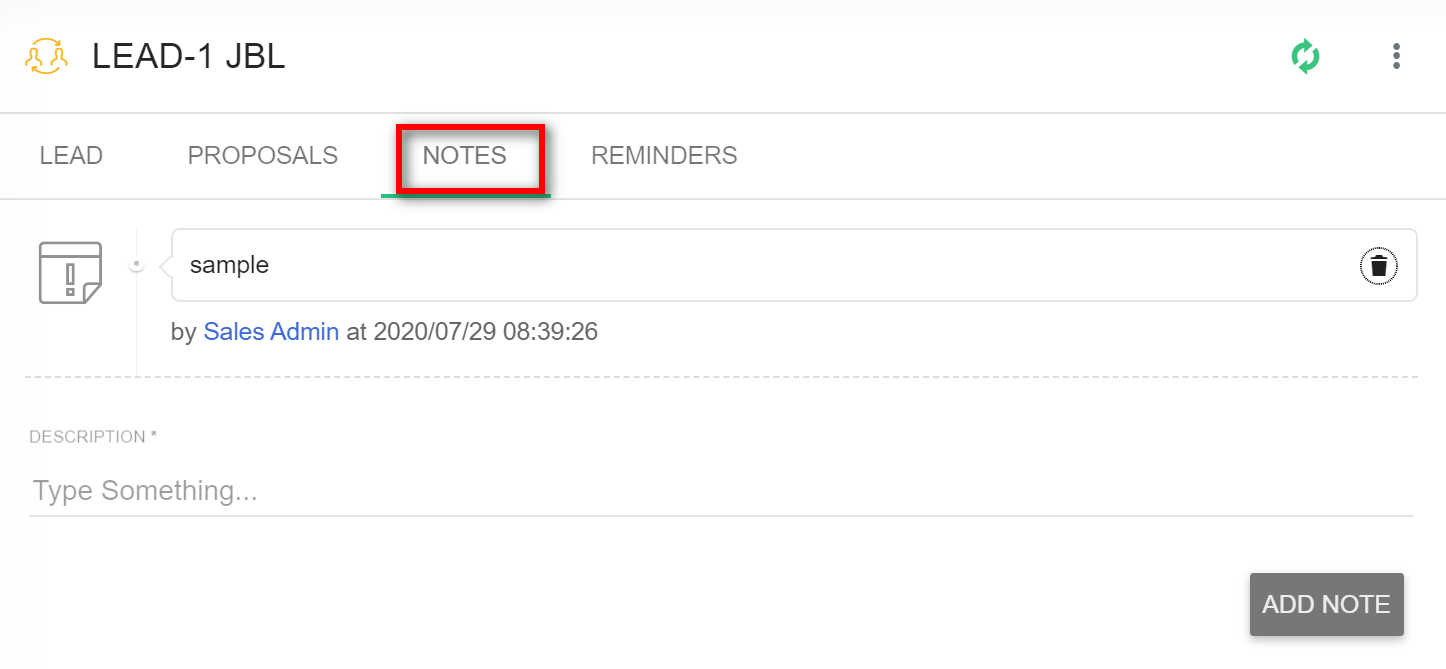
3. Notes: This tab displays all the notes created by the staff. Notes are internal and are not shown to the lead.
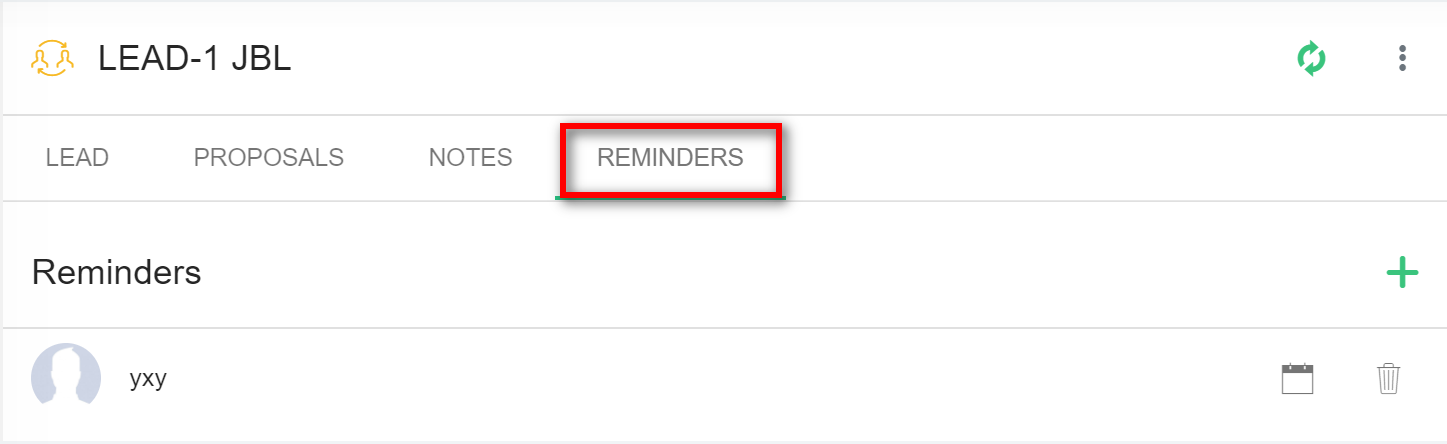
4. Reminders: This tab displays all the reminders set regarding this lead.
4.4.4 Leads Import, Export:
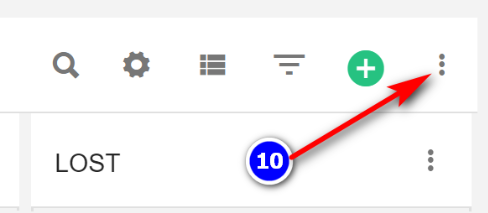
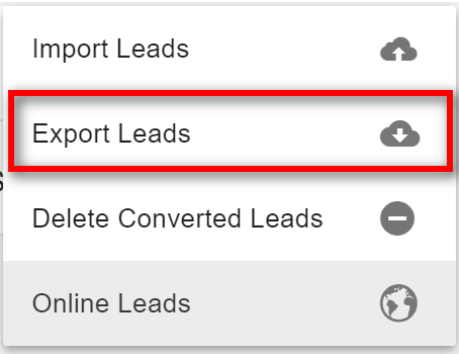
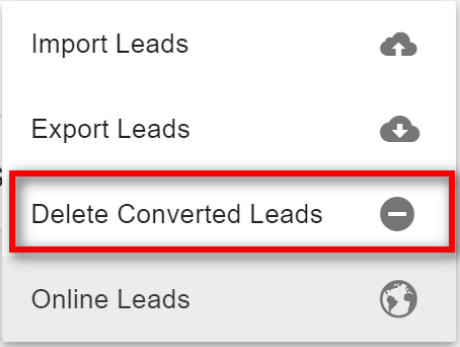
1. For more options like importing and exporting leads click on the "Options"(10) icon.
2. To Import the leads please follow up the steps from 3.1.6 Import Customers.
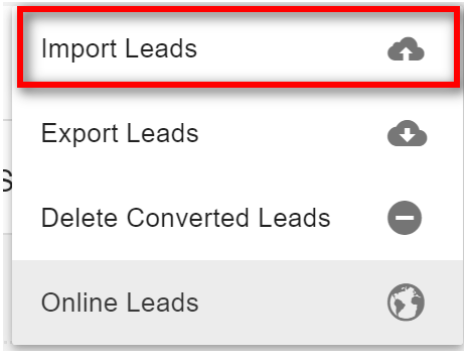
3. To Export the leads click on the "Export Leads".
4. To delete all converted leads click on the "Delete Converted Leads".
4.4.5 Online Leads:
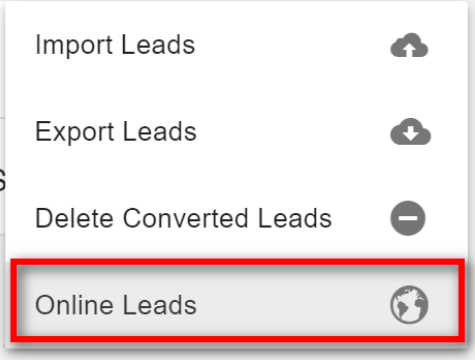
1. To go to online leads click on the "Options"(10) icon and then on the "Online Leads".
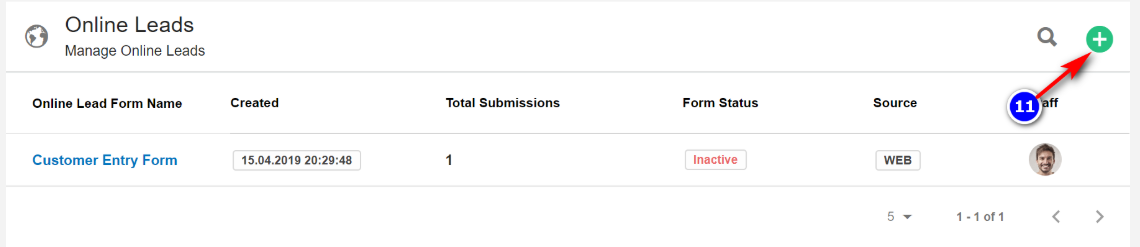
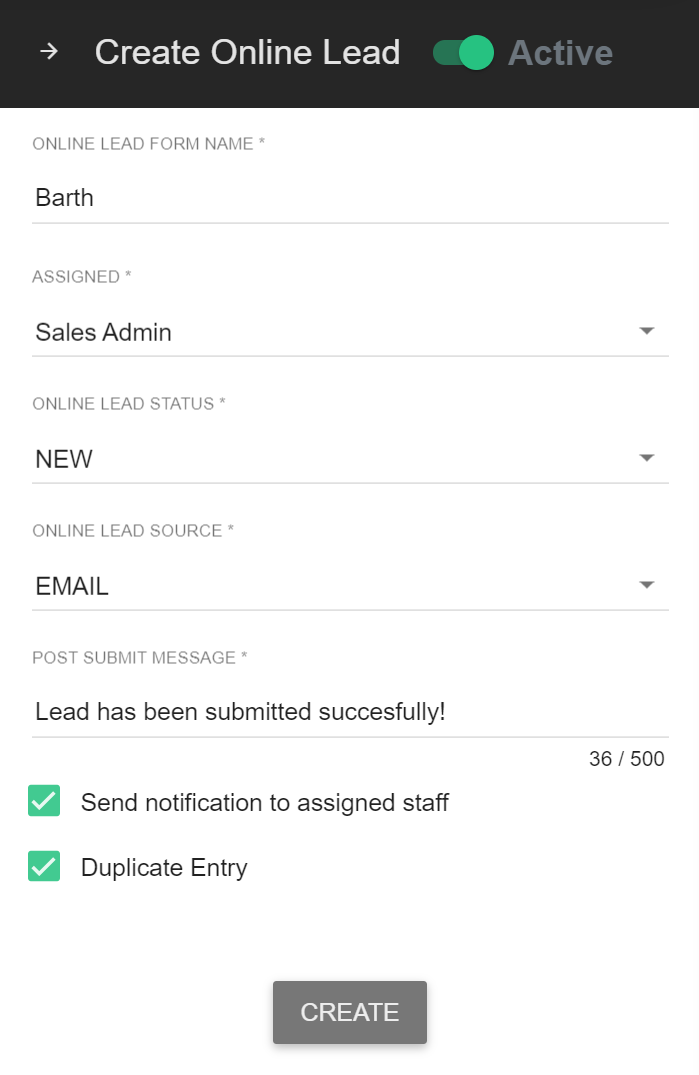
2. To create a new online lead form click on the "Create"(11) icon.
3. Enter the Basic Info for the form, enable or disable button "Active" and click on "Create".
4. You will be redirected to a new page where you are given options to customize your lead form. Drag and drop(14) the required lead form fields from the right to left. A pop-up window appears where you can customize each field.
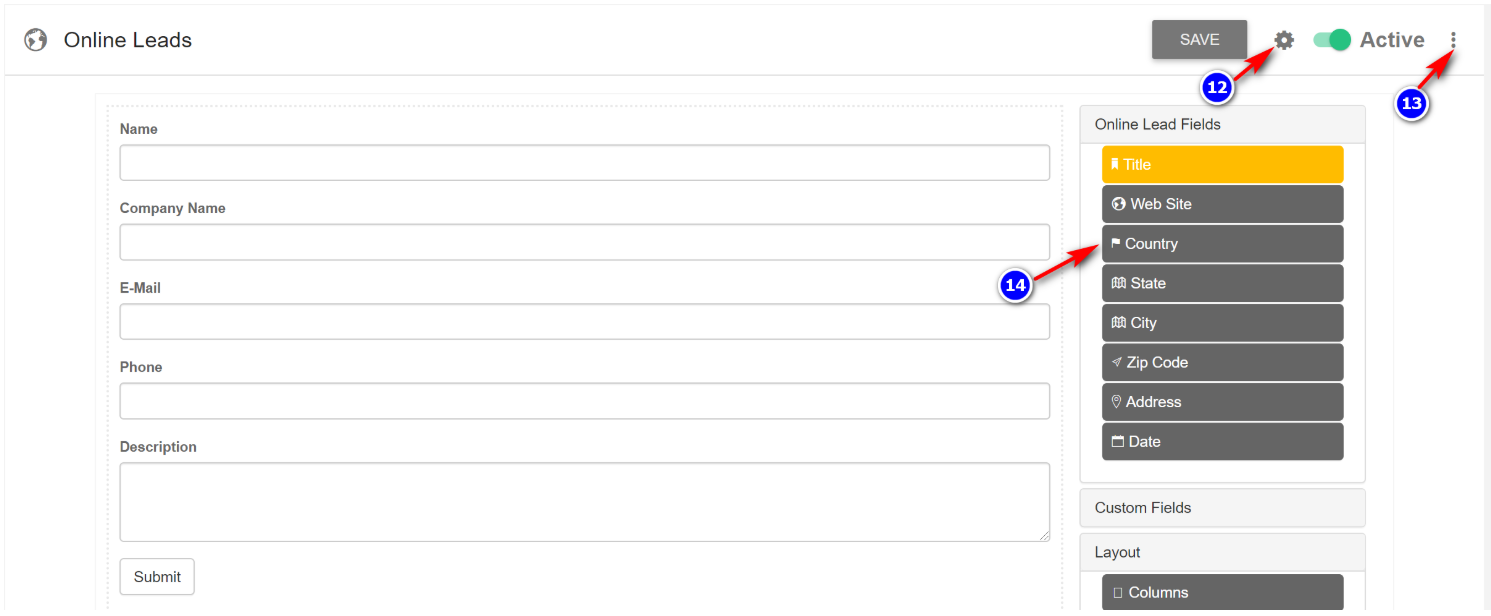
- To "Edit" or "Delete" the lead form click on the "Options"(13) icon.
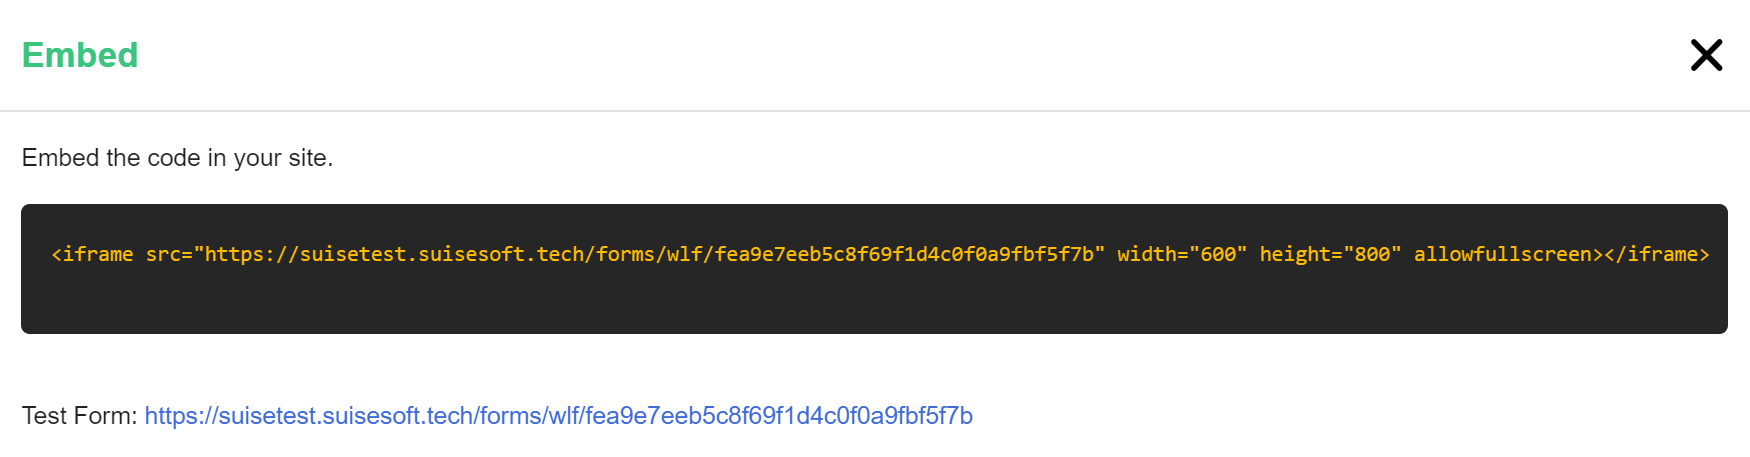
- To show the code, which you can embed in your site click on the "Embed"(12) icon.
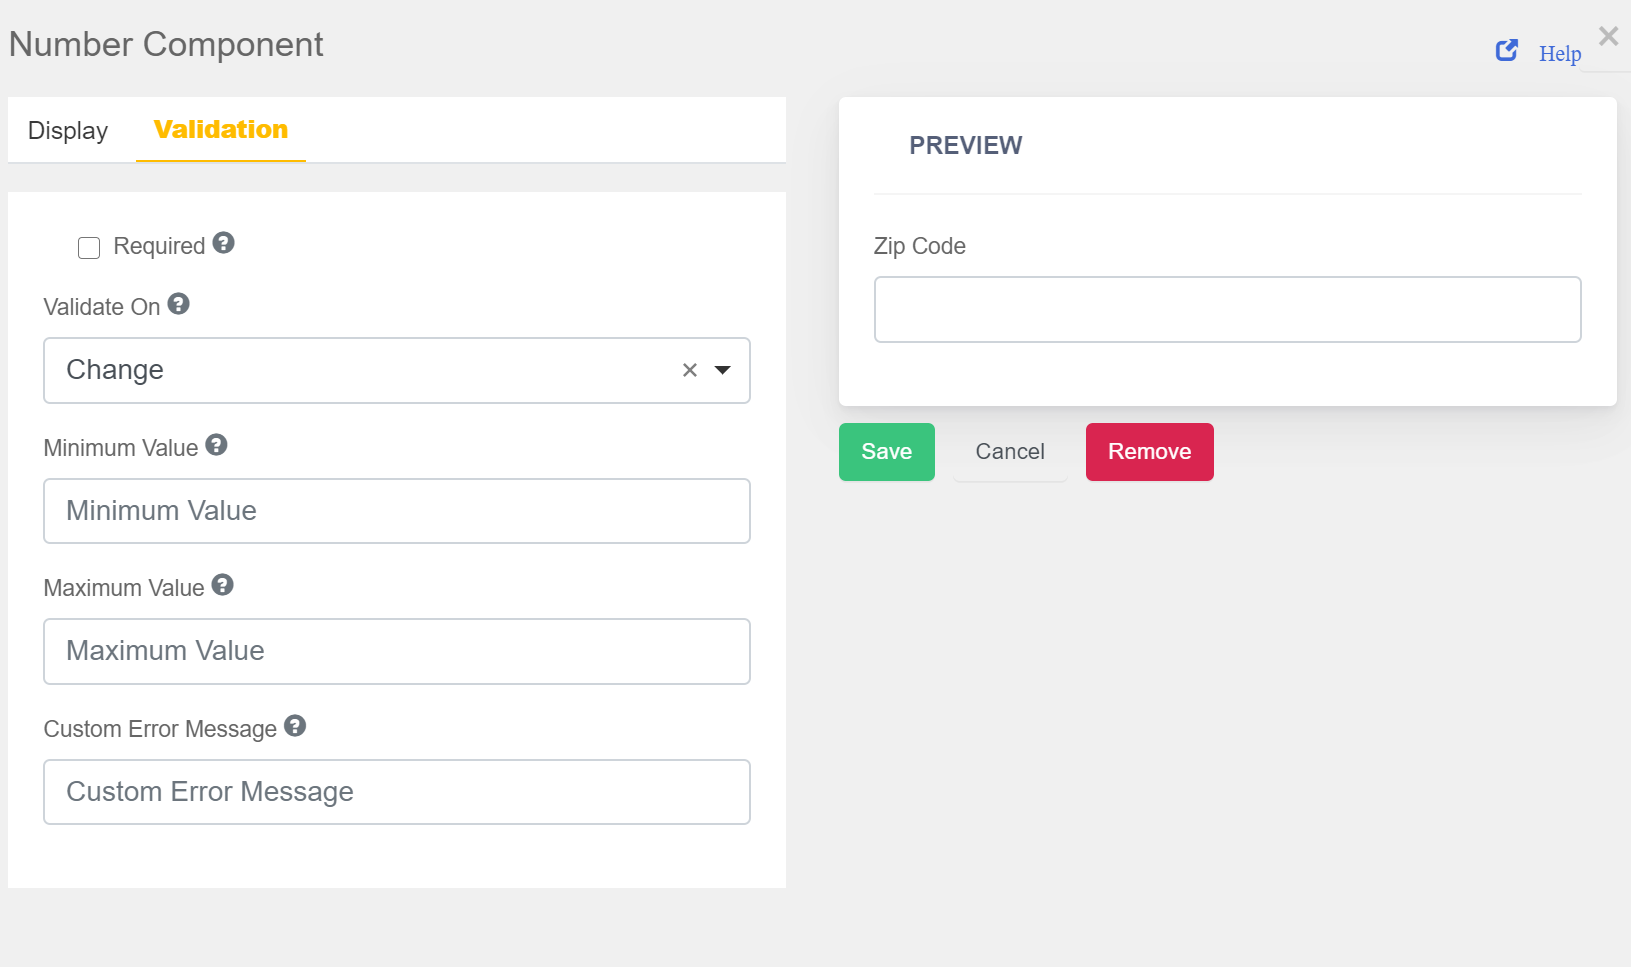
6. The "Display" section of the pop-up window contains the form customization settings for that individual form field. Make appropriate changes and check the preview area.
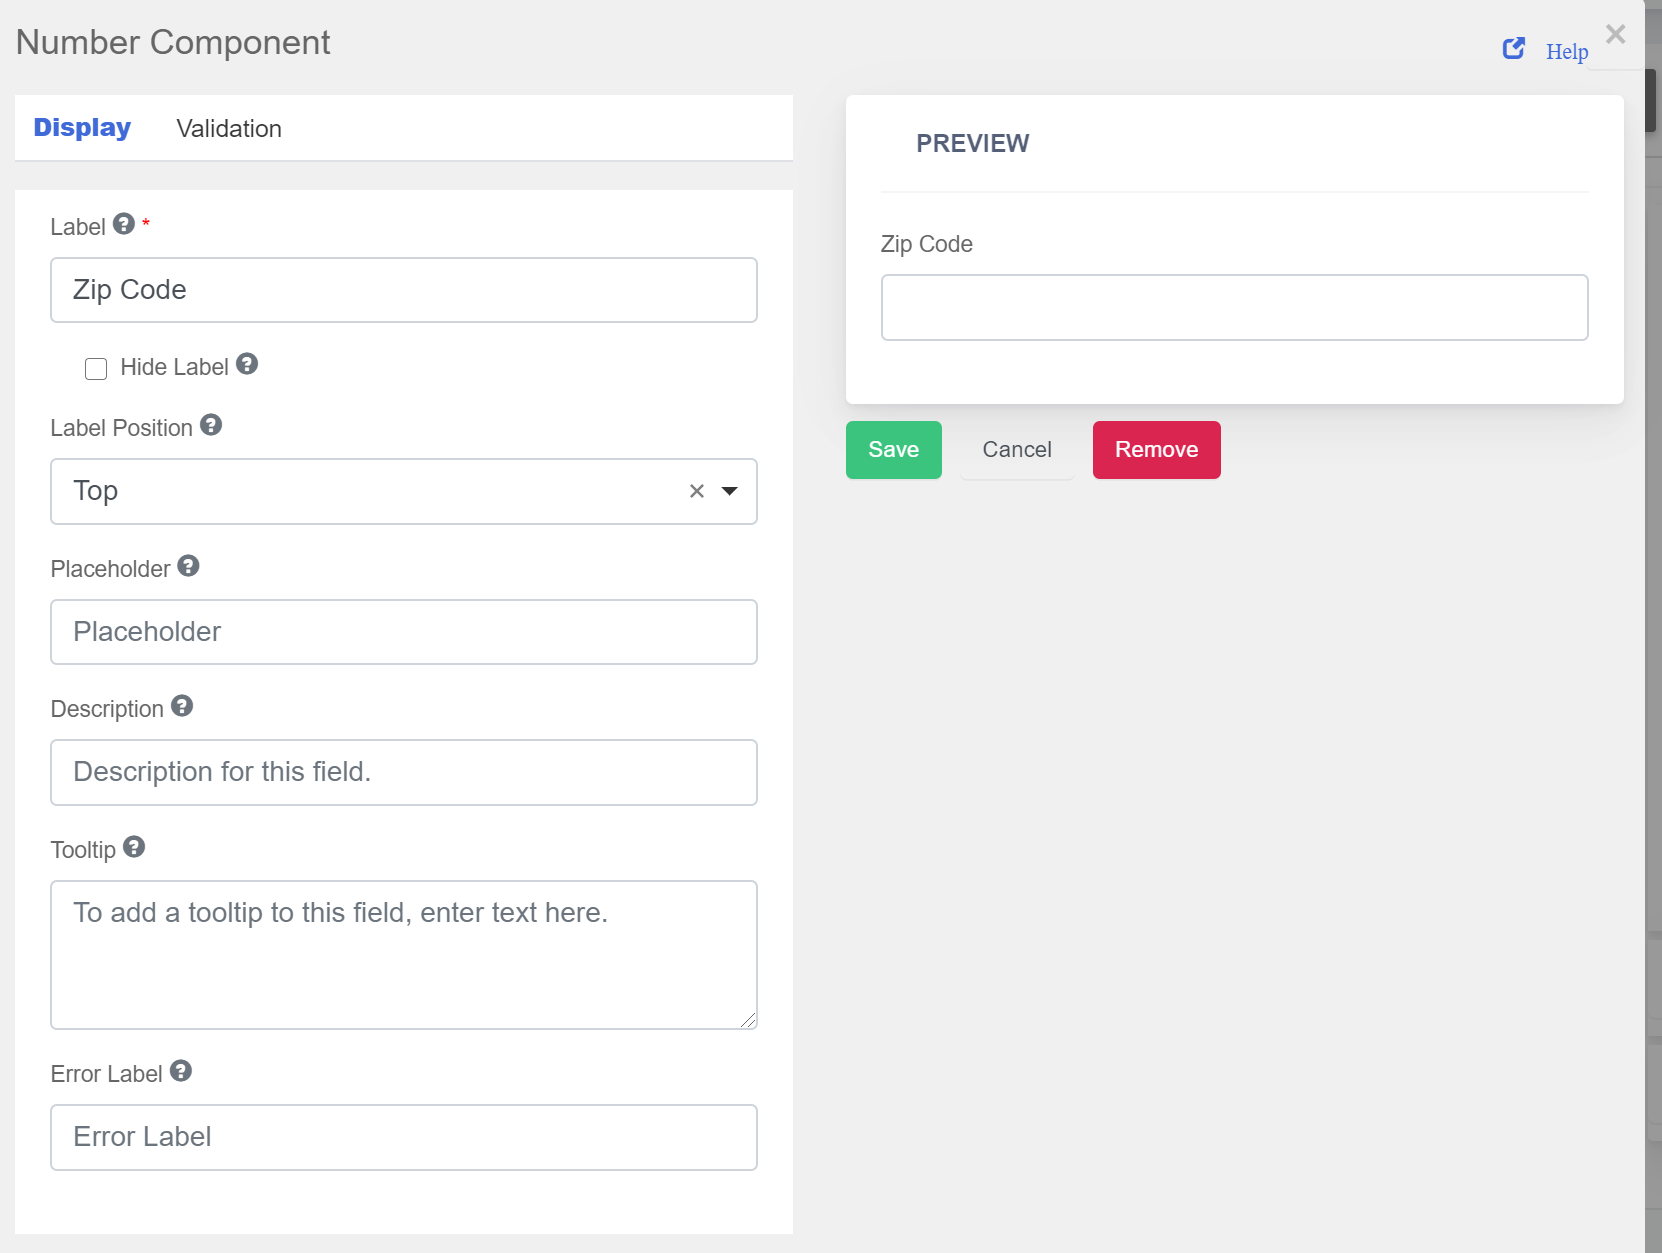
7. In the "Validation" section of the pop-up window, set the data validation parameters and click "Save".