
9.3.1How to manage Expenses?
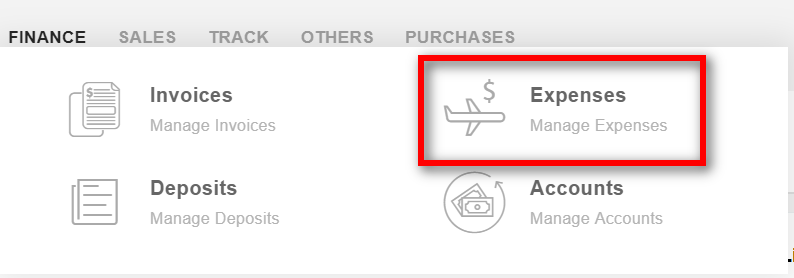
1. Expenses can be found under "Finance" in the main menu.
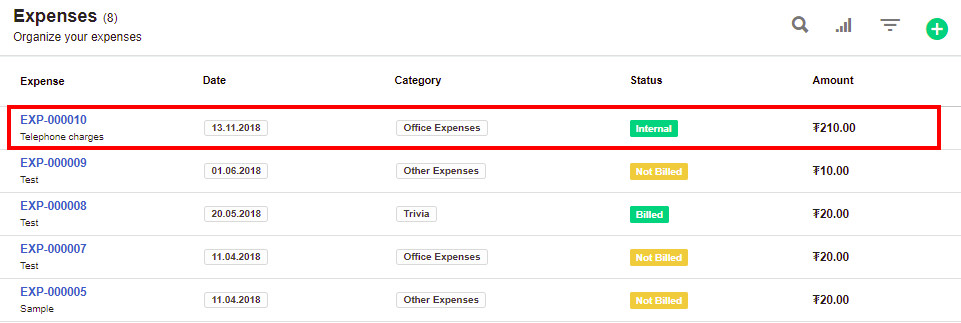
2. Expenses created are listed in the overview of the expenses page.
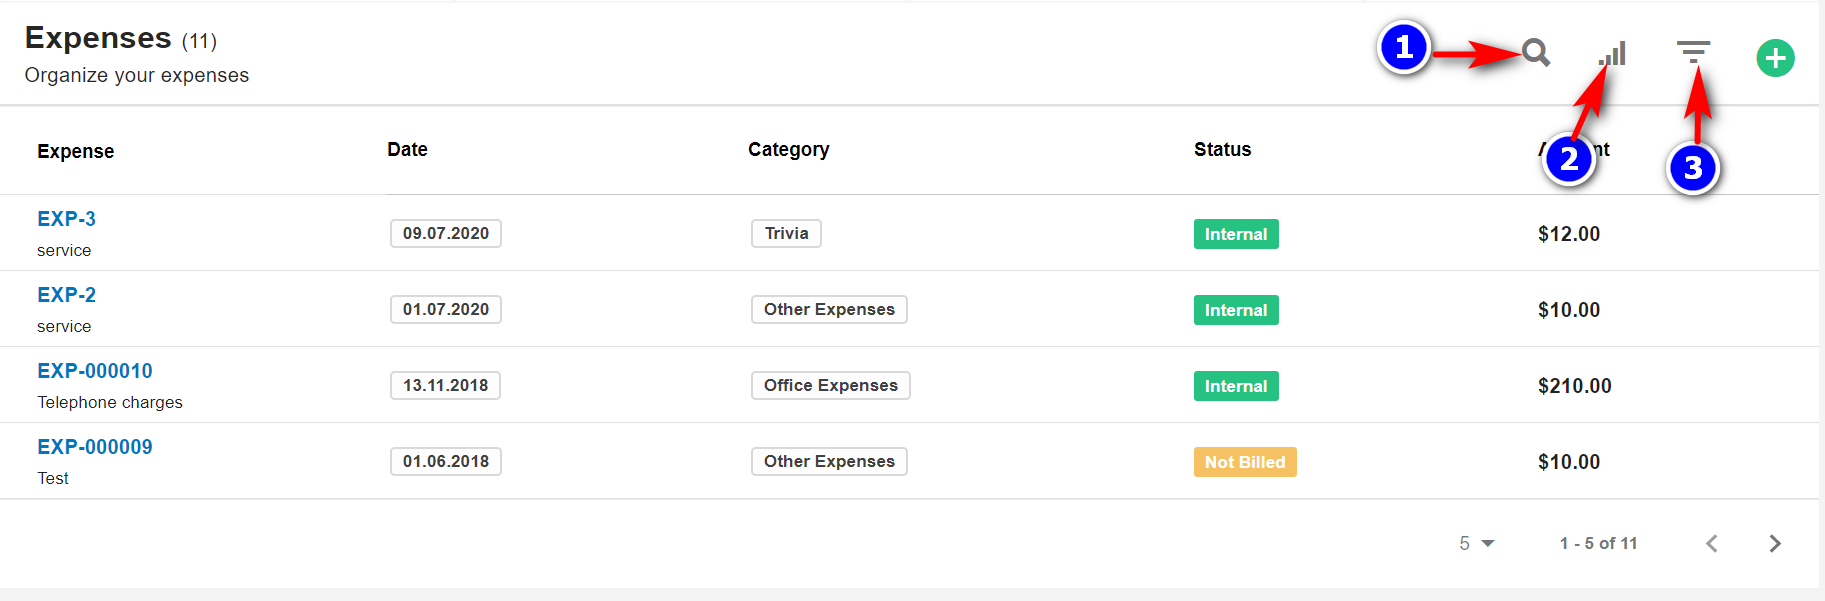
- Search(1): Click on the "Search" icon to search for a particular expense.
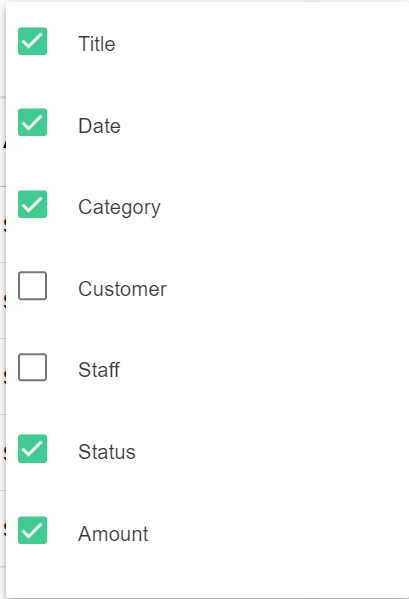
- Filter Column(2): By default, all the columns for the expenses table are displayed. To manage what column needs to be displayed, click on the "Filter Column" icon, after you click on the icon a box will appear as shown in the below image, you can "Check" or "Uncheck" the fields you want to display on your expenses page
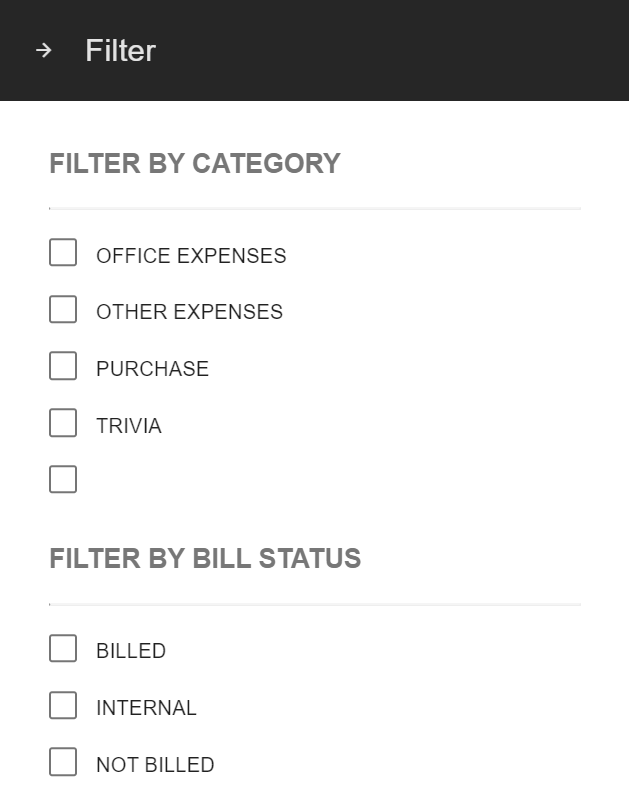
- You can filter the expenses by clicking on the "Filter"(3) icon.
1. On the right side of the expenses page, you can create a category for expenses by clicking on the "+" icon under the categories subheading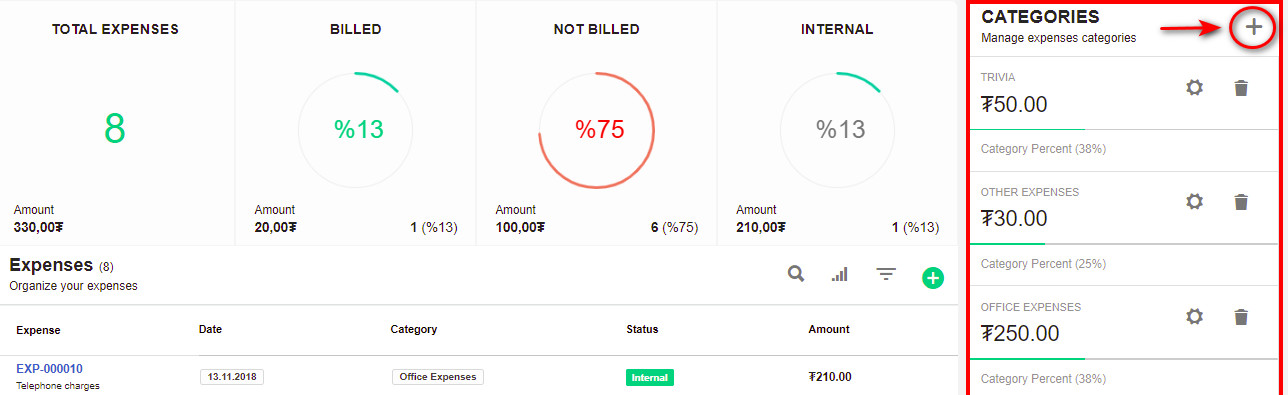 ..
..
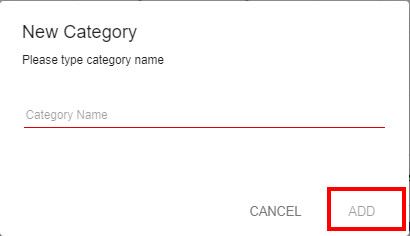
2. Enter the category name and click on Add.
3. The created categories are listed under the categories panel.
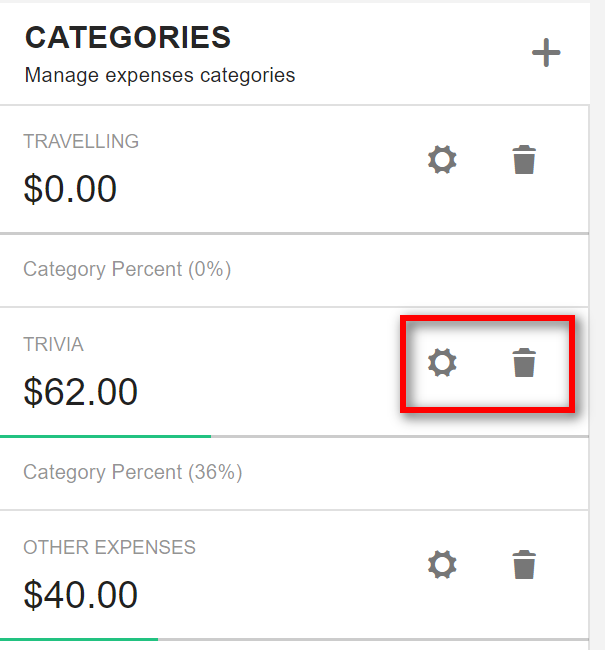
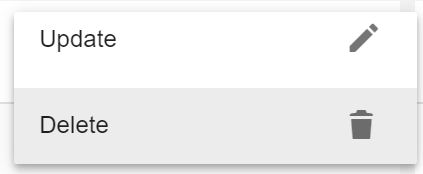
4. To "Edit" the category name or to "Delete" a category click on the appropriate icons.
9.3.3 Create Expense:
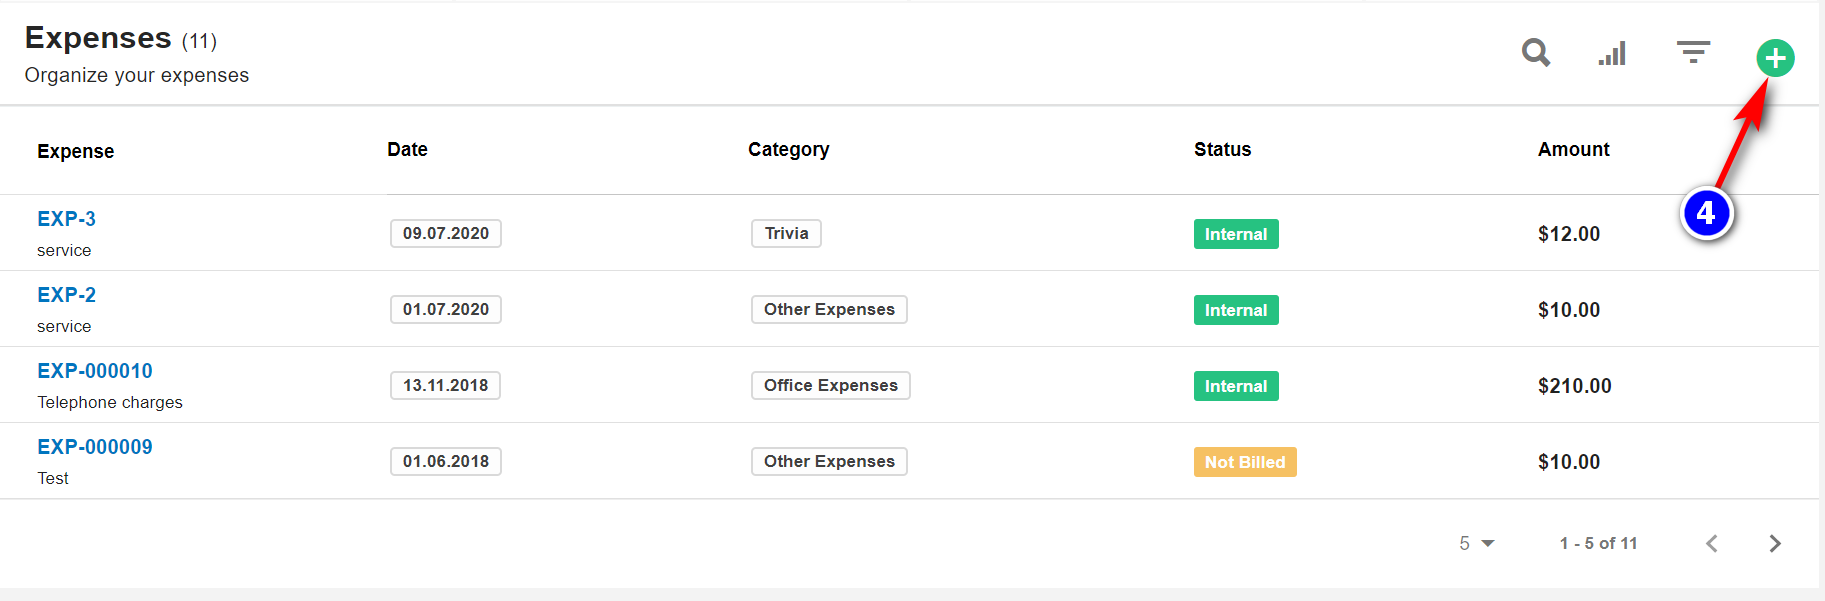
1. Create/Add (4): To add a new expenses record, click on the "Create" icon.
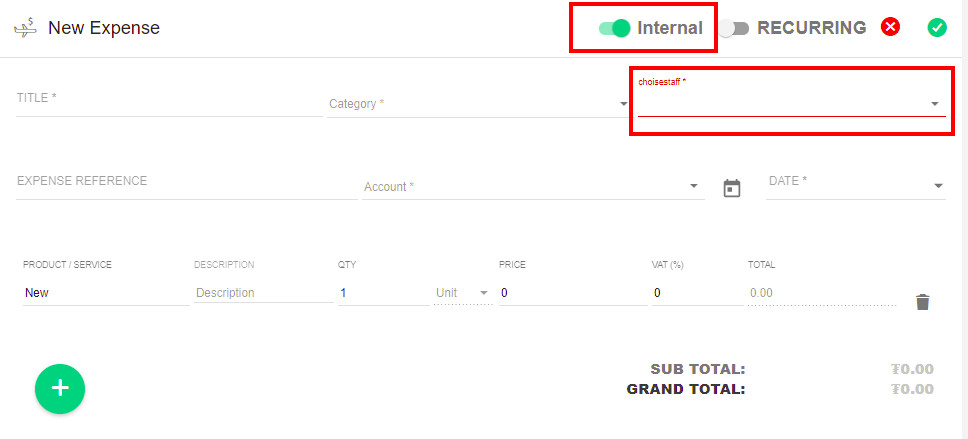
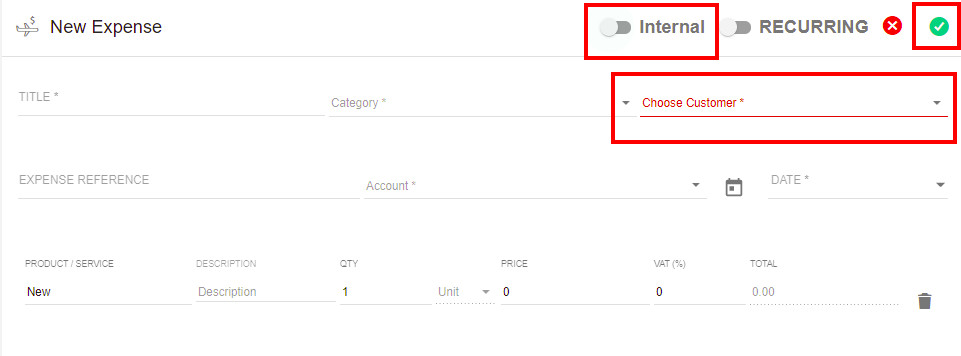
2. Expense can be created for Internal Staff and also by selecting the customer:
Internal Expense: This is for the staff to claim compensation for the expenses they incurred on behalf of your organization.
- To create an Internal Expense: While creating the expenses record "toggle ON" on the "internal toggle" button and select the appropriate staff member from the drop-down.
3.External Expense: This is for your organization to claim compensation from the client/customer for expenses incurred.
- To create an Internal Expense: While creating the expenses record "toggle OFF" the "internal toggle" button and select the appropriate Customer/Client from the drop-down.
 4. Enter the details and click on the "Save" icon.
9.3.3 Expenses Page Details:
1. To view the particular Expenses, select the expense from the overview of the expenses page.
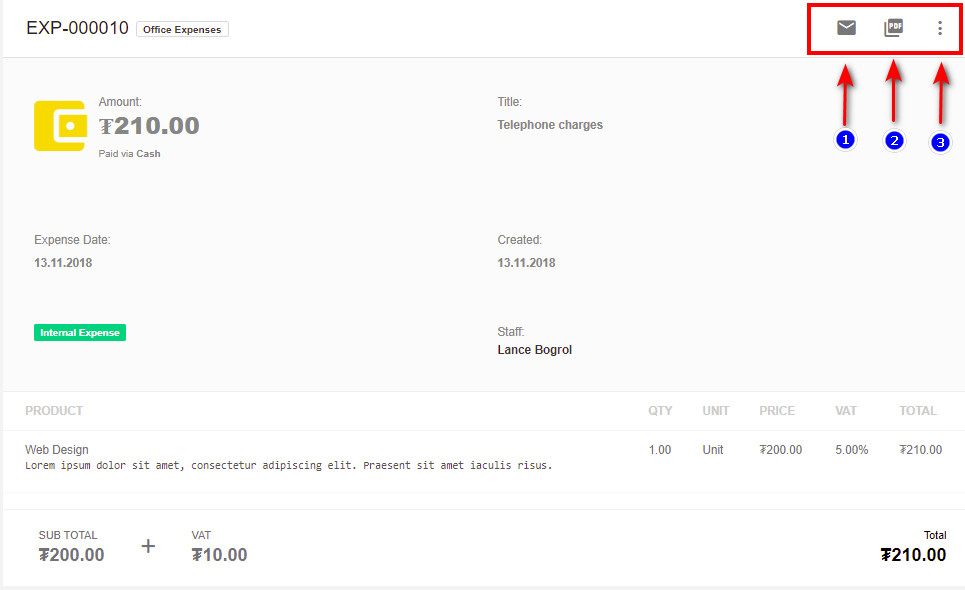
- mail(1) icon: You can click on the "mail icon" to send the mail to the respective contact,
- create PDF(2): it creates the PDF for the expenses.
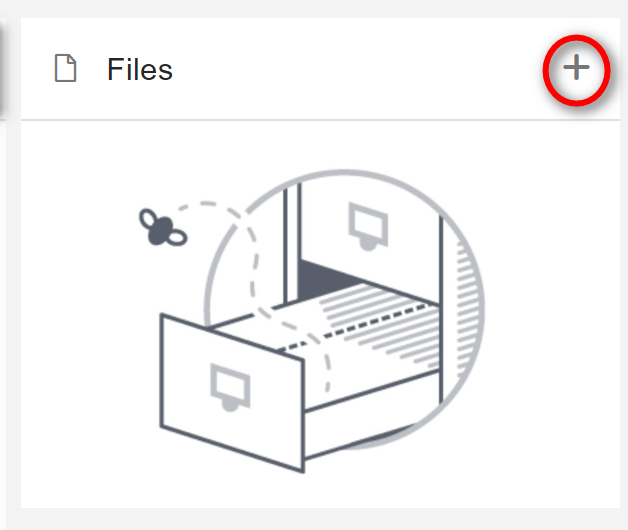
9.3.4 Adding Files:
1. Go to Expense and select the expense to which files have to be added. Click on the "+" icon.
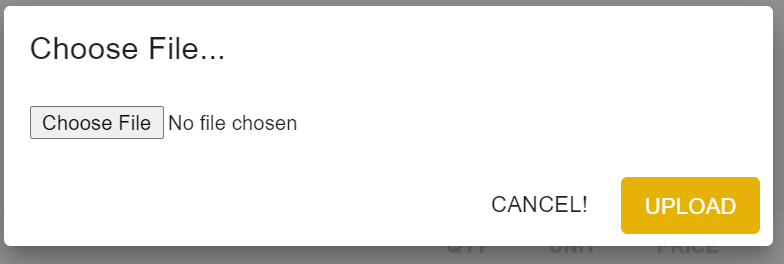
2. Select upload, choose the file/image. Click on ADD.
3. All the files/images uploaded for the expense are displayed under the files section.